Coconut Cream Pie
This post contains affiliate links. As an Amazon Associate, We earn from qualifying purchases. We only recommend products We love and use—thanks for your support!
🥥 Coconut Cream Pie: A Classic, Creamy Dessert That Never Goes Out of Style
There’s something undeniably nostalgic about Coconut Cream Pie — the way the creamy custard melts on your tongue, the flaky, golden crust crumbles just right, and the sweet toasted coconut flakes add that irresistible crunch on top. It’s the kind of dessert that brings you back to sunny afternoons, family gatherings, or cozy nights when all you needed was a slice of something sweet and homemade. Whether you’re a lifelong coconut lover or just looking for a dessert that feels like a tropical escape, this pie has comfort food magic written all over it.
In this post, we’re diving into everything you need to make the perfect Coconut Cream Pie from scratch — including tips to get that custard silky-smooth, how to keep your crust from going soggy, and even some creative ways to serve it. Whether you’re baking ahead for a special occasion or just treating yourself to something truly indulgent, you’ll find all the guidance (and love!) you need right here. Let’s make dessert a little more delicious, shall we? 💛🥧
🥥 Nutrition Spotlight: Is Coconut Cream Pie Healthy?
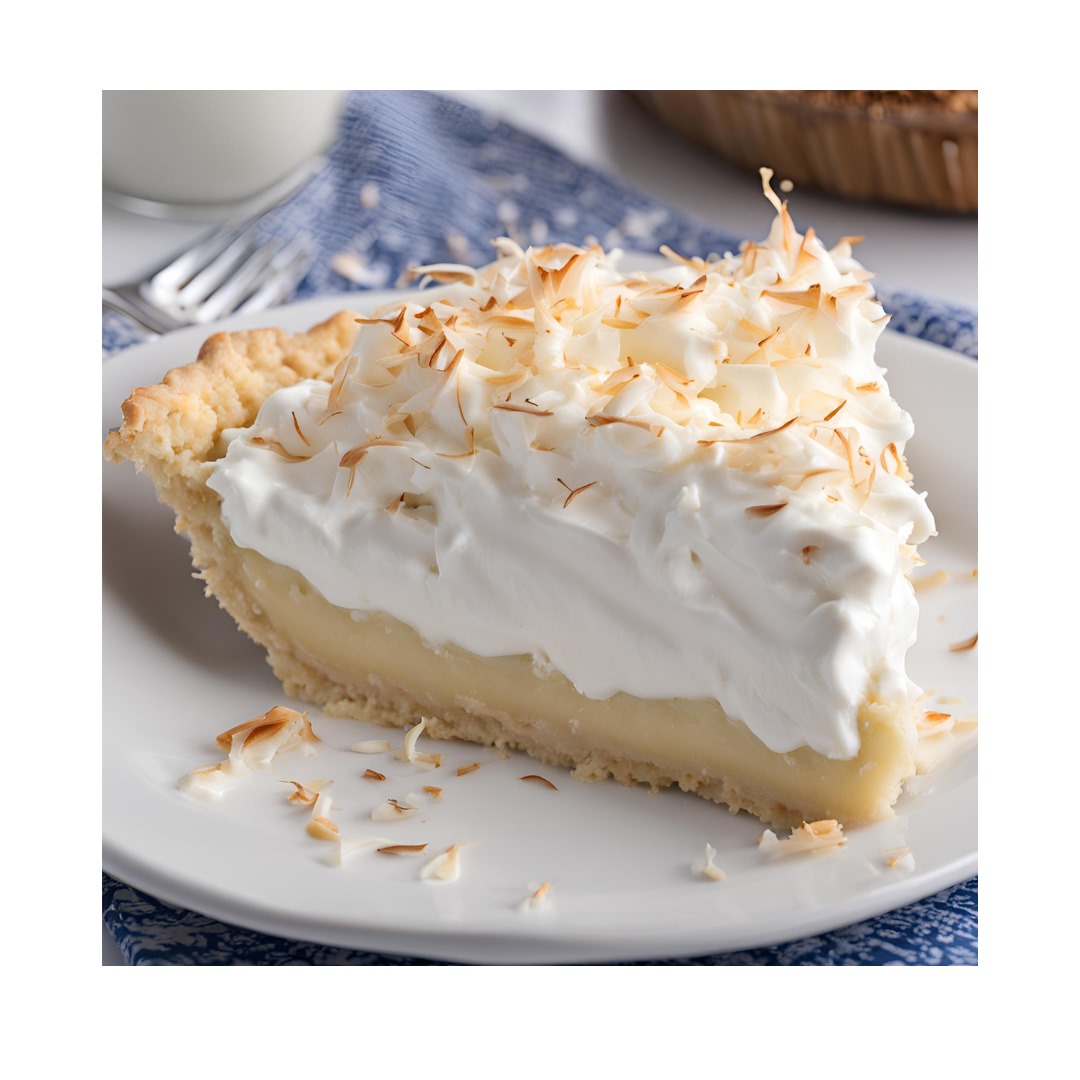
While Coconut Cream Pie might not fall into the “superfood” category, it absolutely has its place in a balanced lifestyle — especially when you know what goes into each slice and how to enjoy it mindfully. Let’s break it down!
Macronutrient Breakdown (Per Average Slice)
Please note: The exact nutrition may vary based on the specific ingredients and quantities used. This breakdown is based on a traditional 9-inch pie cut into 8 slices.
-
Calories: ~400–500
-
Total Fat: 25–35g
-
Saturated Fat: 18–22g
-
Carbohydrates: 35–45g
-
Sugars: 20–28g
-
Protein: 4–6g
-
Fiber: 2–3g (depending on the coconut used)
Key Nutritional Highlights
1. Coconut: A Source of Healthy Fats
Coconut is rich in medium-chain triglycerides (MCTs) — a type of fat that is more readily used for energy compared to long-chain fats. MCTs may support metabolism, brain function, and satiety. However, coconut also contains saturated fats, so moderation is key if you’re watching cholesterol or heart health.
Coconut flakes and coconut milk both contribute to a creamy texture and tropical flavor while offering iron, fiber, and antioxidants.
2. Dairy: Protein and Calcium
The custard and whipped topping in this pie often rely on milk or cream, which provide calcium and protein — both essential for strong bones and muscle maintenance.
Tip: Use organic or grass-fed dairy for a slightly higher content of omega-3s and fat-soluble vitamins like A and D.
3. Egg Yolks: Nutrient Powerhouses
Egg yolks used in the custard bring richness, but they also add choline, vitamin D, selenium, and healthy fats. Choline is crucial for brain and liver function — so yes, even indulgent pie can have nutritional value!
4. Crust: The Carb Corner
The buttery, flaky crust delivers that classic comfort pie feel, but it does add refined carbs and fats. You can lighten it up by:
-
Using whole wheat pastry flour for more fiber.
-
Trying a nut-based or oat crust for a gluten-free twist.
-
Skipping the crust entirely and serving the custard in cups for a crustless version!
Things to Watch
• High Saturated Fat
Between coconut milk, cream, and eggs, saturated fat content can be on the high side. If you have heart health concerns, consider using light coconut milk or swapping in a lower-fat whipped topping alternative.
• Added Sugar
With sweetened coconut, sugar in the custard, and sweet crusts, a slice can easily hit over 20g of sugar. That’s nearly the daily limit recommended for women by the American Heart Association.
Swap Tip: Try using coconut sugar, maple syrup, or a sugar substitute like monk fruit to reduce the glycemic load without sacrificing flavor.
How to Lighten It Up (Without Losing the Magic!)
If you’re looking to make your Coconut Cream Pie a little more balanced, here are a few clean-eating inspired tweaks:
-
Use full-fat canned coconut milk, but cut it with unsweetened almond milk to reduce fat and calories.
-
Sweeten naturally with maple syrup or stevia-based blends.
-
Go crustless or make a crust with oats, almonds, and dates for a fiber-rich base.
-
Top with whipped coconut cream instead of heavy whipping cream to reduce dairy and saturated fat.
-
Add chia seeds to the filling for a little fiber boost and better digestion.
It’s All About Balance
Coconut Cream Pie is meant to be enjoyed — it’s comforting, nostalgic, and incredibly delicious. While it’s not a low-calorie or low-fat dessert, it can be part of a clean, mindful diet when enjoyed in moderation and made with wholesome ingredients.
Bottom line: Savor every bite, and don’t forget to share it with someone you love (or not — no judgment
)!
🥧 How Can I Prevent My Pie Crust from Becoming Soggy?
Nobody wants a soggy bottom — especially not when your Coconut Cream Pie deserves a crust that’s buttery, flaky, and firm enough to hold up to that luscious coconut custard. If you’ve ever sliced into your pie only to find a wet, limp crust underneath… don’t worry, it’s fixable! Here’s exactly how to keep your crust crisp and picture-perfect, every time.
🔥 1. Blind Bake Your Crust
Blind baking means partially or fully baking your pie crust before adding the filling. This is essential for cream pies like Coconut Cream Pie where the filling is not baked in the oven.
Here’s how to do it:
-
Roll out your dough and press it firmly into the pie dish, crimping the edges.
-
Chill the crust for at least 30 minutes — cold dough shrinks less and holds its shape better.
-
Line the crust with parchment paper or foil and fill it with pie weights, dried beans, or uncooked rice.
-
Bake at 375°F (190°C) for 15–20 minutes until the edges start to turn golden.
-
Remove the weights and parchment, then bake for another 5–10 minutes until the bottom is lightly golden and dry.
💡 Pro Tip: For an extra layer of protection, brush the crust with a beaten egg white during the last 5 minutes of baking. This seals it and keeps moisture out!
🍯 2. Apply a Moisture Barrier
After blind baking, you can apply a thin moisture-proof layer to create a barrier between the crust and the creamy filling.
Your options:
-
Light egg white wash (baked on for 2–3 minutes)
-
Melted chocolate (brushed on and cooled)
-
A thin layer of jam or jelly (for added flavor and protection)
-
Cream cheese glaze (a subtle layer that complements coconut beautifully!)
This is especially helpful if you’re prepping the crust in advance or need it to stay crisp for longer periods.
🧁 3. Cool the Crust Completely Before Filling
Adding warm or even slightly hot filling to your crust can trap steam, creating sogginess. Make sure your baked crust is completely cooled to room temperature before pouring in the custard.
🥶 4. Don’t Skip the Chill
Once your Coconut Cream Pie is assembled, chill it thoroughly for several hours (ideally overnight). This helps the filling set firmly without leaking moisture into the crust.
Just remember — always store it uncovered or loosely tented with foil to avoid condensation collecting on the top or sides.
❌ 5. Avoid Overly Wet Fillings
If your custard is too thin, it can leak into the crust no matter how well you baked it. Be sure to cook your filling until it’s thickened — it should coat the back of a spoon before being poured into the crust.
✅ Quick Recap: Your No-Soggy-Crust Checklist
-
✅ Blind bake the crust
-
✅ Use a moisture barrier (egg wash, chocolate, jam, etc.)
-
✅ Let the crust cool completely
-
✅ Pour in a thick, cooled filling
-
✅ Chill the whole pie thoroughly before serving
Try some of our other recipes!
🥥 Can I Use Coconut Milk Instead of Regular Milk in the Filling?
Yes — and in fact, using coconut milk instead of regular milk in your Coconut Cream Pie is not only possible, it might just elevate your pie to tropical bliss status. 🌴✨
Whether you’re aiming for a dairy-free dessert, want to deepen that coconut flavor, or just ran out of regular milk (hey, we’ve all been there), coconut milk is a delicious and effective substitute in cream pie fillings. Here’s everything you need to know before making the switch.
🌿 Coconut Milk vs. Coconut Cream: Know the Difference
Before you grab a can off the shelf, it’s important to understand the difference between coconut milk and coconut cream:
-
Coconut Milk: Thinner, more fluid, and typically used as a 1:1 substitute for regular milk. It has a balanced fat content and is great for custards and puddings.
-
Coconut Cream: Much thicker and richer, more like heavy cream. Best used in small amounts or when blended with another liquid.
💡 For this recipe, full-fat canned coconut milk is your best choice — it provides creaminess without making the filling too dense or overly rich.
🧪 How to Use Coconut Milk in the Custard Filling
When using coconut milk in place of dairy, follow these simple guidelines for success:
-
Use Full-Fat, Unsweetened Canned Coconut Milk
This type gives the best texture and richness without extra sugar. Avoid the beverage-style coconut milk from cartons — it’s too watered down and won’t set up properly. -
Whisk Well Before Using
Coconut milk naturally separates in the can (thick cream on top, watery liquid below). Shake it well or whisk together before measuring. -
Cook the Custard Until Thick
Just like with dairy milk, cook your coconut custard over medium heat, stirring constantly, until it’s thick enough to coat the back of a spoon. This ensures it sets up nicely once chilled. -
Add a Stabilizer If Needed
To help the filling set perfectly, add a touch of cornstarch or arrowroot powder if the recipe doesn’t already include it. About 2–3 tablespoons for a standard pie filling should do the trick.
👅 What About Flavor?
Coconut milk adds a mild, nutty sweetness that beautifully enhances the tropical feel of the pie. It complements the shredded coconut in the filling and topping — making your dessert taste even more like a vacation in a bite. 🏖️
If you want a subtler coconut flavor, try blending half coconut milk and half unsweetened almond or oat milk.
✅ Benefits of Using Coconut Milk
-
Dairy-Free Friendly: Great for those with lactose intolerance or dairy sensitivities.
-
Clean Eating Approved: Especially if you’re avoiding processed dairy.
-
Naturally Sweet & Creamy: May let you reduce added sugar slightly.
-
Boosts Coconut Flavor: Deepens the tropical vibe of your dessert.
⚠️ Things to Watch Out For
-
Some coconut milk brands are thinner than others — always check consistency before using.
-
The pie might set softer than dairy custards — allow for extra chill time if needed (at least 4–6 hours or overnight).
-
Flavor can vary by brand — taste test before using if you’re new to baking with coconut milk.
Using coconut milk in your Coconut Cream Pie is a win-win: more coconut flavor, fewer allergens, and a silky smooth filling that’s still indulgent and dreamy. 🌈 So go ahead — ditch the dairy and let the coconut shine!
Want to offer your readers a dairy-free variation card to print or pin? I can create one for you! Just say the word. 💌
🔥 How Do I Toast Coconut for the Topping?
Toasted coconut is the crown jewel of your Coconut Cream Pie — golden, nutty, slightly crisp, and full of tropical flavor. ✨ It adds texture, visual contrast, and a warm depth of flavor that elevates each bite from delicious to unforgettable. Whether you’re using it as a topping or mixing it into the filling, toasting your coconut just right makes all the difference.
The great news? Toasting coconut is super easy — and can be done in the oven, on the stovetop, or even in the microwave! Let’s break down each method so you can choose your fave.
🧁 What Kind of Coconut Should I Use?
Before we dive into how, let’s talk what:
-
Sweetened Shredded Coconut: Most common for baking — browns faster due to the sugar content and gives you that perfect crunch.
-
Unsweetened Shredded or Flaked Coconut: More natural option, less sugar, browns a little more slowly but still delicious.
-
Coconut Chips or Flakes: Large, wide pieces for a rustic, bakery-style finish.
💡 All of these can be toasted! Just keep an eye on them because coconut can go from golden to burnt in seconds.
🍽️ 1. How to Toast Coconut in the Oven (Best for Batches)
Perfect for larger amounts and even toasting.
Instructions:
-
Preheat your oven to 325°F (160°C).
-
Spread the coconut in a thin, even layer on a baking sheet.
-
Bake for 5–10 minutes, stirring every 2–3 minutes to ensure even browning.
-
Remove from oven when the coconut is light golden brown and smells fragrant.
-
Let cool completely before topping your pie.
✅ Best method if you’re making more than ½ cup.
🔥 2. How to Toast Coconut on the Stovetop (Quick & Easy)
Great for small batches and total control.
Instructions:
-
Place a dry skillet over medium heat.
-
Add your coconut and stir constantly for 3–5 minutes.
-
Watch closely — it will brown quickly, especially sweetened coconut.
-
Once evenly golden and fragrant, transfer to a plate to cool.
⚠️ Don’t walk away! Coconut can burn fast on the stovetop.
⚡ 3. How to Toast Coconut in the Microwave (Yes, Really!)
Surprisingly effective for small amounts and low fuss.
Instructions:
-
Spread ½ cup of coconut on a microwave-safe plate in a thin layer.
-
Microwave on high for 30-second bursts, stirring in between.
-
Continue until coconut is golden brown — usually 2–3 minutes total.
-
Let it cool and crisp up before using.
🧠 This is a great last-minute method if you’re short on time (or oven space).
🌬️ How to Store Toasted Coconut
If you’re toasting your coconut ahead of time (go you! 👏), here’s how to keep it fresh:
-
Let it cool completely before storing.
-
Place in an airtight container or zip-top bag.
-
Store at room temperature for up to a week or freeze for longer.
Pro tip: Make a big batch and keep extra on hand — it’s amazing on oatmeal, smoothie bowls, yogurt, or even sprinkled on pancakes! 🥞
🥥 Final Coconut Toasting Tips
-
Stir regularly to prevent hot spots or uneven browning.
-
Add a sprinkle of cinnamon or vanilla sugar before toasting for a flavor twist.
-
Want extra crunch? Try double toasting — toast it once, cool it, then toast again for 1–2 more minutes. Game changer!
🍮 How Do I Ensure My Custard Filling Sets Properly?
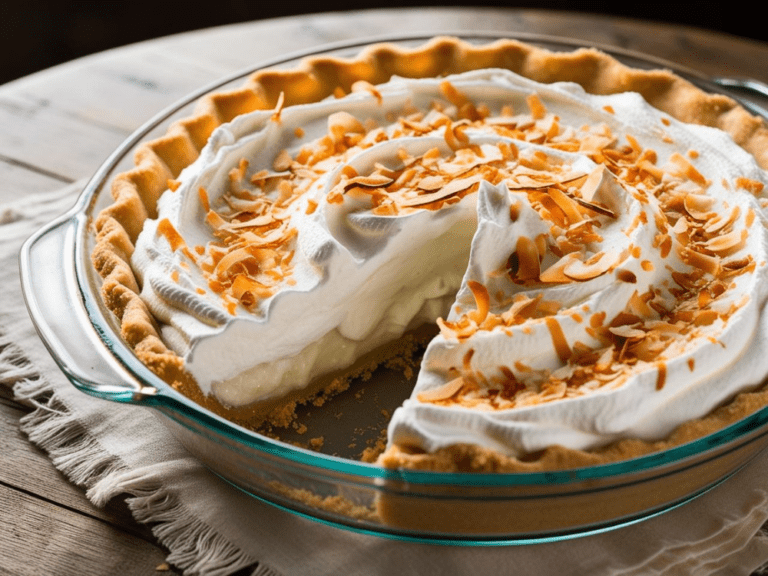
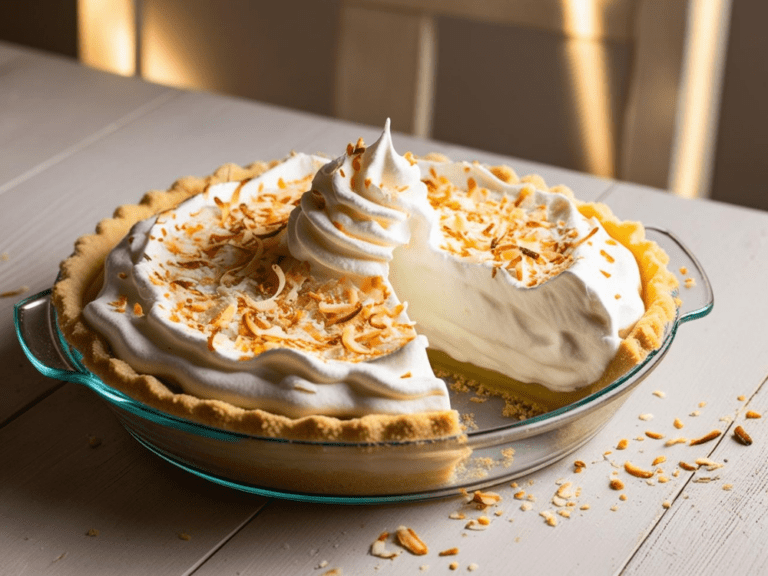
The heart of any Coconut Cream Pie is its silky-smooth, creamy custard filling — rich with coconut flavor and just the right firmness to hold its shape when sliced. But if you’ve ever ended up with a runny, soupy pie (we’ve all been there ), you know how important it is to get the custard just right.
Here’s your go-to guide for making sure your coconut custard sets up beautifully every time — no more guesswork, just pie perfection.
Understanding Custard Basics
Custard is a mixture of milk or cream, eggs, sugar, and a thickening agent (like cornstarch or flour). It thickens as the proteins in the eggs coagulate when heated — but the trick is finding that perfect balance between heat, time, and ingredients.
Too little cooking? It won’t set. Too much? It’ll curdle or turn rubbery. But just right? Pure creamy magic.
1. Use the Right Ratio of Ingredients
Start with a proven recipe that balances egg yolks, liquid (milk or coconut milk), sugar, and cornstarch.
-
Egg Yolks: Help the custard thicken and give it a rich, velvety texture.
-
Cornstarch (or Arrowroot): Adds structure and stability — typically 2–3 tablespoons for every 2 cups of liquid.
-
Full-Fat Coconut Milk: Adds creaminess and coconut flavor, but needs enough thickener to set correctly.
Don’t skimp on the thickening agent or swap ingredients without adjusting the ratios — this is key!
2. Cook It Slowly Over Medium Heat
Low and slow wins the race when it comes to cooking custard.
Here’s how:
-
In a heavy-bottomed saucepan, whisk together all the ingredients before turning on the heat.
-
Cook over medium or medium-low heat, stirring constantly with a whisk or silicone spatula.
-
Do not stop stirring — this prevents lumps and ensures even thickening.
-
After about 5–8 minutes, the mixture will start to thicken noticeably.
You’re aiming for a pudding-like texture that coats the back of a spoon. If you draw a line on the spoon with your finger, it should hold its shape.
3. Look for Visual Cues (Not Just Time)
Custard doesn’t thicken at a specific time stamp — it’s all about the look and feel.
Signs your custard is ready:
-
It becomes glossy and smooth.
-
Bubbles begin to form, but it’s not boiling hard.
-
It thickly coats the back of a spoon or spatula.
-
A spoon dragged through the bottom of the pan leaves a path that doesn’t immediately fill back in.
4. Cool It Down Before Filling the Crust
Once thickened, remove your custard from heat immediately.
-
Pour it through a fine-mesh sieve into a bowl to remove any accidental lumps or bits of egg (optional but pro-level).
-
Let it cool for 10–15 minutes at room temp before pouring into your crust.
-
If you’re not assembling right away, press plastic wrap directly onto the surface of the custard to prevent a skin from forming.
5. Chill the Pie for at Least 4–6 Hours (or Overnight)
Even if your custard feels firm in the pan, it still needs time to fully set in the fridge.
-
Once the pie is assembled, loosely cover it and place it in the refrigerator.
-
Let it chill for a minimum of 4 hours, but overnight is best for perfect slicing and maximum flavor meld.
Chilling allows the cornstarch and egg proteins to finish setting, resulting in that creamy-yet-firm texture we all love.
Troubleshooting: Why Isn’t My Custard Setting?
Here are a few common issues and quick fixes:
| Problem | Possible Cause | Solution |
|---|---|---|
| Too runny | Undercooked or not enough thickener | Cook longer, and ensure proper ratios next time |
| Lumpy | Overcooked or didn’t whisk constantly | Strain it before cooling, stir constantly next time |
| Rubbery | Overheated | Use medium heat and remove as soon as it thickens |
| Weeping | Too much moisture or under-chilled | Let it chill longer, and avoid thin coconut milk |
Bonus Tip: Add a Stabilizer
If you live in a warm climate or want your pie to hold up better at room temp, you can add a small amount of unflavored gelatin to your custard while it’s still warm — just 1 teaspoon bloomed in water will give it a slightly firmer structure without changing the texture.
Custard Confidence Is Key
With a little patience and the right technique, your coconut custard will set like a dream — creamy, sliceable, and ready to wow your guests (or just you… we get it ). So whisk it slow, chill it long, and trust the process — you’ve got this!
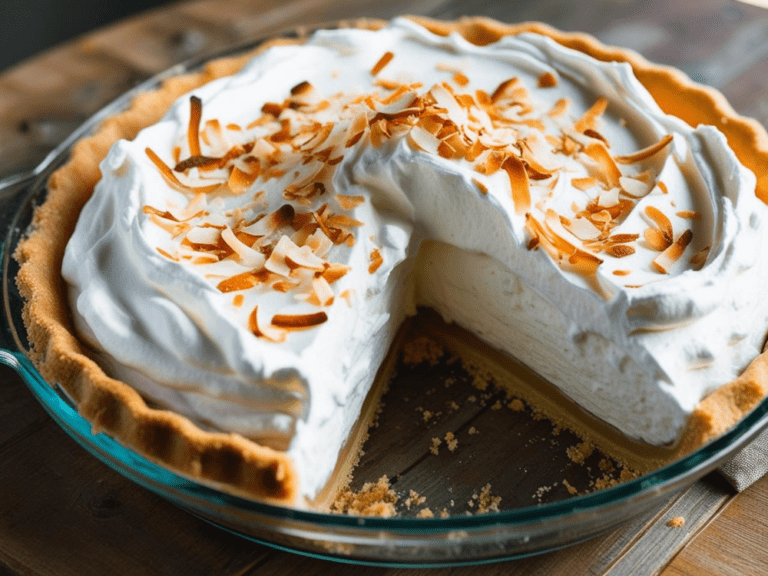
❓ Frequently Asked Questions (FAQs) About Coconut Cream Pie
When it comes to Coconut Cream Pie, we get a lot of questions — and we totally get it! Whether you’re baking it for the first time or fine-tuning your go-to recipe, these FAQs cover everything you need to know to make your pie a success from crust to creamy topping.
🥄 1. Can I Make Coconut Cream Pie Ahead of Time?
Yes! Coconut Cream Pie is actually better when made ahead of time because it needs time to chill and set properly.
-
🕒 Make it at least 4–6 hours in advance, or preferably the day before for the best texture.
-
🚫 Just wait to add the whipped cream and toasted coconut topping until right before serving to keep it fresh and fluffy!
🥥 2. Can I Use Coconut Cream Instead of Coconut Milk?
You can — but use caution. Coconut cream is thicker and more concentrated than coconut milk, so using it straight could make your filling overly rich or too thick.
✅ Tip: If using coconut cream, dilute it with a little water or non-dairy milk (like almond or oat milk) to match the consistency of full-fat coconut milk.
🍽️ 3. How Do I Serve Coconut Cream Pie?
Coconut Cream Pie is best served chilled, right from the fridge. It’s a creamy dessert, so it doesn’t hold up well at room temperature for long stretches.
-
❄️ Chill for several hours before slicing.
-
🔪 Use a sharp, clean knife and wipe between slices for neat presentation.
-
🍽️ Pair with a cup of coffee, tropical tea, or sparkling water for the full experience!
🧊 4. Can I Freeze Coconut Cream Pie?
Technically, yes — but it depends on how it’s assembled.
-
✅ Freeze without whipped topping: Wrap the pie tightly in plastic wrap and foil, and freeze for up to 2 months.
-
❌ Don’t freeze with whipped cream already on top: It will deflate and separate upon thawing.
-
🌬️ To thaw: Place the pie in the refrigerator overnight, then top with fresh whipped cream and toasted coconut before serving.
🧁 5. Can I Make It Dairy-Free?
Absolutely! Coconut Cream Pie is so easy to make dairy-free while keeping all that rich, creamy texture.
Try these swaps:
-
Use full-fat canned coconut milk in the custard
-
Use plant-based butter in the crust (or a graham cracker crust made with coconut oil)
-
Top with whipped coconut cream instead of dairy whipped topping
💡 Check out the “Can I Use Coconut Milk Instead of Regular Milk?” section above for more tips!
🌾 6. Is Coconut Cream Pie Gluten-Free?
Not by default — traditional crusts use wheat flour. But it can easily be made gluten-free!
-
Use a gluten-free pie crust (store-bought or homemade with almond or oat flour)
-
Ensure all other ingredients, especially cornstarch and shredded coconut, are labeled gluten-free
🍯 7. How Sweet Is This Pie?
Coconut Cream Pie has a rich sweetness, especially when made with sweetened coconut and a sweetened whipped topping. If you’re trying to cut down on sugar:
-
Use unsweetened coconut
-
Reduce added sugar in the custard by ¼ cup
-
Choose a lightly sweetened or homemade whipped topping
🔄 You can also use natural sweeteners like maple syrup, honey (if not vegan), or monk fruit-based sugar alternatives.
👩🍳 8. Can I Make This Pie Without Eggs?
You sure can! While traditional custards rely on egg yolks, there are several egg-free ways to thicken the filling:
-
Use extra cornstarch or arrowroot powder
-
Try plant-based egg replacers like JUST Egg or Ener-G
-
Make a coconut pudding-style filling using coconut milk, cornstarch, and sugar
The result is slightly different in texture but still smooth, thick, and delicious.
🔥 9. What’s the Difference Between Coconut Cream Pie and Coconut Custard Pie?
Great question — these two pies are often confused!
| Coconut Cream Pie | Coconut Custard Pie |
|---|---|
| Cooked custard filling, then chilled | Filling is baked in the crust |
| Topped with whipped cream | Often served plain or with meringue |
| No oven baking after custard is made | Bakes the custard in the oven |
🥧 Coconut Cream Pie is lighter, silkier, and chilled — perfect for warm weather or no-fuss entertaining!
🧼 10. How Do I Keep the Crust From Getting Soggy?
This is one of the top concerns — and we’ve got you covered!
-
Blind bake your crust before filling
-
Cool it completely before adding the custard
-
Use a thin layer of egg wash, chocolate, or jam to create a moisture barrier
-
Always chill your pie fully before serving
🍽️ Serving Ideas & Pairings for Coconut Cream Pie
Sure, Coconut Cream Pie is stunning all on its own — smooth custard, golden toasted coconut, and a flaky crust you want to live in 😍. But sometimes, it’s those little extras that turn a delicious dessert into a full-blown experience. Whether you’re serving guests, prepping for a holiday, or just treating yourself to something sweet on a quiet weekend, these serving ideas and pairings will take your Coconut Cream Pie to the next level.
🧁 1. Serve It Chilled (Always!)
Let’s start with the basics: Coconut Cream Pie should always be served chilled. After setting in the fridge for at least 4–6 hours (overnight is even better!), the filling becomes creamy and sliceable, with a texture that holds beautifully.
Serving tip:
Use a warm, clean knife for clean cuts. Just run it under hot water and wipe between slices!
🍍 2. Pair with Tropical Flavors
Coconut is a tropical treasure, and pairing it with other sun-kissed flavors just makes sense! Try these flavor combos:
-
Mango Slices or Purée: Add a tropical-fruit topping or swirl on the plate
-
Pineapple Compote: Bright and sweet with a little tang to balance the richness
-
Passion Fruit Drizzle: Tart and fragrant — perfect if you want a “wow” flavor contrast
🌺 These pairings turn your dessert into a Hawaiian vacation in every bite.
☕ 3. Drink Pairings That Compliment the Creaminess
The right drink can elevate your Coconut Cream Pie into a full-blown moment of bliss. Here are our fave sips to pair with each slice:
Hot Drinks:
-
Coconut Milk Latte or Café au Lait – creamy on creamy 😋
-
Earl Grey or Jasmine Tea – floral notes pair beautifully with the coconut
-
Cinnamon-Spiced Chai – warm spice meets tropical sweetness
Cold Drinks:
-
Sparkling Pineapple Water – refreshing with a tropical twist
-
Iced Matcha Latte – earthy, vibrant, and surprisingly good with pie
-
Toasted Coconut Cold Brew – for the ultimate dessert-coffee combo
🎉 4. Make It Mini for Parties
Hosting a brunch, baby shower, or dinner party? Make mini Coconut Cream Pies in muffin tins or small tart shells. It’s the same creamy filling, but in adorable, single-serve form.
-
Serve on a dessert tray with edible flowers 🌸
-
Add personalized tags or cocktail sticks for a fun display
✨ These minis are also easier to transport, store, and freeze. Plus, who doesn’t love a pie you don’t have to share?
🥥 5. Add a Garnish for Visual Drama
Presentation matters, and a well-placed garnish can make your Coconut Cream Pie pop in photos and on the plate.
Tasty & Beautiful Garnishes:
-
Extra toasted coconut flakes
-
White chocolate curls or shavings
-
Fresh mint leaves
-
Edible flowers (like pansies or chamomile)
-
A drizzle of melted dark chocolate or caramel sauce
📸 Perfect for Instagram-worthy dessert plates and Pinterest-ready pics!
🧊 6. Serve Frozen as a Summer Treat
Want to make your Coconut Cream Pie even more refreshing? Try serving it partially frozen like an icebox dessert! Chill it for several hours, then pop it in the freezer for 1 hour before serving.
-
Slice and serve immediately for a semi-frozen, creamy texture
-
Great for summer parties or backyard cookouts!
🍫 7. Dessert Board Addition
Include small Coconut Cream Pie slices as part of a dessert grazing board with:
-
Chocolate-dipped fruit
-
Mini cheesecakes
-
Berries
-
Coconut macaroons
-
Flavored whipped cream or mousse
🍓 This idea is perfect for entertaining and gives guests options while highlighting your pie as the star.
🥂 8. Wine & Cocktail Pairings
Hosting an adults-only dinner? Pair your pie with a thoughtful glass.
Top picks:
-
Moscato d’Asti – lightly sweet with a floral finish
-
Sparkling Rosé – a bubbly treat to cleanse the palate
-
Coconut Rum Cocktail – dessert and drink in one!
Coconut Cream Pie is more than a dessert — it’s a vibe. Whether you serve it simply with a fork and a smile, or go full tropical-tiki-cocktail-mode, these serving ideas and pairings let your pie shine in every setting.
Lemon Chia Seed Muffins
Chocolate-Dipped Oranges with Sea Salt
Lucky Leprechaun Frozen Yogurt Bark
This post contains affiliate links. As an Amazon Associate, We earn from qualifying purchases. We only recommend products We love and use—thanks for your support!
🧁 Shop The Recipe
🥧 1. Pyrex 9-Inch Glass Pie Plate
Amazon Pick: ★★★★★ 4.8 | Budget-friendly
Why We Love It: A reliable pie plate is essential for even baking. This classic glass dish lets you see the crust as it browns — no more guessing if the bottom is done!
💬 “Perfect every time! I love how I can see the crust baking. It’s also easy to clean and sturdy.” – Verified Amazon Reviewer
🥄 2. OXO Good Grips Balloon Whisk
Amazon Pick: ★★★★★ 4.8 | Under $15
Why We Love It: Ideal for making the custard silky smooth without lumps. The grip is comfy and the wires are strong but flexible — great for daily baking tasks.
💬 “Feels great in my hand and whisks beautifully. OXO never disappoints!” – Verified Amazon Reviewer
🍳 3. Cuisinart 2-Quart Stainless Steel Saucepan
Amazon Pick: ★★★★★ 4.7 | Excellent value
Why We Love It: Perfect for heating and thickening your coconut custard. It heats evenly and cleans easily — no scorched fillings here!
💬 “My go-to for sauces and custards. The weight and balance are just right.” – Verified Amazon Reviewer
⚖️ 4. U-Taste Stainless Steel Measuring Cups & Spoons Set
Amazon Pick: ★★★★★ 4.9 | Great price for the quality
Why We Love It: Accurate measuring = flawless baking. This set is durable, rust-proof, and engraved so the measurements never fade.
💬 “Heavy-duty and accurate. I love how they nest and the bright color rings keep them organized.” – Verified Amazon Reviewer
🌀 5. Hamilton Beach 6-Speed Hand Mixer with Snap-On Storage
Amazon Pick: ★★★★★ 4.6 | Under $30
Why We Love It: Whip that cream like a pro! This affordable hand mixer is powerful, easy to clean, and comes with a snap-on case for easy storage.
💬 “Works like a charm. Lightweight but strong — whipped cream in minutes!” – Verified Amazon Reviewer
✨ Why We Recommend These Tools
Each item on this list has been carefully selected to make your baking smoother, faster, and more foolproof — without breaking the bank 💸. They’re all well-loved by thousands of home bakers and have consistently high ratings on Amazon. Best of all, they’ll come in handy for all your baking adventures — not just this Coconut Cream Pie.
Coconut Cream Pie
Equipment
- Pie Dish: A 9-inch glass or ceramic pie plate is ideal for even baking and classic presentation.
- Saucepan: A medium (2-quart) heavy-bottomed saucepan is essential for making a smooth, thick custard without scorching.
- Whisk: You’ll need a sturdy balloon whisk to ensure the custard filling is lump-free and silky.
- Mixing Bowls: At least two bowls — one for mixing the filling and one for prepping whipped cream or eggs.
- Measuring Cups and Spoons: Precise measurements are key for the custard, crust, and topping, so have both dry and liquid measuring tools on hand.
- Spatula: A silicone spatula helps scrape every last bit of custard and whipped cream out of the bowl.
- Pie Weights or Dried Beans (Optional): Used during blind baking to prevent the crust from puffing up.
- Plastic Wrap or Parchment Paper: To prevent a skin from forming on the custard while it cools.
- Knife & Serving Utensil: A clean, sharp knife for slicing and a pie server for picture-perfect plating.
- Cooling Rack: Allows the crust and filled pie to cool evenly without moisture buildup.
Ingredients
- 1 9-inch pie crust, pre-baked and cooled
- 1 Cup Sweetened shredded coconut
- 1 Cup Whole milk
- 1 Cup Coconut milk
- 2 Eggs, beaten
- 3/4 Cup Granulated sugar
- 1/2 Cup All-purpose flour
- 1/4 Tsp Salt
- 1 Tsp Vanilla extract
- Whipped cream, for topping
Instructions
- Prep the Pie Shell:Start by pre-baking your pie crust according to the package instructions until golden and set aside to cool.
- Toast the Coconut:In a dry skillet, toast half of the shredded coconut over medium heat until golden brown. Stir frequently to avoid burning. This will be used for garnishing the pie, adding a delightful crunch and toasted flavor.
- Make the Filling:In a medium saucepan, combine the whole milk, coconut milk, and granulated sugar. Cook over medium heat, stirring constantly until the mixture is warm and the sugar has dissolved.
- Thicken the Filling:In a small bowl, mix the flour and salt. Temper the beaten eggs by slowly whisking in a cup of the warm milk mixture, then pour the egg mixture back into the saucepan. Stir constantly until the mixture thickens and coats the back of a spoon, about 5-7 minutes.
- Add Flavor:Remove from heat and stir in the vanilla extract and the remaining shredded coconut. Pour the filling into the cooled pie crust and smooth the top with a spatula.
- Chill:Refrigerate the pie for at least 4 hours, or until set.
- Garnish and Serve:Before serving, top the pie with whipped cream and sprinkle with the toasted coconut for a beautiful contrast.
Notes
⏰ Make Ahead Tips
Yes, you can (and should!) make Coconut Cream Pie in advance.In fact, it tastes even better after a few hours in the fridge!
- Make 1 Day Ahead: Assemble the entire pie — crust, custard filling, and even the whipped cream topping if it’s stabilized (like with a bit of gelatin or cornstarch).
- For Best Results: Chill for at least 4–6 hours, or overnight, to allow the filling to fully set.
-
Want to Make in Stages?
- Bake the crust up to 2 days ahead.
- Cook and chill the custard 1 day ahead.
- Assemble and add toppings the morning of serving.
🧁 Hosting tip: Make individual mini pies in jars for grab-and-go convenience!
❄️ How to Store Leftovers
If you’re lucky enough to have leftover Coconut Cream Pie (😋), here’s how to keep it fresh:-
In the Fridge:
- Cover the pie loosely with plastic wrap, foil, or a pie dome.
- Store in the refrigerator for up to 4 days.
- Make sure it’s on a flat surface to prevent the whipped topping from smudging.
-
Avoid Freezing the Assembled Pie:
- The custard and whipped cream don’t freeze well — they can separate and become watery when thawed.
- However, you can freeze the baked crust and even the custard alone (before topping) for up to a month. Just wrap tightly and thaw overnight in the fridge before assembling.
🍴 Re-Serving Tip
Coconut Cream Pie is best served cold. If you’re pulling it out of the fridge for guests:- Let it sit at room temperature for 5–10 minutes before slicing for smoother cuts.
- Use a warm, clean knife and wipe between slices for those bakery-perfect edges.
A Slice of Sweet Satisfaction
There’s something timeless and comforting about a Coconut Cream Pie — that perfect balance of flaky crust, creamy coconut filling, and whipped topping makes it a dessert that feels like a warm hug in every bite. Whether you’re making it for a celebration, a cozy Sunday dinner, or just because you’re craving something sweet and nostalgic, this pie is sure to become a favorite at your table 💕.
We hope this guide gave you all the tools, tips, and inspiration to bake with confidence — and to enjoy every creamy, coconutty forkful 🍽️✨
If you tried this recipe, let us know in the comments below or tag us on Instagram or Pinterest — we love seeing your beautiful creations and sharing them with the Satisfy Your Cravings community!
Join Now!
If you enjoyed this Coconut Cream Pie, don’t miss out on even more fresh, nourishing, and easy-to-make recipes like this! By joining our email community, you’ll get exclusive content, bonus recipes, and expert tips to help you make clean eating simple, flavorful, and fun.
✨ Enter your email & click below to subscribe—you’ll start receiving tasty inspiration right away! It only takes a minute to join our growing community of food lovers who are dedicated to making healthy meals both exciting and effortless!

