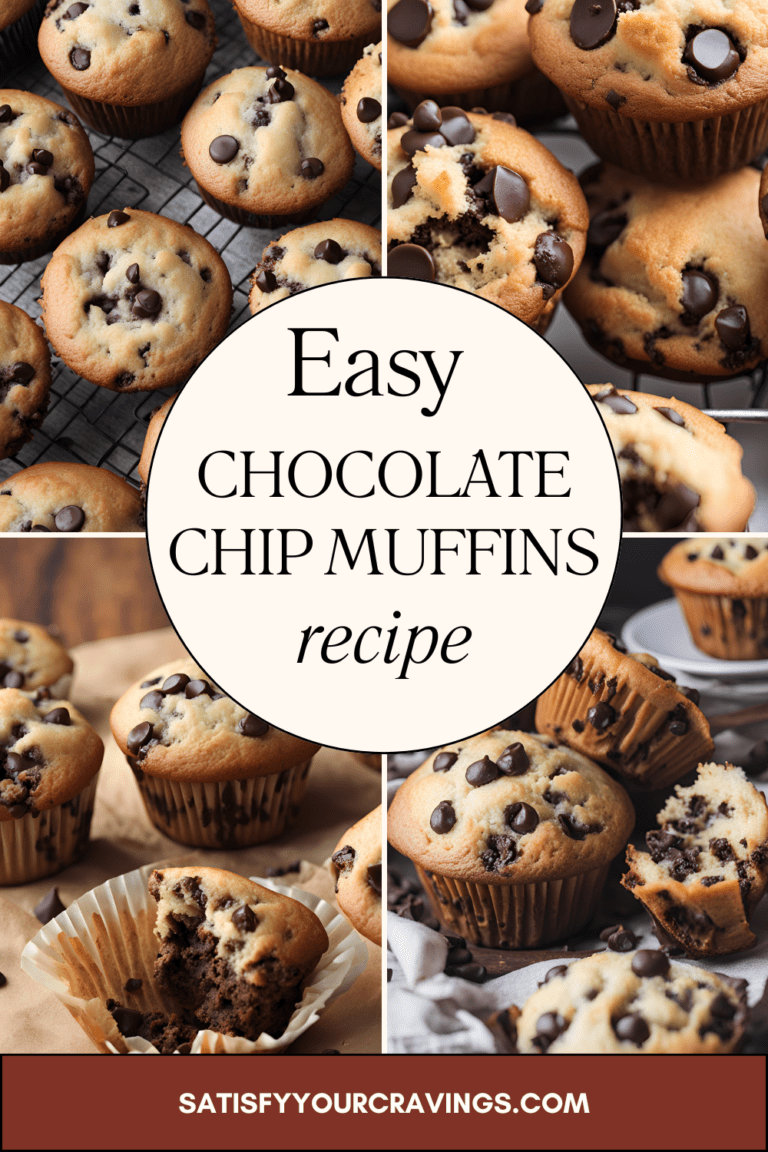
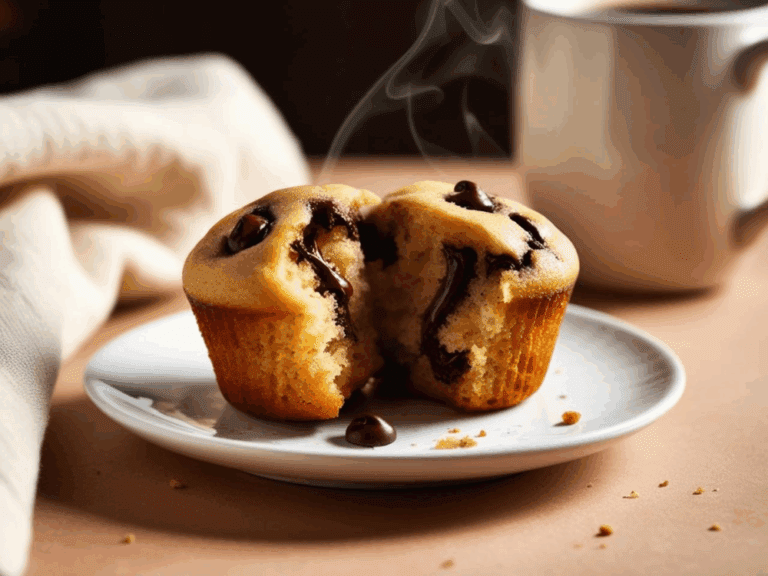
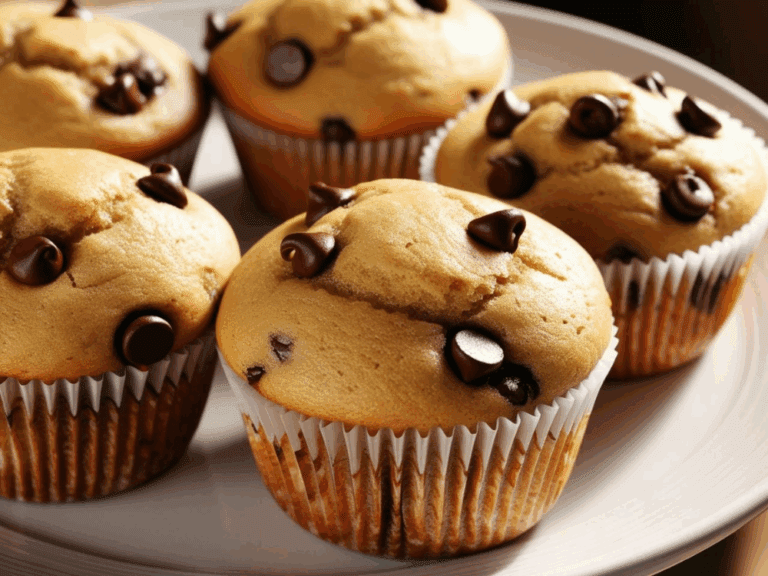
Chocolate Chip Muffins
These partnerships help support our content and keep our recipes free for our amazing readers. We only recommend products and brands we personally use and trust in our own kitchen. Thank you for supporting us! 💛
🧁 The Perfect Muffin Starts Here
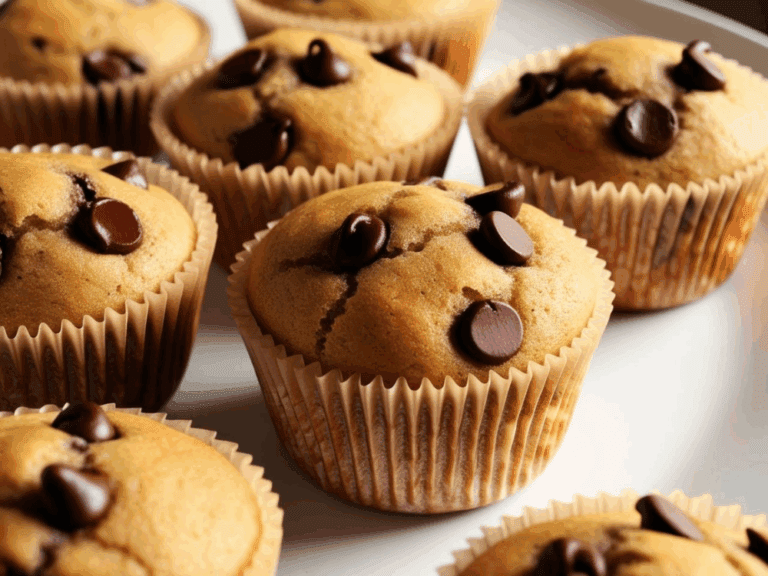
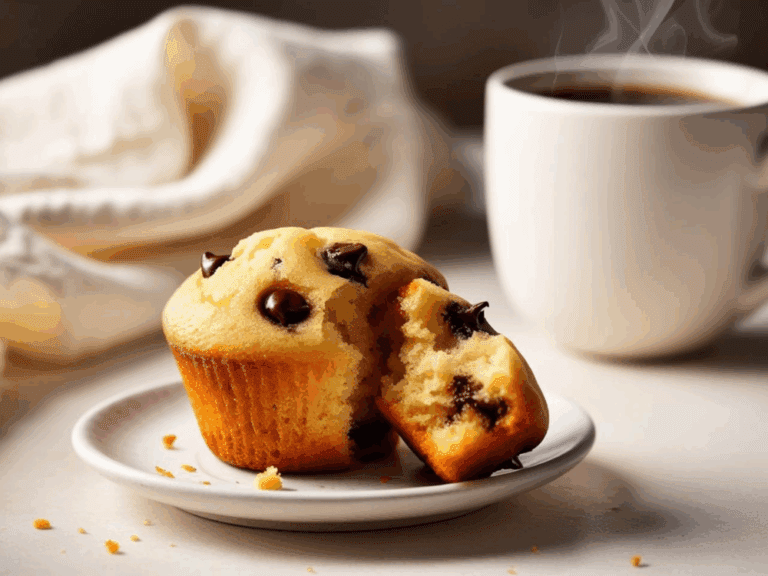
There’s nothing quite like the aroma of freshly baked chocolate chip muffins filling your kitchen. Soft, fluffy, and packed with melty chocolate chips in every bite, this recipe is your go-to for when you want something quick, cozy, and totally satisfying. Whether you’re a weekend baker or a weekday warrior looking for an easy treat, these muffins deliver every time — no fuss, no fancy ingredients, just feel-good flavor.
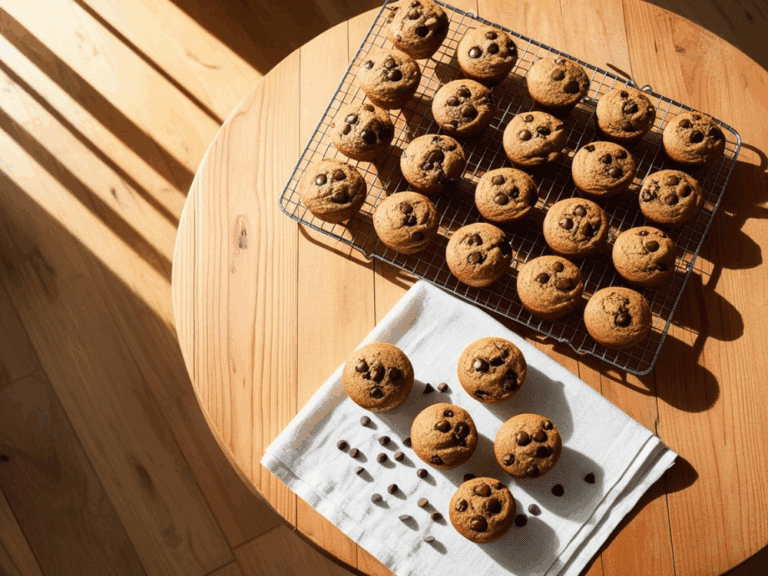
Made with simple pantry staples and ready in just 30 minutes, these muffins are perfect for breakfast, snack time, or a little sweet moment in your day. They’re family-approved, freezer-friendly, and so easy to customize. Once you make a batch, don’t be surprised if they become a regular request in your home. Let’s get baking! 🍫🧁
🧁 What Is the Secret to Moist Muffins?
Moist muffins are the dream — soft, tender on the inside with a slightly golden top that cracks just right. But getting that perfect texture isn’t just luck — it’s science and a little bit of baking magic! Let’s break down the key secrets that will keep your chocolate chip muffins from ever turning out dry again.
1. Fat = Moisture
One of the biggest contributors to moist muffins is fat — specifically from ingredients like butter, oil, whole milk, sour cream, or Greek yogurt. While butter gives you a rich flavor, oil tends to make muffins even more moist because it stays liquid at room temperature. You can also use a combination of both for the best of both worlds!
Clean-eating tip: Try using avocado oil or melted coconut oil for a healthier spin that still delivers tons of moisture.
2. Don’t Overmix the Batter
It’s tempting to stir until everything looks perfectly smooth, but overmixing is one of the biggest muffin mistakes. The more you mix, the more gluten forms — which leads to tough, dry muffins. Instead, gently fold the ingredients together until just combined. A few lumps? Totally fine!
3. Use Room Temperature Ingredients
Cold eggs or milk can cause your batter to curdle or seize, leading to uneven mixing and baking. Bring everything (especially eggs, butter, and milk) to room temperature before you start. This helps the ingredients emulsify better, giving you a smoother batter and a lighter, moister texture.
4. Incorporate Moisture-Retaining Ingredients
Adding ingredients that naturally hold moisture can transform your muffins. Think:
Greek yogurt or sour cream – adds richness and tang
Applesauce – a great oil substitute for lighter muffins
Mashed banana or zucchini – adds moisture and subtle flavor
These are especially great in clean baking recipes where you’re trying to reduce oil or refined sugar.
5. Baking Temperature Matters
A high initial oven temp (like 425°F for the first 5 minutes) helps muffins rise quickly and lock in moisture. Then reduce to 350°F for the remainder of the bake. This little trick also gives you those bakery-style domed tops everyone loves.
6. Don’t Overbake!
Dry muffins are often just… overbaked. Even one or two extra minutes can zap the moisture right out. Check your muffins around the 17–18 minute mark (depending on your oven). A toothpick inserted in the center should come out with a few moist crumbs — not totally clean.
7. Cool Properly
Let your muffins cool in the tin for no more than 5 minutes, then transfer them to a wire rack. If they sit in the hot pan too long, the bottoms can over-steam and lose their fluffy texture.
📌 Pro Tip: Want your muffins to stay moist for days? Store them in an airtight container with a paper towel on the bottom and top. The paper towel will absorb any excess moisture and keep your muffins from getting soggy or stale.
🧈 Can I Use Oil Instead of Butter in Muffins?
Yes — and in many cases, using oil instead of butter can actually make your muffins more moist! 🧁 While both ingredients have their benefits, they each bring something different to the table when it comes to taste, texture, and clean eating preferences. Let’s explore the differences so you can choose what works best for your Easy Chocolate Chip Muffins.
🧈 Butter: Rich Flavor & Classic Crumb
Butter is beloved in baking for a reason. It adds a rich, creamy flavor and helps create that soft, cake-like crumb we all love in muffins. If you cream the butter and sugar together before adding your wet ingredients, it can also help trap air — making your muffins lighter and fluffier.
But there’s a downside: because butter solidifies at room temperature, muffins made with butter can feel a little drier the next day. They’re still delicious — just not as soft or springy as when freshly baked.
🛢️ Oil: Moisture Magic
Oil, on the other hand, keeps muffins softer and moister for longer. That’s because it stays liquid even after cooling, which helps lock in moisture and creates that melt-in-your-mouth texture.
Here are some of the best oils for muffin baking:
Vegetable oil – neutral flavor and classic in muffin recipes
Canola oil – light and heart-healthy
Avocado oil – clean-eating friendly and rich in healthy fats
Melted coconut oil – great for dairy-free baking, but adds a slight coconut taste
Clean eaters love coconut oil and avocado oil as more natural, nutrient-dense options compared to highly processed oils.
⚖️ Which One Should You Use?
Use butter if you’re going for that classic muffin flavor with a richer taste and firmer structure.
Use oil if you want maximum moisture, a longer shelf life, or a dairy-free option.
Use both for the best of both worlds — butter for flavor, oil for moisture! Try replacing half the butter with oil in your recipe to strike a perfect balance.
🍃 Clean Eating Tip
If you’re following a clean eating lifestyle or simply want to cut back on dairy or saturated fats, swap butter for avocado oil or cold-pressed coconut oil in a 1:1 ratio. Just make sure to melt the coconut oil and bring your eggs and milk to room temp to prevent clumping.
📝 How to Substitute Oil for Butter in Muffins:
Here’s a simple guide:
1 cup butter = ¾ cup oil
For best results, use neutral-flavored oils (unless you want a hint of flavor, like coconut!)
Keep in mind, the texture will be slightly different — muffins made with oil will be softer and a little less structured than those made with butter.
📌 Pro Tip: If you’re using oil, adding an extra egg yolk or a spoonful of Greek yogurt can help improve the structure and make up for the richness that butter brings.
Try some of our other recipes!
🧁 How Do I Make Bakery-Style Chocolate Chip Muffins at Home?
We’ve all seen them — those picture-perfect muffins at the bakery with tall, golden domed tops and pockets of gooey chocolate in every bite. They’re soft on the inside, perfectly sweet, and just a little crisp around the edges. The good news? You don’t have to be a pastry chef to recreate that magic. 🙌
With a few simple tricks, you can make bakery-style chocolate chip muffins right in your own kitchen — no mixer or fancy ingredients required!
🍰 1. Start With a Thick, Scoopable Batter
Bakery muffins usually have a thicker batter — not runny like cake batter. A thick batter helps support those tall muffin tops as they rise in the oven.
To achieve this:
Don’t overdo the liquid ingredients
Use Greek yogurt, sour cream, or buttermilk to add richness without thinning the batter
Use a higher ratio of flour to wet ingredients, but don’t overmix!
🔥 2. Use the High-Heat Trick
This is one of the most powerful secrets behind those tall muffin tops.
Here’s how to do it:
Start baking at 425°F (220°C) for the first 5–6 minutes
Then lower the oven to 350°F (175°C) and bake until done
That initial burst of high heat gives the muffins a powerful lift (known as “oven spring”) and helps create those gorgeous domed tops, just like you see in bakeries.
🧁 3. Fill the Muffin Cups All the Way Up
Most home bakers fill muffin cups halfway, thinking they’ll rise a lot. But for that bakery-style look, you’ll want to fill them ¾ full or even all the way to the top.
To avoid spillover:
Use paper liners to help support the sides
Place your muffin tin on a baking sheet for stability
Only fill every other cup in the tin (skip one in between) to allow more air circulation — another trick to help them rise tall!
🍫 4. Use Mini Chocolate Chips or Double Up
Bakery muffins are loaded with chocolate chips — not just a few scattered in. For the most even distribution of gooey chocolate:
Use mini chocolate chips to get chocolate in every bite
Fold in some chocolate chips, then sprinkle more on top before baking so they stay visible and melty
📌 Optional Tip: Toss your chocolate chips in a little flour before mixing them into the batter to help prevent them from sinking.
🧈 5. Butter + Oil = Best Texture
Many bakeries use a mix of butter for flavor and oil for moisture. This hybrid gives you the perfect texture — rich and buttery, but soft and moist. You can try:
¼ cup melted butter + ¼ cup neutral oil (like avocado or canola)
✨ 6. Rest the Batter (If You Have Time)
Letting the batter rest for 15–30 minutes before baking allows the flour to fully hydrate and the baking powder to activate, resulting in a fluffier, more tender crumb. Many pro bakers swear by this step!
👨🍳 7. Don’t Overmix — Fold Gently!
Once you add the dry ingredients to the wet, mix only until combined. Overmixing can lead to dense, rubbery muffins instead of that light, bakery texture.
🎨 8. Style Like a Pro
Before baking, don’t forget to:
Sprinkle extra chocolate chips on top
Add a pinch of coarse sugar or turbinado sugar to the tops for a bakery-style sparkle and crunch
This gives them that “just from the bakery case” finish that looks amazing in photos and wows your guests.
📌 Bonus Tip for Clean Bakers:
If you’re baking with natural sweeteners or whole wheat flour, add a tablespoon of unsweetened applesauce or mashed banana to help retain moisture and soften the crumb while still keeping it clean and healthy.
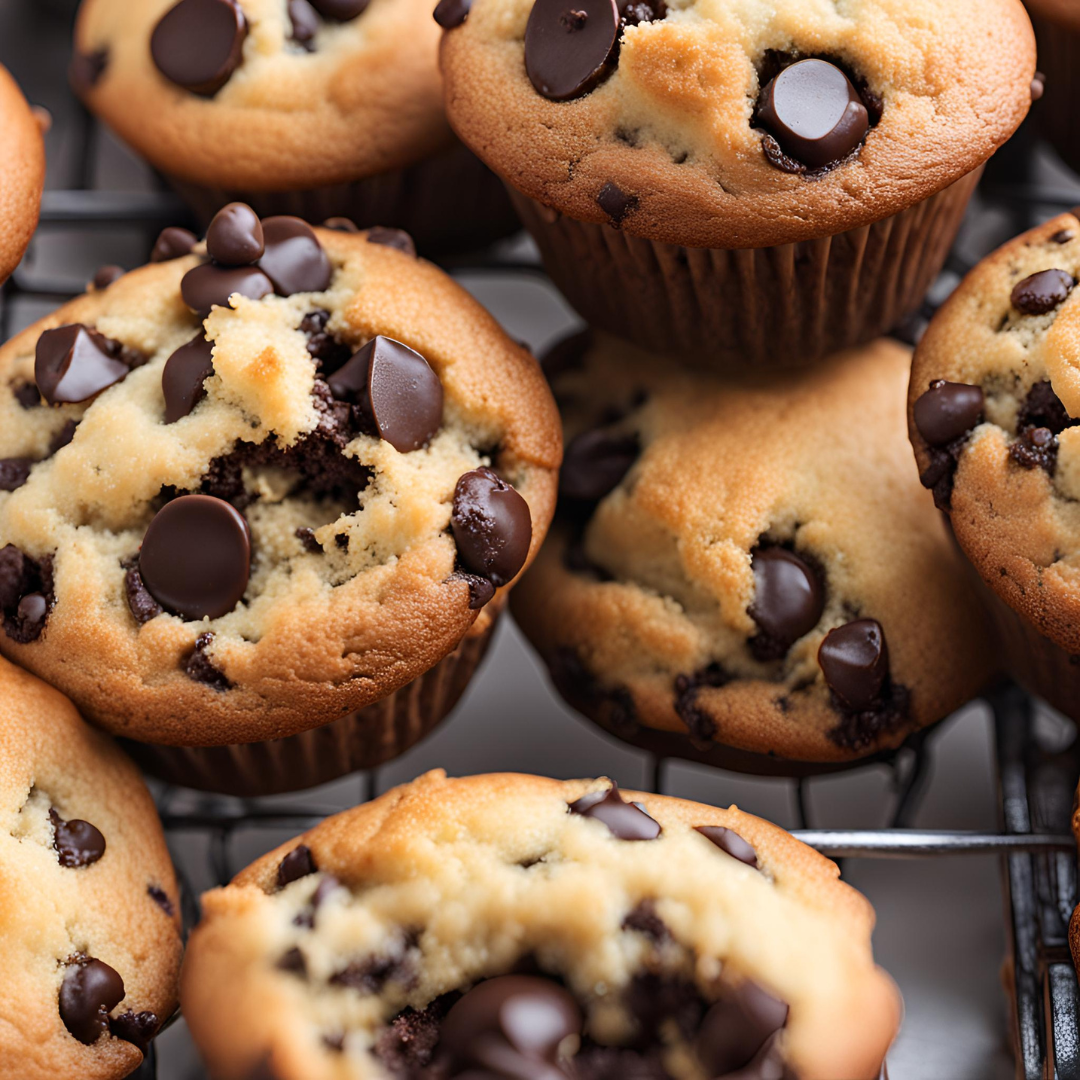
🍫 What Kind of Chocolate Chips Are Best for Muffins?
When it comes to baking the perfect chocolate chip muffin, choosing the right kind of chocolate chips is more important than you might think! The type, size, and even brand of chocolate you use can affect the flavor, texture, and melty goodness of your final muffins. So, let’s talk chips — and how to pick the right ones for bakery-worthy results every time. 🧁🍫
🍪 1. Semi-Sweet Chocolate Chips: The Gold Standard
Semi-sweet chocolate chips are the most classic and versatile choice for muffins. They’re perfectly balanced between sweet and rich, making them ideal for pairing with a soft, slightly sweet muffin base.
Best for: Traditional chocolate chip muffin recipes, crowd-pleasing flavor, and a consistent melt.
📌 Try This Brand: Ghirardelli Semi-Sweet Chocolate Chips – they’re a reader-favorite for a reason!
🍫 2. Milk Chocolate Chips: Sweeter & Creamier
If you’re baking for kids or have a serious sweet tooth, milk chocolate chips are a great option. They’re softer, creamier, and melt quickly, creating gooey pockets of chocolate throughout your muffins.
Best for: A dessert-like muffin that’s extra sweet and comforting.
📌 Clean baking tip: Some milk chocolate chips can contain added oils or dairy ingredients — check the label if you’re baking dairy-free.
🍩 3. Dark Chocolate Chips: Rich & Bittersweet
Dark chocolate chips (60–70% cacao or higher) bring a bold, slightly bitter depth that pairs beautifully with muffins that have lower sugar content or extra sweetness from bananas, maple syrup, or applesauce.
Best for: Clean eaters, dark chocolate lovers, or muffins with a slightly lower sugar content.
Bonus: Dark chocolate tends to have more antioxidants and less sugar than milk or semi-sweet varieties!
🍬 4. Mini Chocolate Chips: Maximum Distribution
Mini chips = maximum chocolate in every bite! Their small size helps them distribute evenly throughout the batter, so you never get a muffin bite without some chocolate.
Best for: Muffins meant for kids, snack-sized bakes, or mini muffin tins.
📌 Pro tip: Sprinkle a few mini chips on top of each muffin just before baking for a speckled, bakery-style look.
🍫 5. Chocolate Chunks or Roughly Chopped Chocolate
Want those dramatic, melt-in-your-mouth puddles of chocolate? Use chocolate chunks or chop up a high-quality chocolate bar. These larger pieces create luxurious, melty ribbons of chocolate inside your muffins.
Best for: Bakery-style or indulgent muffins that make a statement.
📌 Favorite bar to chop: Lindt or Trader Joe’s Pound Plus Dark Chocolate
🧂 6. Flavored or Specialty Chips
Looking to mix things up? Try white chocolate chips, peanut butter chips, or butterscotch chips! These can be fun additions or mixed with standard chocolate chips to create your own custom flavor combo.
Best for: Special occasions, dessert muffins, or creating unique twists on your classic recipe.
📝 Should I Coat My Chocolate Chips in Flour First?
Yes — if you’ve ever baked muffins and all your chocolate chips sank to the bottom, this simple trick helps! Just toss your chips in a tablespoon of flour before folding them into the batter. It helps them suspend evenly so they stay beautifully distributed throughout your muffins.
👩🍳 What About Clean Eating & Allergy-Friendly Options?
If you’re baking for dietary needs, look for chocolate chips that are:
Dairy-free (like Enjoy Life brand)
Low sugar or stevia-sweetened
Soy-free or organic if you’re avoiding additives
📌 Pro Tip: No matter which chips you choose, save some to sprinkle on top of each muffin before baking. This gives them that bakery-style look with gooey chocolate peeking out of every bite — and it makes your muffins totally irresistible!
❄️ Can I Freeze Chocolate Chip Muffins?
Yes, you absolutely can — and should — freeze chocolate chip muffins! 🧁 Freezing is a fantastic way to preserve their freshness, reduce food waste, and have a delicious grab-and-go snack or breakfast anytime you need it. Whether you’re meal prepping for the week or just don’t want that last batch to go to waste, freezing muffins is simple and smart.
Let’s walk through the best ways to freeze, thaw, and enjoy your muffins so they taste just as soft and moist as the day you baked them.
🧊 How to Freeze Muffins (Step-by-Step)
Let Them Cool Completely
This is super important! Never freeze warm muffins. Let them cool on a wire rack until they reach room temperature to avoid trapping steam, which can cause sogginess or freezer burn.Individually Wrap Each Muffin
Wrap each muffin tightly in plastic wrap or compostable parchment paper. This adds a layer of protection from freezer air and helps prevent freezer burn.Place in a Freezer-Safe Bag or Container
After wrapping, place the muffins into a large zip-top freezer bag or airtight container. Try to remove as much air as possible from the bag to prevent ice crystals.Label with the Date
Use a marker to label the bag with the date you baked and froze them. Muffins are best when used within 2–3 months, although they’re safe beyond that — the texture just might change.
⏱️ How to Thaw & Reheat Frozen Muffins
There are a few easy options depending on your time frame:
👉 For Room Temp Thawing:
Just remove the muffin from the freezer, unwrap it, and place it on a plate at room temperature.
It will thaw in 1–2 hours.
👉 For a Quick Reheat (Microwave):
Unwrap and place the frozen muffin on a paper towel.
Microwave on medium power (50–70%) for 20–30 seconds.
This brings it back to warm, fluffy perfection without drying it out.
👉 For Oven Reheat (Best Texture):
Preheat your oven to 300°F (150°C).
Place frozen muffins on a baking sheet and cover loosely with foil.
Warm for about 10–12 minutes — this revives the texture like it’s fresh out of the oven!
🔁 Can I Freeze Muffin Batter?
Yes, you can also freeze uncooked muffin batter for even fresher bakes on demand.
Here’s how:
Spoon the batter into paper-lined muffin cups in a muffin tin.
Freeze the entire tin until solid (about 1–2 hours).
Transfer the frozen batter portions into a zip-top freezer bag.
When ready to bake, place the frozen batter back into a muffin tin and add 3–5 extra minutes to the baking time.
Perfect for busy mornings or baking a few muffins at a time!
🧁 Bonus: Freezing Muffins for School Lunches or Snacks
Chocolate chip muffins are perfect for school or work lunches. Just pop a frozen muffin into a lunchbox in the morning — it will be thawed and ready to eat by snack time! Plus, it helps keep the lunchbox contents cool.
📌 Freezer-Friendly Muffin Tips:
Avoid using paper towels in the bag — they trap moisture.
Don’t freeze muffins with glazes or frostings; add those fresh after reheating.
Double-wrap for long-term freezing (especially if freezing for more than 2 months).
😩 Why Did My Muffins Turn Out Dry or Dense? (And How to Fix It!)
There’s nothing worse than pulling a batch of muffins out of the oven, only to discover they’re dry, crumbly, or dense instead of moist and fluffy. The good news? These issues are usually easy to fix once you understand what went wrong — and how to avoid the same mistake next time!
Let’s dive into the most common causes of dry or dense muffins and the foolproof tips to rescue your next batch.
🧁 1. You Overmixed the Batter
This is the #1 reason muffins turn out tough or dense. When you overmix, you activate the gluten in the flour, which results in a tighter, chewier crumb — the opposite of what you want in a muffin!
✅ Fix:
Mix your batter just until the dry ingredients disappear. It’s okay if there are a few lumps — in fact, that’s ideal! Use a gentle folding motion rather than vigorous stirring.
⚖️ 2. You Added Too Much Flour
Too much flour = dry, heavy muffins. It’s an easy mistake to make, especially if you’re scooping straight from the bag. Overpacking your measuring cup can lead to 25–50% more flour than needed!
✅ Fix:
Use the “spoon and level” method: spoon the flour into your measuring cup, then level it off with a flat edge. Or better yet, use a digital kitchen scale for accuracy.
🥚 3. Not Enough Moisture or Fat
If your recipe is lacking enough oil, butter, eggs, or liquid (like milk or yogurt), your muffins will bake up dry and crumbly. Fat adds tenderness and richness, while liquids help keep the crumb soft and moist.
✅ Fix:
Make sure your recipe has a good balance of wet and dry ingredients. You can also add a spoonful of Greek yogurt, applesauce, or sour cream to boost moisture — especially helpful in clean eating recipes.
⏱️ 4. You Baked Them Too Long
Even just 2–3 minutes too long in the oven can completely dry out your muffins. Baking time varies depending on your oven, the size of your muffin tin, and how full you fill the cups.
✅ Fix:
Start checking your muffins for doneness 2–3 minutes before the recipe suggests. Insert a toothpick into the center — it should come out with a few moist crumbs (not wet batter, and not bone dry). You want it slightly underbaked rather than overdone.
🌡️ 5. Your Oven Temperature Is Off
Ovens are often hotter or cooler than they say, and an inaccurate temperature can throw off your whole bake. If it’s too hot, muffins brown too quickly on the outside while staying underbaked (or drying out) on the inside.
✅ Fix:
Use an oven thermometer to ensure accuracy. They’re inexpensive and a total game-changer for consistent baking.
🧂 6. You Skipped a Binding or Moisture-Retaining Ingredient
In many clean eating or allergy-friendly recipes, removing eggs or oil without a substitute can lead to dry, crumbly muffins.
✅ Fix:
If you’re baking egg-free, be sure to include a replacement like:
Mashed banana
Unsweetened applesauce
Ground flax mixed with water (flax egg)
Silken tofu or plant-based yogurt
These keep the batter cohesive and lock in moisture.
❄️ 7. You Didn’t Store Them Properly
Even perfectly baked muffins can become dry overnight if they’re stored incorrectly.
✅ Fix:
Let muffins cool completely, then store them in an airtight container with a paper towel on top and bottom. This helps control moisture and keeps them soft for days. Avoid refrigerating them unless absolutely necessary — fridges dry out baked goods quickly.
📌 Quick Moisture Fix: How to Rescue a Dry Muffin If you already have a dry batch on your hands:
Warm a muffin for 15 seconds in the microwave with a damp paper towel draped over it
Drizzle with a little honey, maple syrup, or nut butter
Split it open and add a pat of butter, letting it melt right in
Delicious save every time!
☁️ How Do I Make Muffins Rise High and Fluffy?
There’s something so satisfying about a muffin that rises tall with a beautiful domed top — like it came straight from a bakery case. But if your muffins are coming out flat or uneven, don’t worry — you’re not alone, and the solution is easier than you think!
Whether you’re baking chocolate chip muffins, blueberry, or banana nut, these pro-level tips will teach you exactly how to get that high rise and fluffy interior every single time.
🔥 1. Use the High-Heat Oven Trick
This is the #1 muffin game-changer — and it’s used by professional bakers everywhere.
Here’s how it works:
Preheat your oven to 425°F (220°C)
Bake your muffins at 425°F for the first 5–6 minutes
Then reduce the temperature to 350°F (175°C) for the remaining time
Why this works: The initial high heat causes a quick burst of steam, giving the muffins a big lift right at the start of baking (called “oven spring”). This helps form those signature domed tops before the crumb sets.
🧁 2. Fill the Muffin Cups Higher Than You Think
Contrary to old-school advice, don’t stop at half-full. If you want your muffins to rise high, fill each muffin liner 3/4 full or almost to the top.
Tips for success:
Use a cookie scoop or ice cream scoop for even filling
For dramatic rise, try skipping every other muffin cavity in the pan to allow more airflow around each muffin
Add a few extra chocolate chips on top before baking to make them pop visually
🥄 3. Rest the Batter Before Baking
Letting the muffin batter rest for 15 to 30 minutes before baking gives the flour time to fully hydrate and helps activate the leavening agents.
This results in:
A fluffier, more even crumb
Better rise once the muffins hit the oven
A less dense, more tender interior
You can rest the batter right in the mixing bowl or scoop it into the muffin tin and rest it in the fridge.
🧂 4. Check Your Leavening Agents
Old baking powder or baking soda = flat muffins. These ingredients lose potency over time.
Here’s how to check if they’re still active:
For baking powder: Drop a teaspoon into warm water — it should fizz immediately
For baking soda: Drop it into vinegar — it should bubble up fast
If there’s little or no reaction, it’s time to replace them.
📌 Pro Tip: Make sure you’re using the right amount of leavening. Too little = flat muffins. Too much = muffins rise too fast and collapse. Typically, you’ll want about 1 teaspoon of baking powder per cup of flour.
🧈 5. Use Room Temperature Ingredients
Cold eggs or milk can slow down how well your batter emulsifies and rises. Bringing your ingredients to room temperature allows for smoother mixing and better lift in the oven.
Try this trick:
Set eggs and milk out 30 minutes before baking
Or place your eggs in a bowl of warm (not hot!) water for 5 minutes if you’re short on time
🥛 6. Choose the Right Fat for Texture
Want fluffy, bakery-style muffins? Go with a fat that enhances both softness and lift:
Oil makes muffins super moist and helps them rise
Butter adds richness but can weigh the batter down slightly
Try half butter, half oil for the best of both worlds!
🧁 7. Don’t Overmix the Batter
Mixing too much activates gluten and leads to tough, dense muffins that don’t rise well. Instead:
Use a spatula to gently fold the wet and dry ingredients together
Stop mixing as soon as the flour disappears — a few lumps are totally fine!
🌬️ 8. Bake on the Middle Rack
The center rack ensures even air circulation and baking. Too close to the bottom and the muffins brown too quickly; too close to the top and they may dry out before rising properly.
✨ Bonus Tips for Bakery-Level Rise
Sprinkle sugar on top before baking for a crisp dome with sparkle
Use a nonstick metal muffin tin for better heat distribution (silicone molds can sometimes bake unevenly)
Avoid opening the oven door in the first 10 minutes — this can cause muffins to sink!
📌 Fun Fact: Want that perfect bakery look? Top each muffin with extra chocolate chips, chopped nuts, or coarse sugar just before baking. Not only does it look amazing, but it also adds extra flavor and texture to the muffin top.

♻️ How Do I Store Chocolate Chip Muffins to Keep Them Fresh?
So you’ve baked a beautiful batch of warm, fluffy chocolate chip muffins (yay! 🎉), but now you’re wondering how to keep them tasting just as amazing tomorrow — and maybe even a few days later. Muffins, like most baked goods, can go stale quickly or lose their soft texture if stored improperly.
But don’t worry — with just a few simple tricks, you can keep your muffins fresh, moist, and bakery-perfect for days (and even weeks if freezing!).
🕒 First, Cool Them Completely Before Storing
Before storing, it’s crucial that your muffins cool to room temperature. Trapping warm muffins in a container will cause condensation, which leads to soggy tops and an unappealing texture.
✅ Pro Tip:
Place your muffins on a wire rack for 30–60 minutes after baking to cool evenly on all sides.
🥡 How to Store Muffins at Room Temperature (Up to 3 Days)
Once your muffins are completely cool, you can store them at room temperature using this method to maintain their texture and flavor:
Step-by-Step:
Line an airtight container with a paper towel
Place muffins in a single layer
Add another paper towel on top before sealing the lid
This helps absorb excess moisture and prevents the muffins from getting soggy or sticky on the top.
📌 Important: Do not refrigerate muffins unless absolutely necessary — the cold air will dry them out much faster than room temp storage.
❄️ How to Store Muffins in the Freezer (Up to 3 Months)
Freezing muffins is an excellent way to make them last longer while locking in flavor and moisture.
Here’s how to do it right:
Let muffins cool completely
Wrap each one tightly in plastic wrap or parchment paper
Place them in a freezer-safe zip-top bag or airtight container
Label the bag with the date
They’ll stay fresh in the freezer for up to 3 months.
🔥 How to Reheat Muffins (So They Taste Fresh Again!)
👉 Room Temp Thawing:
Simply unwrap and leave the muffin on the counter for 1–2 hours
👉 Quick Microwave Method:
Microwave a frozen muffin on medium power for 20–30 seconds
Place a damp paper towel over the top to prevent drying out
👉 Oven Method (Best Texture):
Preheat oven to 300°F (150°C)
Wrap muffins in foil and warm for 10–12 minutes
You’ll have soft, warm muffins that taste just like freshly baked ones again.
🍱 Great for Meal Prep or Lunchboxes
Chocolate chip muffins are the perfect snack or breakfast item to prep ahead. Pop one in your bag or lunchbox in the morning — if it’s frozen, it’ll thaw by mid-morning and be ready to enjoy!
📌 Bonus tip: Add a little almond butter, peanut butter, or fruit spread to make it feel brand new again.
💡 Common Muffin Storage Mistakes to Avoid:
❌ Storing while still warm (leads to sogginess)
❌ Refrigerating unnecessarily (dries them out)
❌ Not using paper towels (can trap too much or too little moisture)
🌿 Clean Eating Storage Tip
If you’ve made clean or low-sugar chocolate chip muffins with ingredients like coconut flour, almond flour, or maple syrup, you might find they’re even more sensitive to moisture changes. Use parchment paper instead of paper towels and keep them in a cool pantry or cabinet out of direct sunlight.
⏰ Can I Make Muffin Batter Ahead of Time?
Yes, you can! Making muffin batter ahead of time is a brilliant time-saver, especially on busy mornings. Whether you’re meal prepping for the week, baking for a brunch party, or just want warm muffins without the early morning hassle, prepping the batter in advance is totally doable — with a few important tips to get it right.
Let’s break down how long muffin batter lasts, how to store it properly, and what to expect when baking it later.
🥣 Why Make Muffin Batter Ahead of Time?
Prepping muffin batter in advance allows you to:
Save time in the morning or during the week
Enjoy freshly baked muffins without all the mess
Make muffin baking a more flexible and less rushed process
Keep your muffins as soft and fresh as possible (vs. baking and storing days in advance)
Whether you’re planning weekday breakfasts or weekend baking, it just makes life easier!
🧁 How Long Can Muffin Batter Sit Before Baking?
Most muffin batters can be stored in the fridge for up to 24 hours, and some can even last up to 48 hours, depending on the ingredients. However, because baking powder and baking soda start reacting once mixed with liquids, some of the rise can be lost if the batter sits too long without being baked.
📌 The Trick to Keeping That Rise:
If your recipe uses double-acting baking powder (which reacts once when mixed, and again when heated), you’re in luck — it still rises beautifully even after sitting overnight!
🧊 How to Store Muffin Batter in the Fridge
If you want to bake muffins fresh in the morning (or within 24 hours), here’s the best method:
✅ Method 1: Store in the Bowl
Cover the entire bowl tightly with plastic wrap or a lid
Keep it in the fridge until ready to bake
When ready, let it sit at room temp for 10–15 minutes while your oven preheats
Give it one gentle stir (don’t overmix!), then portion and bake as usual
✅ Method 2: Portion in Advance
Line a muffin tin with paper liners
Fill the liners ¾ of the way with batter
Cover the entire muffin tin tightly with plastic wrap
Place in the fridge overnight
In the morning, remove the wrap and bake directly (no extra prep needed!)
📌 Bonus: You’ll feel like a baking genius when all you have to do is pop the tray in the oven!
❄️ Can I Freeze Muffin Batter?
Yes, you can even freeze individual muffin batter portions for longer storage and spontaneous muffin cravings!
Here’s how:
Line a muffin tin with paper or silicone liners
Scoop batter into each cup
Freeze the tin until batter is solid (1–2 hours)
Transfer the frozen batter cups to a zip-top freezer bag
When ready to bake, place the frozen cup directly into a muffin tin and bake from frozen, adding 3–5 minutes to the baking time
Frozen muffin batter lasts up to 2 months and is great for meal prep or portion control.
👩🍳 What to Expect When Baking Muffin Batter Later
If you’ve stored your batter correctly, the muffins will:
Still rise beautifully (especially with double-acting baking powder)
Retain their moist, fluffy texture
Taste just as good as freshly made batter!
If your batter includes fresh fruit or chocolate chips, just give it a quick stir before baking to redistribute the mix-ins evenly.
🥄 Clean Eating Tip
For clean or natural muffin batters made with ingredients like coconut flour, almond flour, maple syrup, or flax eggs — it’s best to refrigerate no more than 12–18 hours. These batters can thicken or change texture slightly over time, but still bake up deliciously with a gentle stir before baking.
📌 Pro Tip: Always label your refrigerated or frozen batter with the date you made it so you can keep track — especially helpful for batch prepping multiple flavors or recipes at once!
Lemon Chia Seed Muffins
Chocolate-Dipped Oranges with Sea Salt
Lucky Leprechaun Frozen Yogurt Bark
These partnerships help support our content and keep our recipes free for our amazing readers. We only recommend products and brands we personally use and trust in our own kitchen. Thank you for supporting us! 💛
🍽️ Must-Have Tools for Perfect Chocolate Chip Muffins (With Budget-Friendly Amazon Finds!)
1. Nonstick Muffin Pan
Why It’s Essential: A high-quality nonstick muffin pan ensures even baking and easy release of your muffins, preserving their shape and texture.
Recommended Product: Amazon Basics Nonstick Muffin Baking Pan – 12 Cups
Rating: 4.8 out of 5 stars
Features: Durable steel construction, nonstick coating, and easy to clean.
Why We Recommend It: This pan provides consistent heat distribution, ensuring your muffins bake evenly. The nonstick surface means your muffins will come out effortlessly, and cleanup is a breeze.
2. Stainless Steel Mixing Bowls
Why It’s Essential: Mixing bowls are crucial for combining your ingredients effectively. Stainless steel bowls are durable, lightweight, and don’t retain odors or stains.
Recommended Product: FineDine Stainless Steel Mixing Bowls Set – 5 Pieces
Rating: 4.7 out of 5 stars
Features: Variety of sizes, nesting design for easy storage, and dishwasher safe.
Why We Recommend It: This set offers multiple sizes to accommodate different mixing needs. The nesting feature saves space, and the stainless steel material ensures longevity and easy maintenance.
3. Measuring Cups and Spoons Set
Why It’s Essential: Accurate measurements are vital in baking to achieve the desired texture and taste.
Recommended Product: Spring Chef Magnetic Measuring Spoons Set – 8 Pieces
Rating: 4.9 out of 5 stars
Features: Double-sided spoons, magnetic for easy storage, and includes a leveler.
Why We Recommend It: The double-sided design allows for measuring both liquids and solids, and the magnetic feature keeps the spoons organized and easily accessible.
4. Silicone Spatula Set
Why It’s Essential: A good spatula helps in mixing ingredients thoroughly and scraping down the sides of bowls to ensure even mixing.
Recommended Product: HOTEC Heat Resistant Silicone Spatula Set – 5 Pieces
Rating: 4.8 out of 5 stars
Features: Heat resistant up to 600°F, BPA free, and dishwasher safe.
Why We Recommend It: These spatulas are flexible yet sturdy, making them perfect for mixing batter and scraping bowls clean. Their heat resistance also means they can be used for various cooking tasks.
5. Cooling Rack
Why It’s Essential: After baking, placing your muffins on a cooling rack allows air to circulate around them, preventing sogginess and ensuring they cool evenly.
Recommended Product: Checkered Chef Cooling Rack – Set of 2
Rating: 4.7 out of 5 stars
Features: Stainless steel construction, oven safe, and dishwasher safe.Amazon
Why We Recommend It: These racks are sturdy and versatile, suitable not only for cooling but also for baking tasks like roasting. Their grid design ensures even support for your muffins.
Equipping your kitchen with these tools will enhance your baking experience and help you achieve perfect chocolate chip muffins every time.
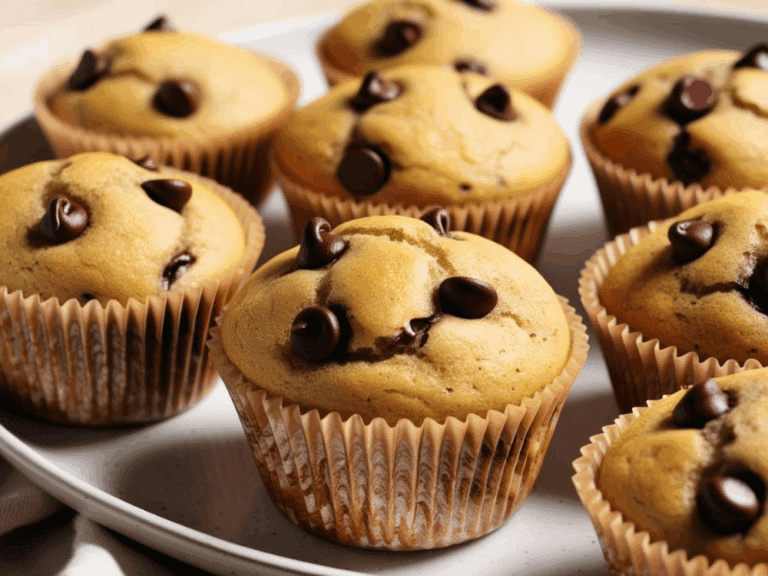
Easy Chocolate Chip Muffins
Equipment
- Muffin Tin: To bake your muffins evenly and give them that perfect rounded top. A 12-cup nonstick muffin tin works best.
- Mixing Bowls: You’ll need one large bowl for your dry ingredients and one medium bowl for your wet ingredients.
- Measuring Cups and Spoons: Accurate measurements are key to perfect texture and rise in baking.
- Spatula or Wooden Spoon: For gently mixing the batter without overworking it. A flexible silicone spatula is ideal.
- Wire Cooling Rack: Allows air to circulate around the muffins as they cool, preventing soggy bottoms and preserving texture.
Ingredients
- 2 Cups All-purpose flour
- 1 Cup Granulated sugar
- 1 Tbsp Baking powder
- 1/2 Tsp Baking soda
- 1/2 Tsp Salt
- 1 Cup Chocolate chips (semi-sweet or milk chocolate)
- 1 Cup Milk (whole or buttermilk)
- 1/2 Cup Vegetable oil
- 1 Tsp Vanilla extract
- 2 Large eggs
Instructions
- Preheat the oven:Preheat your oven to 375°F (190°C) and line a muffin tin with paper liners or lightly grease it.
- Mix dry ingredients:In a large bowl, whisk together the flour, sugar, baking powder, baking soda, and salt. Make sure everything is well combined.
- Add chocolate chips:Stir in the chocolate chips, making sure they are evenly distributed throughout the dry mixture. This helps prevent them from sinking to the bottom during baking.
- Prepare wet ingredients:In a separate bowl, whisk together the milk, vegetable oil, eggs, and vanilla extract until well combined.
- Combine wet and dry ingredients:Pour the wet ingredients into the dry ingredients and gently fold them together using a spatula. Mix until just combined – be careful not to overmix, as this can make the muffins tough.
- Fill the muffin tin:Divide the batter evenly among the muffin cups, filling each about 2/3 full. This ensures they have room to rise without overflowing.
- Bake:Place the muffin tin in the preheated oven and bake for 18-20 minutes, or until a toothpick inserted into the center of a muffin comes out clean.
- Cool:Allow the muffins to cool in the tin for about 5 minutes, then transfer them to a wire rack to cool completely.
💖 The Sweetest Little Muffins You’ll Ever Bake
There’s something so comforting about a warm, homemade chocolate chip muffin fresh out of the oven — especially when it’s made with love and a handful of pantry staples. Whether you’re baking a batch for busy weekday breakfasts, cozy weekend treats, or sweet little surprises in lunchboxes, these muffins are guaranteed to bring smiles all around. 🧁✨
We hope this recipe becomes a staple in your kitchen, just like it has in ours. And remember, the best part of baking isn’t just the taste — it’s the joy of creating something simple and delicious to share with the people you love. 💕
Join Now!
❤️ Love this recipe? Don’t miss out on even more delicious, healthy, and easy-to-make recipes like this chocolate chip muffin recipe!
🍽️ By joining our email community, you’ll gain exclusive access to bonus content, printable recipes, and clean eating tips that make healthy living a breeze.
📬 Enter your email & click below to subscribe — it only takes a minute to join our growing community of food lovers who believe healthy should still taste amazing!
These partnerships help support our content and keep our recipes free for our amazing readers. We only recommend products and brands we personally use and trust in our own kitchen. Thank you for supporting us! 💛