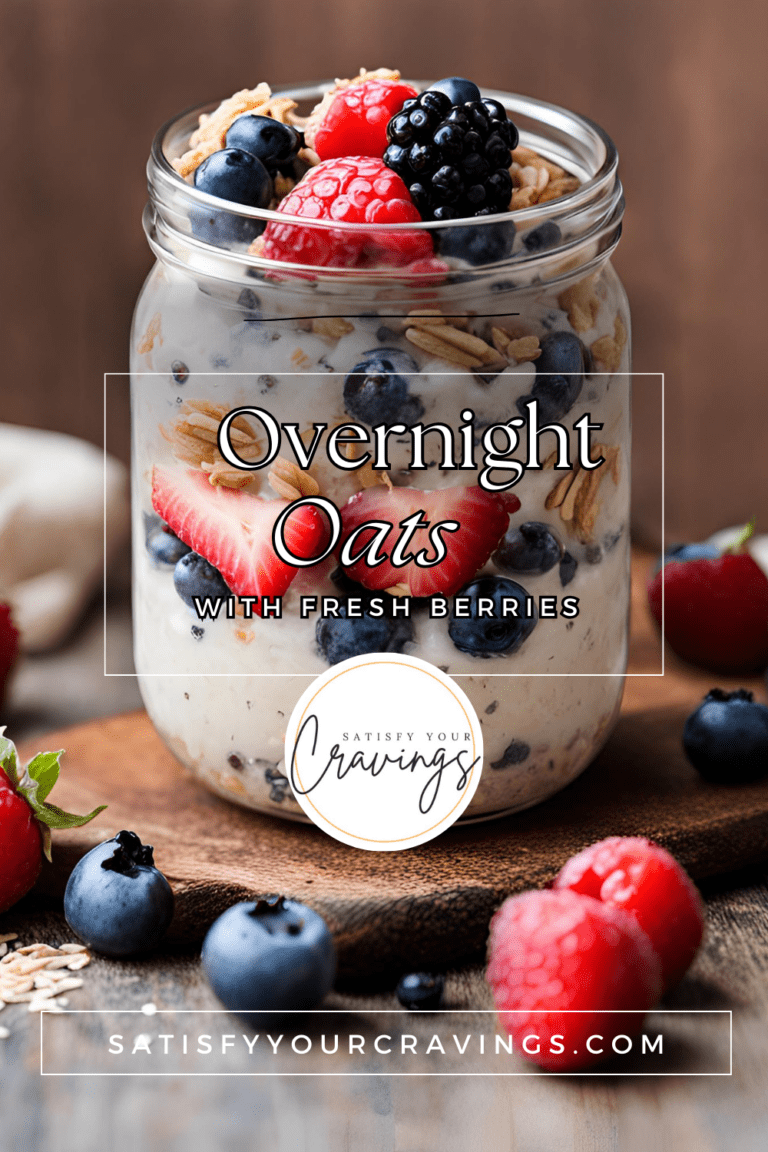
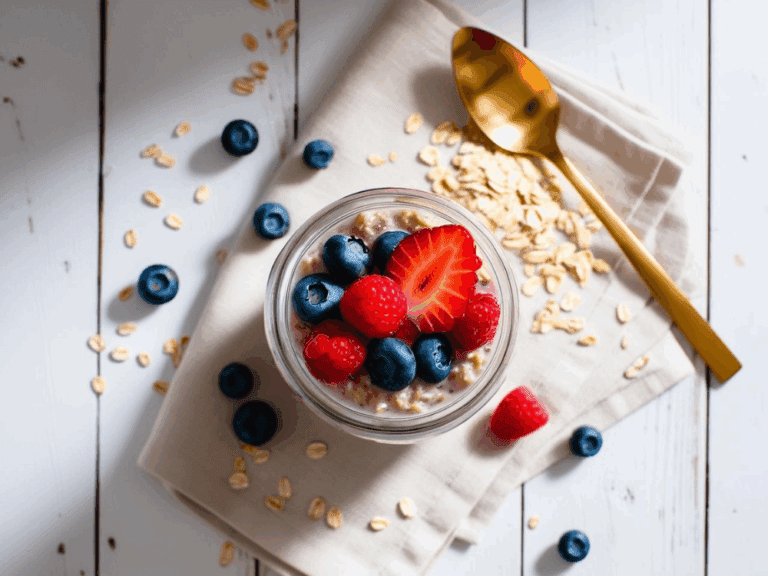
Berry Overnight Oats
These partnerships help support our content and keep our recipes free for our amazing readers. We only recommend products and brands we personally use and trust in our own kitchen. Thank you for supporting us! 💛
🌙 Wake Up to Berry Bliss: Easy Overnight Oats You’ll Crave
If your mornings are anything like ours—busy, rushed, and in need of something nourishing—you’re going to fall in love with these Berry Overnight Oats. Made with simple, wholesome ingredients like rolled oats, juicy berries, and creamy plant-based milk, this no-cook breakfast is the ultimate grab-and-go solution. It’s naturally sweet, fiber-rich, and packed with antioxidants to keep you full and energized all morning long.
Whether you’re meal-prepping for the week or just want to enjoy a quiet moment with a spoonful of goodness, these overnight oats check every box: quick, customizable, kid-approved, and downright delicious. Plus, they’re perfect for clean eating lovers who want a satisfying start without the stress. Just prep, chill, and wake up to a jar of berry-filled joy waiting for you in the fridge. 🍓💫
🌿 Are Overnight Oats a Healthy Breakfast Option?
Yes! Overnight oats are one of the healthiest breakfast choices you can make—especially when made with clean, whole ingredients like oats, berries, and non-dairy milk. This simple no-cook meal delivers a powerful punch of fiber, protein, vitamins, and minerals in every spoonful, all while keeping you full and satisfied for hours.
Let’s break down exactly why berry overnight oats are so good for you and how they support your clean eating lifestyle:
💪 Nutrient-Dense & Full of Fiber
At the heart of this breakfast is rolled oats, a whole grain rich in soluble fiber, particularly beta-glucan. This type of fiber:
Supports digestion and gut health
Keeps you full longer, reducing mid-morning snacking
Helps regulate blood sugar levels
Lowers LDL cholesterol, supporting heart health
Combined with chia seeds or flaxseeds (if added), you also get a boost of omega-3 fatty acids and extra fiber, further supporting digestive wellness.
🍓 Packed with Antioxidants
Fresh or frozen berries—like strawberries, raspberries, and blueberries—are among the best sources of antioxidants in any diet. These colorful fruits:
Fight inflammation
Protect against free radical damage
Support skin, brain, and heart health
Add natural sweetness and vibrant color with no refined sugar
Berries also contain vitamin C, vitamin K, and manganese—key micronutrients that support your immune system and overall vitality.
🌱 Naturally Plant-Based & Clean
This recipe is:
100% plant-based if made with dairy-free milk and yogurt
Gluten-free (as long as certified gluten-free oats are used)
Refined sugar-free when sweetened with maple syrup, honey, or mashed banana
Perfect for clean eating with minimal, whole food ingredients
You can even control the sodium, sugar, and fat content depending on the milk and toppings you choose, making it ideal for a wide variety of dietary needs including:
Vegan
Vegetarian
Dairy-free
Low-sugar
High-fiber diets
⏱️ Time-Saving and Stress-Reducing
What makes overnight oats extra healthy isn’t just the ingredients—it’s the lifestyle benefit. Prepping them the night before sets you up for success the next day, reducing stress and decision fatigue in the morning. That’s a win for your mental health and overall well-being!
✅ Healthy Summary:
| Benefit | Why It Matters |
|---|---|
| High in fiber | Improves digestion & keeps you full |
| Antioxidant-rich | Fights inflammation & boosts immunity |
| Balanced macros | Supports energy and blood sugar levels |
| Customizable | Fits any clean eating plan or lifestyle |
| No refined sugar | Helps avoid crashes and cravings |
| Easy to prep | Saves time & reduces stress |
In short, berry overnight oats are not just healthy—they’re a smart, delicious, and empowering choice to fuel your day and support your wellness goals.

❄️ Can You Use Frozen Berries in Overnight Oats?
Yes, absolutely! Frozen berries are not only a convenient option for overnight oats, but they may even enhance flavor, texture, and color. If you’re making overnight oats regularly or prepping breakfast jars in batches, frozen fruit is a smart (and budget-friendly) choice.
Let’s dive into how frozen berries work in overnight oats and how to use them for the best results!
🧊 Why Frozen Berries Work So Well
Frozen berries are picked at their peak ripeness and flash-frozen within hours, meaning they often retain more nutrients than berries that have been transported fresh over long distances. This makes them:
Just as nutritious (or even more so) than fresh
Longer-lasting, minimizing food waste
Perfectly soft and juicy after soaking overnight in oats
Easy to use straight from the freezer—no thawing needed!
🥣 How to Use Frozen Berries in Overnight Oats
Using frozen berries is easy and requires no extra steps. Here’s how to do it:
Add them directly into your jar or container along with the oats and milk.
Mix thoroughly to evenly distribute them and avoid clumping.
Let the oats sit overnight (or at least 6 hours). As they thaw, frozen berries release their natural juices, creating a beautiful berry “swirl” that naturally flavors and sweetens the oats.
In the morning, give it a good stir or leave the berry layer intact for that gorgeous layered look!
💡 Bonus Tip: Slightly mash a few frozen berries into the oats before sealing the jar. This creates a jam-like consistency that infuses the oats with color and flavor.
🍓 Best Frozen Berries to Use
You can use a single type of berry or a mixed bag! Great options include:
Blueberries: hold their shape and don’t get mushy
Raspberries: melt into the oats and create a jam-like texture
Strawberries: slice large ones before using or buy sliced frozen
Mixed berry blends: available in most grocery stores and usually include blueberries, strawberries, raspberries, and blackberries
🧃 Want Less Liquid? Here’s What to Know
Because frozen berries release moisture as they thaw, you may want to:
Use slightly less milk if you prefer thicker oats
Stir in some chia seeds to help absorb the extra liquid
Or embrace the juiciness for a soft, creamy texture!
💸 Budget-Friendly & Meal Prep-Approved
Frozen berries are often cheaper than fresh, especially out of season. This makes them ideal for:
Weekly meal prep
Feeding a family
Avoiding waste from berries that spoil too fast
And if you’re prepping multiple jars, frozen berries are a time-saving staple—no washing, slicing, or prepping needed.
✅
Frozen berries are not just a substitute for fresh—they’re a meal-prep power move. They bring color, flavor, nutrition, and convenience to every overnight oat jar, making them a staple ingredient for clean eating breakfasts all year round.
Try some of our other recipes!
⏰ How Long Do Overnight Oats Last in the Fridge?
One of the biggest reasons people love overnight oats—besides how delicious and nutritious they are—is their amazing shelf life! Overnight oats typically last between 4 to 5 days in the refrigerator, making them the perfect solution for busy mornings, weekly meal prep, and clean eating routines.
Let’s break down exactly how long they last, how to store them properly, and how to tell when it’s time to toss and start fresh.
🧊 Shelf Life of Overnight Oats: 4–5 Days
As a general rule, when stored in an airtight container in the fridge, overnight oats made with dairy-free milk and fresh or frozen fruit will stay fresh for:
➡️ 4 to 5 days
If your oats contain yogurt or dairy, they may be best enjoyed within 3 to 4 days to maintain optimal texture and taste.
💡 Meal Prep Tip: Prep several jars on Sunday night and have grab-and-go breakfasts ready through Friday!
🍶 Best Storage Containers
To maximize freshness and prevent spoilage:
Use mason jars with tight-sealing lids (regular or wide mouth)
Reusable glass or BPA-free plastic containers with snap lids also work well
Avoid using open bowls or foil—these allow air and bacteria in
👉 Label jars with the prep date using masking tape or a dry-erase marker for easy tracking.
🥣 How Texture & Taste Change Over Time
On Day 1-2: Oats are thick, creamy, and berries are still fresh and plump.
By Day 3-4: Oats may soften further, becoming more pudding-like. Berry color may bleed slightly, but flavor is even richer.
On Day 5: Still safe to eat if stored properly, but taste and texture may feel more blended or mushy—some love this, others don’t!
If you’re someone who prefers firmer oats, eat them within the first 2–3 days. For creamier results, let them sit longer.
❌ Signs Your Overnight Oats Have Gone Bad
If your overnight oats have:
A sour smell
Visible mold or discoloration
A strange, bitter, or off taste
Separation or bubbling from fermentation
🚫 It’s time to toss them!
When in doubt, trust your senses—if it doesn’t look, smell, or taste right, don’t risk it.
💡 Make-Ahead Bonus Tips
Don’t add fresh fruit toppings (like bananas or apple slices) until the day you plan to eat it to avoid browning or sogginess.
Leave room in the jar for stirring before eating or adding last-minute toppings.
Use frozen berries if you want them to stay firmer longer and gradually release flavor.
✅ Summary: How to Maximize Freshness
| Tip | Why It Helps |
|---|---|
| Use airtight containers | Prevents spoilage and odor absorption |
| Keep refrigerated | Essential for safety and freshness |
| Add toppings later | Avoids soggy or browned fruit |
| Label with prep date | Helps track shelf life easily |
| Use plant-based milk | Extends freshness vs. dairy |
Berry overnight oats are not only quick and easy, they’re reliable—making them an ideal part of your weekly routine. With the right prep and storage, you can have a clean, healthy breakfast ready for nearly a full workweek!

🥛 Can You Make Overnight Oats Without Yogurt?
Yes, you can 100% make overnight oats without yogurt—and they’ll still be creamy, delicious, and nutritious! Whether you’re avoiding dairy, following a vegan diet, or simply don’t have yogurt on hand, there are plenty of ways to get the right consistency and flavor in your oats without it.
In fact, omitting yogurt gives you more flexibility to control sweetness, thickness, and even the nutrient profile of your breakfast. Let’s break down how to make the best yogurt-free overnight oats 👇
✅ Why Skip the Yogurt?
There are lots of reasons you might prefer overnight oats without yogurt:
Dairy-free or vegan diet
Lactose intolerance or allergy
Want a lighter or less tangy flavor
Don’t like the texture of yogurt
Simply ran out of yogurt!
The good news? Your oats will still turn out beautifully with the right ratio of ingredients.
🧪 The Secret to Creamy Oats Without Yogurt
The key is to use the right amount of liquid to help the oats soften and absorb moisture overnight. Instead of yogurt, you can rely entirely on your plant-based milk or water to hydrate the oats, or add other creamy boosters.
🥄 Basic Yogurt-Free Overnight Oats Formula:
½ cup rolled oats
½–⅔ cup plant-based milk (almond, oat, coconut, soy, etc.)
1–2 tsp chia seeds or flaxseeds (optional but helps thicken)
¼–½ cup berries or fruit
1 tsp maple syrup or other sweetener (optional)
Let it chill overnight and you’ll wake up to a perfectly soft, spoonable texture.
🥥 Creamy Yogurt Substitutes to Try:
If you still want that luxurious creamy texture without traditional or plant-based yogurt, here are some delicious alternatives:
| Substitute | Notes |
|---|---|
| Mashed banana | Adds sweetness + creaminess (½ banana per serving) |
| Unsweetened applesauce | Great for a milder flavor (2–4 tbsp) |
| Coconut cream or milk | Adds richness and tropical flavor |
| Nut butters | Stir in 1 tbsp almond, cashew, or peanut butter |
| Silken tofu | Blend into the oats for protein + smooth texture |
| Avocado | Adds healthy fats and a creamy mouthfeel |
| Protein powder | Mix with milk for thick, yogurt-like consistency |
💡 Bonus Tips for Yogurt-Free Overnight Oats
Chia seeds are your BFF! They naturally thicken the oats while adding fiber and omega-3s. Just 1 tsp can transform the texture.
Add the liquid gradually. Start with ½ cup of milk and adjust the next day based on your preference.
Don’t skip the stir. Give your oats a good mix before sealing and refrigerating so everything blends well.
🌱 Example Yogurt-Free Flavor Combo:
Berry Almond Overnight Oats (No Yogurt)
½ cup rolled oats
⅔ cup almond milk
¼ cup frozen mixed berries
1 tsp chia seeds
1 tsp maple syrup
1 tbsp almond butter
Let sit overnight, then top with more berries and slivered almonds in the morning.
✅ Summary: No Yogurt, No Problem!
| Concern | Solution |
|---|---|
| Creaminess | Use chia seeds, nut butters, mashed fruit, or coconut cream |
| Sweetness | Add banana, applesauce, or maple syrup |
| Protein | Mix in nut butter, silken tofu, or plant protein powder |
| Dairy-free | Use oat, almond, soy, or coconut milk as your base |
Overnight oats are all about flexibility, and skipping the yogurt opens up a world of flavor and texture possibilities while keeping things simple, clean, and delicious. So go ahead—ditch the yogurt and embrace the creamy, dreamy potential of plant-powered oats 🌿🥣
🥄 How to Make Berry Overnight Oats (Step-by-Step)
Making berry overnight oats is one of the easiest and most satisfying ways to start your day with something wholesome, colorful, and delicious. Whether you’re meal prepping for the week or just want a no-fuss breakfast, this recipe has you covered. The best part? There’s no cooking required—just mix, chill, and enjoy!
✅ Ingredients You’ll Need:
½ cup rolled oats (old-fashioned oats are best)
½ cup plant-based milk (like almond, oat, or soy milk)
¼ cup mixed berries (blueberries, raspberries, strawberries, or frozen berries)
1–2 tsp chia seeds (optional but great for fiber and texture)
1 tsp maple syrup or honey (optional for sweetness)
A dollop of yogurt (dairy-free or Greek, optional for creaminess)
Dash of cinnamon or vanilla extract (optional but delicious)
🥣 Step-by-Step Instructions:
Step 1: Add Your Base Ingredients
In a mason jar or sealable container, combine ½ cup rolled oats and ½ cup plant-based milk. Give it a stir or shake to mix.
Step 2: Stir in the Flavor
Add chia seeds, a drizzle of maple syrup, and a small splash of vanilla extract if using. Stir well to ensure everything is evenly distributed.
Step 3: Add the Berries
Gently fold in your berries—you can use fresh, frozen, or a combination. For a swirl of color and flavor, mash a few of the berries into the oats.
Step 4: Top with Yogurt (Optional)
Add a spoonful of your favorite yogurt on top for a creamy layer. It adds richness and helps balance the oats’ texture.
Step 5: Seal and Refrigerate
Tightly close the jar or container and place it in the refrigerator for at least 6 hours, or overnight. This allows the oats to absorb the liquid and flavors to meld together.
Step 6: Serve and Customize
In the morning, give it a good stir and top with additional berries, a sprinkle of granola, nut butter, or your favorite toppings. Enjoy cold—or warm it up in the microwave for 30–45 seconds if you prefer it warm!
👩🍳 Quick Tips for Perfect Overnight Oats:
Always use old-fashioned rolled oats for the best texture—not steel-cut or quick oats.
Double or triple the recipe and store in individual jars for meal prep all week long.
If using frozen berries, they’ll thaw beautifully overnight and create a natural berry “syrup.”
For added protein, stir in a scoop of vanilla protein powder or a spoonful of almond butter.
🧊 Do Overnight Oats Need to Be Refrigerated?
Yes—overnight oats must be refrigerated. Keeping them chilled is essential for food safety, proper consistency, and flavor development. Whether you’re using dairy or plant-based ingredients, refrigeration allows the oats to absorb liquid slowly and prevents bacteria from forming during the soak.
Let’s explore why refrigeration is non-negotiable, how long oats can safely stay out, and tips to store them the right way for the best texture and taste.
🧠 Why Refrigeration Matters
Here’s why you should never skip chilling your overnight oats:
Food Safety:
Ingredients like milk (even non-dairy), yogurt, and fresh berries are perishable. Leaving them at room temperature for extended periods creates a breeding ground for harmful bacteria like Listeria or E. coli.Proper Absorption:
Refrigeration allows oats to slowly absorb the liquid overnight, which softens them without becoming mushy or sour. Cold soaking gives the oats that signature chewy-yet-creamy texture we love.Flavor Development:
As the oats rest in the fridge, the berries release their juices, sweeteners mellow, and the ingredients meld into a cohesive, flavorful mix.
⏱️ How Long Can Overnight Oats Sit Out?
If you accidentally left your overnight oats on the counter, here’s the rule of thumb:
| Situation | Safe? |
|---|---|
| Out for less than 2 hours | ✅ Safe to refrigerate and eat later |
| Out for more than 2 hours (especially with dairy) | 🚫 Discard to avoid risk of spoilage |
| Packed in a lunchbox with ice packs | ✅ Safe for up to 4–6 hours while chilled |
If the temperature was warm or the jar sat in direct sunlight, it’s safest to toss it—even if it looks and smells okay. Better safe than sorry!
❄️ Storage Tips to Keep Overnight Oats Fresh
To ensure your oats stay fresh and safe in the fridge:
Use airtight containers: Mason jars with lids or sealed glass containers are ideal.
Label the prep date: Use tape or a marker to track freshness.
Store near the back of the fridge: It’s colder and more stable than the fridge door.
Don’t overcrowd the jar: Leave room at the top for expansion and mixing before eating.
🧃 Want to Pack Overnight Oats to Go?
If you’re bringing them to work, school, or the gym, here’s how to keep them cold and safe:
Use an insulated lunch bag
Add a small ice pack
Eat within 4–6 hours of removing from the fridge
Some people enjoy eating overnight oats chilled straight from the jar, while others prefer a quick microwave warm-up (30–45 seconds is usually perfect!).
✅ Yes, Refrigerate Always
Refrigerating overnight oats isn’t just a suggestion—it’s essential. It protects your health, perfects the texture, and brings out the best in your ingredients.
| Benefit | Why Refrigeration Helps |
|---|---|
| Safety | Prevents bacterial growth from milk/yogurt |
| Texture | Helps oats soften evenly and stay creamy |
| Flavor | Allows ingredients to meld together overnight |
| Freshness | Keeps oats good for up to 5 days |
So go ahead and prep your Berry Overnight Oats with confidence—just seal them up and chill them down for safe, satisfying breakfasts all week long! ❄️🍓
🫙 What’s the Best Container for Overnight Oats?
If you’re making overnight oats regularly (especially for meal prep!), using the right container makes a big difference in freshness, flavor, and convenience. The best container for overnight oats is one that’s airtight, food-safe, reusable, easy to clean, and ideally, portable.
Let’s break down your best container options, what to avoid, and why certain features matter—plus our top recommendations! 🙌
✅ Must-Have Features in a Good Overnight Oats Container
When choosing a container for overnight oats, look for these key features:
| Feature | Why It Matters |
|---|---|
| Airtight lid | Keeps oats fresh, prevents leaks & odors |
| Food-safe material | Avoids chemical leaching and preserves taste |
| Portability | Great for meal prep and grab-and-go breakfasts |
| Dishwasher-safe | Saves time and makes cleanup easy |
| Clear sides | Allows you to see layers and portion sizes |
| Right size (8–16 oz) | Holds a single serving with room for toppings |
🫙 Top Container Options (Pros & Cons)
1. Mason Jars (8oz or 16oz Wide Mouth)
Pros:
Airtight seal with screw-on lids
Stylish for blog photos and Pinterest
Easy to layer and stack in the fridge
Budget-friendly and reusable
Cons:
Heavier than plastic
Lids can rust over time if not dried properly
👉 Best for: Meal prep, clean eating blogs, gifting breakfast jars
2. Glass Meal Prep Containers with Snap Lids
Pros:
Durable, BPA-free, and microwave-safe
Leak-proof with silicone seals
Ideal for stacking and portioning
Cons:
May be bulky
Can break if dropped
👉 Best for: Bulk prepping, lunchboxes, multi-day batches
3. Reusable Plastic Storage Containers (BPA-Free)
Pros:
Lightweight and great for travel
Inexpensive and easy to find
Often sold in meal prep sets
Cons:
Can stain or absorb odors over time
Not always airtight
👉 Best for: Kids, work bags, or short-term use
4. Silicone Reusable Food Pouches or Cups
Pros:
Eco-friendly and collapsible
Great for small fridges or on-the-go
Dishwasher and freezer safe
Cons:
Not as sturdy for layered oats
Harder to see contents
👉 Best for: Zero-waste kitchens and travel breakfasts
🎯 Tips for Using Containers Successfully
Leave room at the top (at least ½ inch) for toppings or stirring
Label jars with the prep date using masking tape or dry-erase markers
Store vertically in your fridge to maximize space
Keep lids loose until the oats cool (if you heat them up later) to prevent pressure build-up
💡 Blogger Tip: Show Off the Layers!
Mason jars and clear containers are perfect for highlighting the beautiful layers of oats, fruit, and yogurt—making your overnight oats visually appealing for social media, Pinterest pins, or blog content. 📸✨
Use transparent containers to show:
Oats on the bottom
Mashed or whole berries in the middle
Yogurt or nut butter on top
Crunchy toppings added just before serving
🔗 Recommended Containers (Affiliate Ideas)
Here are a few top-rated, blog-worthy containers your readers might love:
Ball 16oz Wide-Mouth Mason Jars – Great for individual servings
Weck Glass Jars – Trendy & aesthetic with glass lids
Prep Naturals Glass Meal Prep Containers – Stackable with compartments
Ello Duraglass Leak-Proof Food Storage Jars – Colorful silicone sleeve + snap lids
Stasher Silicone Reusable Bowls – Eco-friendly, collapsible for travel
TIP: Add these to your “Shop the Recipe” section for affiliate revenue opportunities!
✅ Final Takeaway
| Best For | Recommended Container |
|---|---|
| Everyday meal prep | Mason jars (8oz–16oz) |
| Family-size batches | Glass containers with snap lids |
| Travel or work | BPA-free plastic or silicone pouches |
| Pinterest-perfect shots | Weck or Ball clear glass jars |
So, whether you’re meal prepping five jars on Sunday night or just mixing up a quick breakfast for tomorrow, choosing the right container makes overnight oats more enjoyable, mess-free, and ready to grab whenever hunger strikes.
🔥 Can You Heat Up Overnight Oats?
Yes, you can definitely heat up overnight oats—it’s all about personal preference! While overnight oats are traditionally enjoyed cold straight from the fridge, warming them up can transform the texture, bring out cozy flavors, and make them feel more like classic oatmeal on chilly mornings.
So whether you love your oats chilled and refreshing or warm and comforting, this breakfast has the flexibility to meet your mood and season. Let’s dive into how to heat them up properly and why it might just become your new favorite way to enjoy them. 👇
🌡️ Why Heat Overnight Oats?
There are plenty of reasons why someone might prefer to eat their overnight oats warm:
Soothing on colder mornings ❄️
Enhances flavors like cinnamon, berries, and maple syrup
Creates a more traditional oatmeal feel
Easier to digest for some people
Perfect for those who dislike cold breakfasts
If you’ve ever thought, “I love overnight oats, but I wish they were warm…”—you’re in luck!
🔁 How to Heat Up Overnight Oats
You’ve got two super easy methods: microwave or stovetop. Here’s how to do both:
🥣 Method 1: Microwave (Fastest & Easiest)
Transfer your overnight oats into a microwave-safe bowl (or use a microwave-safe jar).
Heat on high for 30–45 seconds.
Stir well.
Heat again in 15-second intervals until warm, if needed.
Add toppings like fresh fruit or nut butter after heating.
✅ Best for busy mornings or when you’re at work and want a cozy breakfast fast!
🔥 Method 2: Stovetop (For a Creamier, Cooked Texture)
Pour the oats into a small saucepan.
Add a splash of plant-based milk or water to loosen them.
Heat over medium-low, stirring continuously, for 3–5 minutes.
Once warmed through and creamy, serve with toppings of your choice.
✅ Best for when you want that fresh-cooked oatmeal texture with all the flavor infusion of overnight oats.
🍓 Flavor & Texture Differences (Cold vs. Warm)
| Feature | Cold Overnight Oats | Warmed-Up Oats |
|---|---|---|
| Texture | Thick and pudding-like | Creamier and softer |
| Flavor | Refreshing and fruity | Cozy and comforting |
| Best For | Summer mornings or post-workout | Fall & winter mornings or comfort meals |
Some people enjoy alternating between cold and warm depending on the season, cravings, or toppings. Warm oats pair beautifully with:
Melted nut butters
Cinnamon or pumpkin spice
Warm berries or sautéed apples
Drizzles of maple syrup or honey
❄️ Can You Reheat Overnight Oats More Than Once?
While reheating once is fine, it’s not recommended to reheat the same batch multiple times, as it can affect texture and safety. Instead:
Only reheat the portion you plan to eat
Keep the rest chilled and untouched until needed
⚠️ Heating Tips & Common Mistakes to Avoid
Don’t overheat—oats can dry out quickly and lose their creamy texture
Add a splash of milk before reheating to keep them soft
Stir thoroughly halfway through heating to avoid hot spots
If using frozen berries, allow a few extra seconds for even warming
✅ Warm It Up, Your Way
Overnight oats are all about flexibility, and heating them up just gives you one more way to enjoy this incredibly convenient and nourishing breakfast.
| Want a refreshing, on-the-go bite? | Eat them cold! |
| Craving a warm, comforting bowl? | Heat them up! |
Both options are healthy, delicious, and totally customizable to your lifestyle. So don’t be afraid to warm things up and enjoy your Berry Overnight Oats just the way you like them 💖🥣
🌾 What Type of Oats Are Best for Overnight Oats?
When it comes to making the perfect overnight oats, not all oats are created equal. The type of oats you use will significantly affect the texture, taste, soak time, and even nutritional value of your final breakfast jar.
So, what’s the best choice?
Old-fashioned rolled oats are the gold standard for overnight oats—and for good reason. But let’s break down all the common oat types and why some work beautifully for overnight soaking while others… not so much.
🥇 Best Choice: Old-Fashioned Rolled Oats
These are the most recommended oats for overnight oats recipes. They’re oat groats that have been steamed and then rolled flat, which helps them absorb liquid gradually while maintaining a slightly chewy texture.
✅ Why Rolled Oats Are Ideal:
Absorb liquid overnight without turning mushy
Create a creamy, yet textured consistency
Soak within 4–6 hours (or overnight)
Versatile for both hot and cold prep
Widely available and affordable
💡 Tip: Use gluten-free certified rolled oats if you’re avoiding gluten.
🥈 Acceptable (with Modifications): Quick Oats / Instant Oats
Quick oats are rolled thinner and steamed longer than old-fashioned oats, so they absorb liquid very quickly—sometimes too quickly. This results in a much softer, almost mushy texture.
✅ Pros:
Soak faster (ready in ~2 hours)
Good for kids or people who like ultra-soft oats
❌ Cons:
Can become soggy or paste-like overnight
Less chewy, more porridge-like
May not hold up well to longer storage (3+ days)
👉 Best used when you’re short on time and okay with a softer consistency.
🥉 Not Recommended: Steel-Cut Oats
Steel-cut oats are the least processed form—whole oat groats that are simply chopped into small pieces. They take much longer to soften and usually require boiling to become edible.
❌ Why They Don’t Work Well:
Remain hard and chewy even after overnight soaking
Require cooking or extended soaking (12–24 hours)
Can upset digestion if under-soaked
👉 If you’re determined to use steel-cut oats, partially cook them first, or soak them for a full day plus a quick heat-up in the morning.
🌱 Other Oat Types (Less Common):
1. Oat Bran
High in fiber but not ideal for overnight oats—gets too mushy
2. Oat Groats
Whole oat kernels; take hours to soak or cook
Best for savory grain bowls, not overnight recipes
🍓 Summary Table: Which Oats Work Best?
| Oat Type | Texture | Soak Time | Best For | Notes |
|---|---|---|---|---|
| Old-fashioned rolled oats | Creamy & chewy | 6–8 hours | Traditional overnight oats | Gold standard |
| Quick/instant oats | Soft, mushy | 1–2 hours | Short soak/preference for soft oats | Not great for meal prep |
| Steel-cut oats | Tough, chewy | 12–24 hours or cooked | Advanced prep or cooked recipes | Not ideal |
| Oat bran/groats | Mushy or too firm | Varies | Other grain dishes | Not recommended |
✨ Pro Tip: Mix & Match for Texture
Want to experiment? Try blending ¾ rolled oats with ¼ quick oats to get the best of both worlds—a balance between chew and creaminess!
When making overnight oats—especially Berry Overnight Oats—your best bet is to stick with old-fashioned rolled oats. They’re easy to work with, deliver a consistent texture, and soak up all those juicy berry flavors like a dream 😍
Lemon Chia Seed Muffins
Chocolate-Dipped Oranges with Sea Salt
Lucky Leprechaun Frozen Yogurt Bark
🎨 How to Customize Overnight Oats (Endless Flavor Ideas!)
One of the best things about overnight oats—besides being healthy and hassle-free—is how customizable they are! This breakfast can be tailored to suit any craving, season, dietary preference, or nutritional goal. Whether you’re going for fruity, indulgent, protein-packed, or low-sugar, the possibilities are truly endless.
With just a base of oats and milk, you can transform your overnight oats into a different experience every single day. Here’s how to get creative with flavors, toppings, mix-ins, and more 👇
🧱 Start with the Base (The Building Block)
All great customizations start with a basic structure:
½ cup rolled oats
½ cup plant-based milk (like almond, oat, or coconut)
Optional: 1 tbsp chia seeds, 1–2 tsp maple syrup, or a dollop of yogurt
Now, let the creativity begin! 🪄
🍓 1. Change Up the Fruit
Berries are classic, but there’s a whole fruit universe waiting to be explored:
Banana (mashed for sweetness or sliced for topping)
Apples + cinnamon (like apple pie!)
Mango + coconut milk (tropical twist)
Pineapple + lime zest (Pina Colada vibes)
Peaches or nectarines (in summer, so juicy!)
Cherries + dark chocolate chips (Black Forest flavor)
✅ TIP: Frozen fruit works just as well—no thawing needed!
🧂 2. Stir in Spices & Flavor Boosters
Level up flavor without adding sugar:
Cinnamon
Nutmeg
Pumpkin pie spice
Vanilla extract
Cocoa powder
Cardamom or ginger for a chai-inspired profile
🥜 3. Add Creamy, Rich Mix-Ins
Make your oats indulgent and satisfying with healthy fats:
Peanut butter, almond butter, or sunflower seed butter
Coconut cream or coconut yogurt
Greek yogurt or dairy-free alternatives
Mashed avocado (trust us—it’s ultra creamy!)
Tahini + honey for a Middle Eastern twist
💪 4. Pack in the Protein
Great for post-workout fuel or keeping full longer:
Protein powder (vanilla, chocolate, berry)
Collagen peptides
Chia seeds
Hemp seeds or flaxseeds
Cottage cheese or high-protein yogurt
🍯 5. Natural Sweeteners to Try
Skip the refined sugar—try:
Maple syrup
Honey
Date syrup
Mashed ripe banana
Unsweetened applesauce
Stevia or monk fruit drops (if low-carb)
🥥 6. Crunchy & Textured Toppings
Always add these just before eating to keep them crispy:
Granola or toasted oats
Chopped nuts (almonds, walnuts, pecans)
Pumpkin or sunflower seeds
Toasted coconut flakes
Cacao nibs or dark chocolate shavings
Bee pollen or hemp hearts
🎉 7. Fun & Flavorful Combos to Try
| Flavor | Ingredients |
|---|---|
| Peanut Butter & Jelly | Peanut butter + raspberries or strawberry jam |
| Carrot Cake | Grated carrot + raisins + walnuts + cinnamon |
| Chocolate Banana | Cocoa powder + banana + peanut butter |
| Tropical Sunrise | Mango + pineapple + coconut milk |
| Pumpkin Pie | Pumpkin purée + maple + pumpkin spice |
| Berry Cheesecake | Berries + vanilla + yogurt + graham crumbs |
🥳 8. Make It Seasonal!
Spring: Strawberries + lemon zest + chia
Summer: Blueberries + peaches + almond milk
Fall: Pumpkin + cinnamon + pecans
Winter: Cranberries + orange zest + maple
🛠️ Pro Tips for Customization
Layer in jars for beautiful presentation (fruit on bottom, oats in the middle, toppings last)
Adjust texture by adding more/less milk or yogurt
Prep 3–5 variations at once to avoid flavor fatigue during the week
Add toppings right before eating to keep things fresh and crunchy
✅ Final Word: Get Creative and Make It Yours
Overnight oats are a blank canvas—customizable, forgiving, and always delicious. Whether you want a light fruity breakfast or a rich, dessert-inspired indulgence, there’s a combo for every craving and lifestyle.
So go ahead, mix things up and let your overnight oats reflect your mood, season, or wellness goals 🌞🍓🥥
These partnerships help support our content and keep our recipes free for our amazing readers. We only recommend products and brands we personally use and trust in our own kitchen. Thank you for supporting us! 💛
🧰 Top 5 Tools You’ll Need for the Perfect Berry Overnight Oats
Making overnight oats doesn’t require a lot of fancy tools—but having the right essentials makes the process smoother, more enjoyable, and great for prepping in bulk. These are our must-haves for consistent, mess-free, and Instagram-worthy oats every time!
1. Mason Jars (8–16 oz)
Perfect for prepping, storing, layering, and even taking your oats on-the-go. Clear glass makes it easy to see your beautiful berry layers, and wide-mouth jars are easy to fill and clean.
⭐ Why We Recommend It:
They’re reusable, eco-friendly, and keep your oats fresh for up to 5 days. You can meal prep several at once and stack them in the fridge.
🔗 Ball Wide Mouth 16 oz Mason Jars with Lids (4-Pack) – Amazon Best Seller
2. Silicone Spatulas
A flexible silicone spatula is ideal for scooping every last bit of oats from the bowl into your jar—waste nothing, stir everything.
⭐ Why We Recommend It:
Unlike metal or wooden spoons, silicone won’t scratch glass or stain, and it’s heat-resistant, easy to clean, and long-lasting.
🔗 DI ORO Silicone Spatula Set – Heat-Resistant and BPA-Free
3. Measuring Cups and Spoons
Precision = perfect oats every time. A good set of measuring cups and spoons ensures consistent texture, especially when meal prepping.
⭐ Why We Recommend It:
Having accurate measurements makes it easier to track nutrition and replicate the recipe with ease.
🔗 OXO Good Grips 7-Piece Measuring Cup and Spoon Set
4. Mini Glass Bowls or Ramekins for Toppings
Perfect for organizing your toppings like fresh berries, coconut flakes, nuts, or granola. They’re also helpful for portioning out add-ins during meal prep.
⭐ Why We Recommend It:
Keeps things clean, organized, and fun—especially if you’re prepping multiple jars with different toppings.
🔗 Delling Stackable Glass Ramekins, Set of 6
5. Reusable Lids with Leak-Proof Seals
If your jars didn’t come with high-quality lids, reusable silicone or BPA-free plastic lids are a must—no spills in your lunch bag!
⭐ Why We Recommend It:
They prevent leaks, odors, and make jars easier to open/close—especially for kids or busy mornings.
🔗 Aozita 8-Pack Colored Mason Jar Lids – Leakproof & BPA-Free
🎯 Why These Items Matter
| Tool | Why It’s Worth It |
|---|---|
| Mason jars | For fresh, portable, and pre-portioned oats |
| Silicone spatula | Scrapes, stirs, and serves without mess |
| Measuring set | Keeps ratios perfect every time |
| Topping ramekins | Easy organization + pretty presentation |
| Leakproof lids | Ensures freshness and mess-free travel |
Each of these tools adds a touch of ease, consistency, and fun to your overnight oat prep. Whether you’re a first-timer or an oat-prepping pro, these are the go-to basics that elevate your breakfast game. ✨
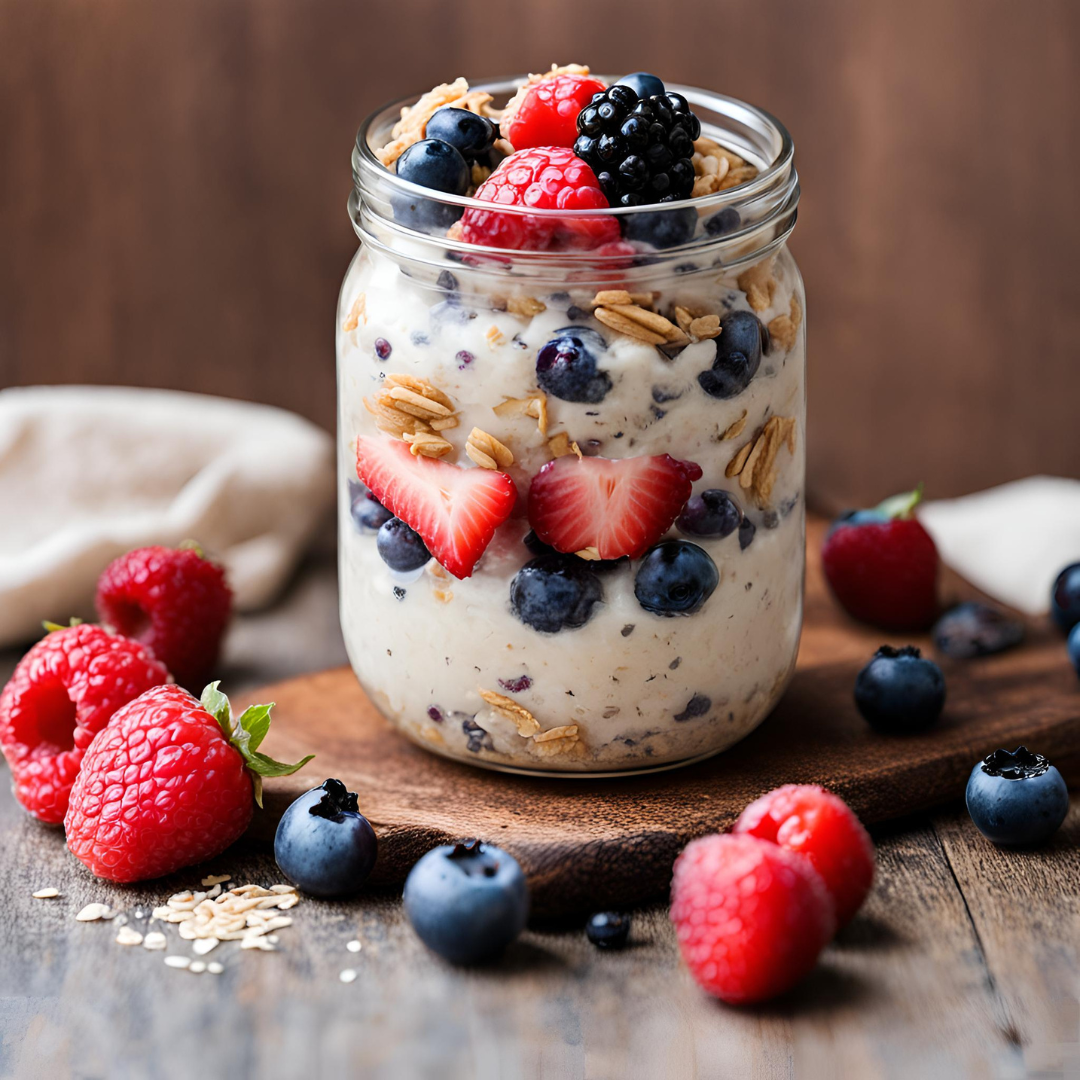
Berry Overnight Oats
Equipment
- Mason jar or airtight container: Used to mix, store, and serve the oats. Ideal for grab-and-go mornings and keeping your oats fresh.
- Measuring cups and spoons: Ensures the correct ratios of oats, milk, chia seeds, and sweeteners for consistent results.
- Mixing spoon or silicone spatula: Helps blend the ingredients smoothly without sticking or clumping.
- Small bowl (optional): Useful for pre-mashing berries or mixing wet ingredients before combining.
- Refrigerator: Essential for chilling the oats overnight and allowing them to absorb liquid and flavors.
Ingredients
- 1 Cup Rolled oats
- 1 Cup Milk (dairy or plant-based)
- 1/2 Cup Greek yogurt
- 2 Tbsp Chia seeds
- 2 Tbsp Honey or maple syrup
- 1 Tsp Vanilla extract
- 1 Cup Mixed berries (blueberries, strawberries, raspberries, etc.)
- Optional toppings: nuts, seeds, shredded coconut, or nut butter
Instructions
- Combine the Base Ingredients:In a medium-sized bowl or a jar, combine the rolled oats, milk, Greek yogurt, chia seeds, honey or maple syrup, and vanilla extract. Stir well to ensure all the ingredients are evenly mixed.
- Mix and Match:Gently fold in half of the fresh berries. This allows some of the berry flavors to infuse the oats overnight. The rest of the berries will be used as a topping in the morning.
- Refrigerate:Cover the bowl or jar with a lid or plastic wrap and place it in the refrigerator. Let it sit overnight, or at least for 4 hours. This gives the oats time to absorb the liquid and soften.
- Morning Magic:In the morning, give the oats a good stir. If the mixture is too thick, you can add a splash of milk to reach your desired consistency.
- Top It Off:Add the remaining fresh berries on top. You can also sprinkle your favorite toppings like nuts, seeds, shredded coconut, or a drizzle of nut butter for added texture and flavor.
- Serve and Enjoy:Your overnight oats with fresh berries are ready to enjoy! You can eat them straight from the bowl or jar, or transfer them to a serving dish if you prefer.
💖 A Spoonful of Simplicity and Joy
There’s something truly special about starting your day with a breakfast that’s not only nourishing and energizing—but also made with love the night before. These Berry Overnight Oats are more than just a meal—they’re a small act of self-care, a delicious ritual that supports your health and your schedule.
Whether you’re fueling a busy workday, meal-prepping for the week, or simply craving something creamy, fruity, and good-for-you, this recipe is your reliable go-to. It’s quick to make, endlessly customizable, and always satisfying.
So go ahead—grab a spoon, top it with your favorite fruit, and enjoy a slow moment before your fast-paced day begins. 💫✨
Join Now!
❤️ Love this recipe? Don’t miss out on even more delicious, healthy, and easy-to-make recipes like this Berry Overnight Oats!
🍽️ By joining our email community, you’ll gain exclusive access to bonus content, printable recipes, and clean eating tips that make healthy living a breeze.
📬 Enter your email & click below to subscribe — it only takes a minute to join our growing community of food lovers who believe healthy should still taste amazing!
These partnerships help support our content and keep our recipes free for our amazing readers. We only recommend products and brands we personally use and trust in our own kitchen. Thank you for supporting us! 💛