Berry Swirl Frozen Yogurt
These partnerships help support our content and keep our recipes free for our amazing readers. We only recommend products and brands we personally use and trust in our own kitchen. Thank you for supporting us! 💛
🍓 Cool, Creamy, and Swirled with Love: Meet Your New Favorite Summer Treat
When the weather heats up and you’re craving something sweet but still clean and nourishing, Berry Swirl Frozen Yogurt is the answer. This easy, no-churn recipe is bursting with bright berry flavor, naturally sweetened, and made with creamy Greek yogurt for that tangy, satisfying bite. It’s everything you love about frozen desserts — but lighter, fresher, and so much better for you.
Whether you’re serving it in cones at a backyard get-together, layering it into a parfait for breakfast, or enjoying a quiet bowl on the porch at sunset, this frozen yogurt feels like a little moment of joy. It’s simple enough for weeknights, pretty enough for company, and wholesome enough for everyone to enjoy. 💕🍧
🫐 How to Make Berry Swirl Frozen Yogurt at Home
Making your own Berry Swirl Frozen Yogurt at home is easier than you might think — and the results are way more flavorful (and healthier!) than anything you’ll find in the store. With just a handful of wholesome ingredients and a few simple steps, you can create a delicious, refreshing dessert that looks beautiful and tastes even better.
This frozen treat starts with a base of creamy Greek yogurt, which provides a rich texture and a slight tang that pairs perfectly with sweet-tart berries. Add a touch of natural sweetener like honey or maple syrup and a splash of vanilla extract to enhance the flavor. The real star of the show, though, is the vibrant berry swirl — made by cooking down fresh or frozen blueberries and raspberries into a naturally sweet, slightly thickened compote.
Once both components are ready, all you have to do is layer them into a container (like a loaf pan) and gently swirl the berry mixture into the yogurt. This step creates the stunning marbled look that makes this frozen yogurt so Instagram-worthy 📸.
After a few hours in the freezer, your homemade berry swirl frozen yogurt will be ready to scoop and enjoy! It’s perfect for hot summer days, healthy after-dinner treats, or anytime you’re craving something sweet but light.
✨ Pro Tip: For best results, freeze the yogurt in a shallow dish and stir it every 30 minutes for the first 2 hours. This helps prevent ice crystals from forming and gives you that smooth, creamy consistency you’d expect from a churned dessert.
🍧 No Ice Cream Maker? No Problem! Here’s How to Make Berry Swirl Frozen Yogurt Without One
One of the best parts about this Berry Swirl Frozen Yogurt recipe is that you don’t need an ice cream maker to enjoy smooth, creamy, and delicious results. This no-churn method is perfect for anyone who wants a refreshing homemade treat without investing in special equipment. Whether you’re short on kitchen space or just prefer to keep things simple, this method is for you.
🥣 Step-by-Step No-Churn Method:
Make the Berry Compote Swirl
In a saucepan, simmer your choice of fresh or frozen berries (like raspberries, blueberries, or strawberries) with a bit of lemon juice and honey or maple syrup. Let it cook until the berries break down and the mixture thickens slightly. Cool completely before using — this is key to preventing unwanted ice crystals.Mix the Yogurt Base
In a mixing bowl, stir together Greek yogurt, a natural sweetener (like maple syrup), and a splash of vanilla extract. Full-fat or 2% yogurt works best for texture. Make sure the base is well combined and smooth.Layer and Swirl
Pour half of the yogurt into a loaf pan or freezer-safe container. Spoon half the berry compote on top and swirl gently with a butter knife or spatula. Repeat with the remaining yogurt and berry mix. Don’t overmix — you want visible ribbons of berry swirl.Freeze and Stir (Optional but Recommended)
Cover the pan tightly with a lid or plastic wrap. Place in the freezer and stir the mixture every 30–45 minutes for the first 2–3 hours. This breaks up any ice crystals and mimics the churning process of an ice cream maker.Freeze Until Firm
After about 4–6 hours, your frozen yogurt should be firm and scoopable. Let it sit at room temperature for 5–10 minutes before scooping if it’s too hard.
🍓 Why This Works:
The secret to great no-churn frozen yogurt lies in using creamy yogurt, sweetener (which helps soften the texture), and gently swirling in the berries. Stirring during the freezing process helps keep the texture smooth instead of icy.
🧊 Bonus Tips:
Freeze your container beforehand to help the yogurt freeze faster and evenly.
Store leftovers in an airtight container to prevent freezer burn.
For an extra creamy texture, stir in a little coconut cream or milk before freezing.
Try some of our other recipes!
🍦 Frozen Yogurt vs. Ice Cream – Which Is Healthier?
One of the most frequently asked questions when it comes to Berry Swirl Frozen Yogurt is: “Is frozen yogurt healthier than ice cream?” The short answer? Yes — in many ways! But let’s break it down so you can feel confident about choosing frozen yogurt as a healthier dessert option 🍓✨
🥛 The Base: Yogurt vs. Cream
The primary difference between frozen yogurt and ice cream lies in the dairy base.
Ice Cream is typically made with heavy cream, whole milk, and lots of sugar, making it richer in fat and calories.
Frozen Yogurt, on the other hand, uses cultured milk or Greek yogurt, which is naturally lower in fat and often higher in protein — especially if you’re using full-fat or 2% Greek yogurt like in this recipe.
By swapping heavy cream for yogurt, you significantly reduce the saturated fat content without sacrificing creamy texture — especially when the yogurt is frozen properly or churned.
🍭 Sweetener Swap: Less Sugar, More Flavor
Traditional ice cream is loaded with refined sugar — sometimes up to 25 grams per serving or more.
In contrast, this Berry Swirl Frozen Yogurt recipe uses natural sweeteners like honey or maple syrup, which are less processed and offer a more complex flavor profile. Plus, berries bring their own natural sweetness and antioxidants to the mix, so you can use less sweetener overall while still satisfying your cravings.
🧬 Probiotics = Gut-Friendly Goodness
This is where frozen yogurt really shines!
Because it’s made with live-culture yogurt, it retains probiotics — the beneficial bacteria that support gut health, digestion, and even immunity. Regular ice cream offers none of that. Just make sure your yogurt base is labeled with “live and active cultures” for maximum benefit.
🔢 Nutritional Comparison (Per 1/2 cup serving):
| Category | Ice Cream (Vanilla) | Frozen Yogurt (Plain, Greek-based) |
|---|---|---|
| Calories | ~250–300 kcal | ~100–150 kcal |
| Total Fat | 14–17g | 2–4g |
| Sugar | 20–25g | 8–15g (depending on sweetener) |
| Protein | 3–4g | 8–12g |
| Probiotics | ❌ | ✅ |
🍨 So… Should You Ditch Ice Cream?
Not at all — but if you’re looking for a healthier, cleaner dessert that still feels indulgent, frozen yogurt is the way to go. This recipe strikes the perfect balance:
Naturally sweetened
Packed with fresh berries
Rich in gut-loving probiotics
High in protein
Lower in calories and fat
✅ Clean Eating Win: With this recipe, you’re in control of the ingredients. No preservatives, no weird thickeners, and no artificial flavors — just real, nourishing ingredients you can feel good about.
🥣 Best Yogurt for Homemade Frozen Yogurt – What to Use and Why It Matters
When it comes to making creamy, dreamy Berry Swirl Frozen Yogurt at home, the type of yogurt you use makes a huge difference in both taste and texture. Not all yogurts are created equal — and choosing the right one can elevate your homemade treat from icy and bland to rich, smooth, and flavor-packed 🍓🫐
Let’s break down the best options and why they work so well.
✅ Top Choice: Full-Fat Greek Yogurt
Full-fat Greek yogurt is hands-down the best option for homemade frozen yogurt.
Here’s why:
Thicker texture = creamier frozen yogurt
Higher fat content prevents iciness
Naturally tangy flavor balances out the sweetness of berries and honey
High in protein, which helps with creaminess and keeps you full longer
Greek yogurt has much of the water strained out, so it’s naturally denser. This means you don’t end up with a frozen block of ice, but rather a soft, scoopable treat that mimics churned ice cream — no machine required!
🥛 Can I Use Regular Yogurt?
Yes, but with caution.
Plain, full-fat regular yogurt can be used, but it contains more water than Greek yogurt. This can result in an icier texture, especially if you’re not churning it or stirring it during the freezing process.
Tips if using regular yogurt:
Strain it in a cheesecloth or coffee filter for a few hours to thicken
Avoid non-fat versions — fat is key to texture and flavor
Stir well before freezing to keep it smooth
🥥 Can I Use Plant-Based Yogurt?
Absolutely! If you’re dairy-free or vegan, plant-based yogurts are a great alternative — just choose wisely:
Coconut yogurt (full-fat) is rich and creamy, making it the best non-dairy option
Almond or oat-based yogurts work too, but may need a bit of help from coconut cream or nut butter to improve texture
Look for unsweetened, thick varieties and add natural sweeteners like maple syrup as needed
Check that it contains live and active cultures for probiotic benefits
❌ What to Avoid:
Non-fat or low-fat yogurt – too watery, results in iciness and bland flavor
Flavored yogurts – often packed with added sugar and artificial ingredients
Runny, pourable yogurts – lead to poor texture when frozen
🧊 Pro Tip for Best Texture:
Before freezing, taste the yogurt base. If it’s not delicious before freezing, it won’t improve in the freezer. Sweeten to taste, and balance with a touch of acidity (like lemon juice) to bring out the berry swirl.
⭐ Bottom Line:
For best results, go with full-fat Greek yogurt for a rich, creamy texture and clean eating ingredients. If you’re plant-based, choose a thick coconut yogurt or blend in something like cashew cream to boost the body. Whatever you choose, the key is using a yogurt that’s thick, tangy, and delicious on its own — because that’s what will shine through in every scoop.
🍓 Fresh vs. Frozen Berries – What’s Best for Berry Swirl Frozen Yogurt?
When making Berry Swirl Frozen Yogurt, one of the most common questions is: “Should I use fresh or frozen berries?” The great news is — both work beautifully! But depending on what you’re going for (texture, flavor, convenience, or seasonality), one option may suit your needs better than the other.
Let’s break down the pros and cons of each so you can pick what’s best for your recipe and your kitchen 🫐🍒
🫐 Option 1: Fresh Berries – Flavorful & Vibrant
Fresh berries are ideal when:
Berries are in season (hello, summer farmers markets!)
You want the brightest flavor and natural sweetness
You want to garnish your frozen yogurt with whole fruit
Using fresh blueberries, raspberries, or strawberries for your swirl can give your compote an ultra-vibrant, sweet-tart kick. The berries break down beautifully when simmered with a touch of lemon juice and maple syrup, creating a naturally jammy swirl with intense color and flavor.
Benefits of fresh berries:
Better control over sweetness and moisture
More photogenic for toppings and presentation
Richer, more nuanced berry flavor
Pro Tip: If you’re using fresh berries that are very juicy, cook them down a little longer to thicken the swirl and prevent wateriness in your frozen yogurt.
🧊 Option 2: Frozen Berries – Convenient & Consistent
Frozen berries are an excellent choice when:
Berries are out of season or expensive
You want to cook your compote quickly and easily
You’re looking for convenience and affordability
Frozen berries are flash-frozen at peak ripeness, meaning they retain nutrients and flavor. They work great for creating berry swirls when simmered down into a compote — in fact, they often break down faster than fresh berries, making the process quicker.
Benefits of frozen berries:
Available year-round
Often more budget-friendly
Just as nutritious as fresh
Ideal for making sauces and swirls
Important Tip:
Frozen berries release more liquid when cooked. To avoid making your frozen yogurt too icy, be sure to simmer your compote long enough to thicken it. You can even add a teaspoon of cornstarch or arrowroot powder if you want an extra jammy texture.
🍇 What About a Combo?
You can absolutely use both!
Try making the swirl with frozen berries and topping your frozen yogurt with a few fresh berries and mint for that gourmet, photo-ready finish. This approach gives you the best of both worlds: flavor + freshness.
✅ Final Verdict:
| Criteria | Fresh Berries 🍓 | Frozen Berries 🧊 |
|---|---|---|
| Flavor | Bright & nuanced | Consistent & sweet |
| Convenience | Needs washing/prep | Ready to use |
| Best For | Toppings & compote | Cooking down to swirl |
| Cost | Higher (seasonal) | Lower (year-round) |
| Texture Control | Easier to manage | Can be watery if not reduced properly |
No matter which you choose, you’ll end up with a delicious, antioxidant-rich, and visually stunning berry swirl. Just make sure to cool your compote completely before swirling it into the yogurt to prevent melting and iciness.
🎨 The Secret to a Perfect Berry Swirl in Frozen Yogurt
Let’s be real — half the joy of making Berry Swirl Frozen Yogurt is admiring those gorgeous, marbled ribbons of berry goodness swirling through creamy yogurt. But while it might look like culinary wizardry, creating that perfect swirl is surprisingly simple when you know the right technique 💫🫐
In this section, we’ll show you exactly how to achieve a beautifully swirled effect that’s not only stunning for presentation but also enhances flavor and texture in every bite.
🍧 Step 1: Start with a Thick, Creamy Yogurt Base
Your base should be:
Cold (straight from the fridge)
Smooth and well-mixed
Ideally made with full-fat Greek yogurt for richness and reduced iciness
If your yogurt is too thin, the berry swirl will bleed too much and disappear during freezing. A thicker base holds the swirl beautifully in place.
🍓 Step 2: Prep a Jammy Berry Swirl
Whether using fresh or frozen berries, simmer them down with a touch of lemon juice and sweetener until the mixture thickens into a compote. Let it cool completely before using — this is key to maintaining your yogurt’s structure.
The swirl should have the consistency of soft jam or fruit sauce. If it’s too runny, it will overmix; if it’s too thick, it won’t swirl properly.
🥄 Step 3: Layer and Swirl
Now for the fun part!
Pour half of your yogurt mixture into a loaf pan or freezer-safe container.
Dollop spoonfuls of the cooled berry compote on top — aim for 4–6 evenly spaced spoonfuls.
Add the rest of the yogurt on top.
Add a few more dollops of compote to the top layer.
Then, using a butter knife, skewer, or chopstick, gently swirl through the yogurt.
Use a figure-eight motion or drag the utensil in a loose zig-zag pattern.
Do not overmix! You want visible ribbons — not a fully blended pink mixture.
Pro Tip: Swirl just enough to marble the compote without losing the contrast of colors.
📸 Bonus: Make It Instagram-Worthy
Want your frozen yogurt to really pop for your blog or Pinterest?
Finish with a few whole berries on top before freezing.
Garnish with mint leaves right before serving for a fresh contrast.
Use a white or light-colored container to make the swirls stand out more dramatically.
🧊 After Swirling: Freeze Like a Pro
Cover tightly with plastic wrap or a reusable lid.
Freeze 4–6 hours or until firm enough to scoop.
For a soft-serve consistency, freeze for 2–3 hours and serve right away.
Let sit at room temp for 5–10 minutes before scooping if fully frozen.
The swirl is more than just eye candy — it’s the flavor boost that makes every bite exciting. Done right, each scoop delivers a contrast of creamy tang and sweet berry brightness. And with just a little technique and creativity, you can turn a simple frozen yogurt into a showstopping dessert that’s as beautiful as it is delicious.
🌱 Can I Make This Frozen Yogurt Dairy-Free or Vegan?
Absolutely — and it’s easier than you might think! Making Berry Swirl Frozen Yogurt dairy-free or fully vegan is a fantastic way to enjoy this refreshing treat while sticking to your dietary preferences or accommodating food sensitivities. With a few simple swaps, you can keep all the creamy texture, sweet-tart flavor, and signature swirl — no dairy required
Whether you’re lactose intolerant, vegan, or just experimenting with plant-based desserts, this guide will help you craft a delicious, dairy-free version of this clean, cool classic.
Step 1: Choose a Thick, Creamy Non-Dairy Yogurt
The foundation of your frozen yogurt is, of course, the yogurt. To mimic the creaminess of Greek yogurt without dairy, here are some plant-based stars:
Best Dairy-Free Yogurt Options:
Coconut Milk Yogurt (Full-Fat): Rich and creamy with a mild tropical flavor. This is the closest you’ll get to the texture of full-fat Greek yogurt.
Cashew Yogurt: Smooth and subtly sweet, with a neutral base that pairs perfectly with berries.
Almond Yogurt: Lighter in texture but still creamy. Works well if thickened slightly or frozen in smaller portions.
Soy Yogurt: High in protein and creamy, though some brands may have a stronger flavor.
Tip: Look for unsweetened, plain varieties so you can control the sweetness yourself. Also make sure the yogurt contains live and active cultures for probiotic benefits.
Step 2: Use Natural Vegan Sweeteners
Skip the honey and go with plant-based sweeteners that complement your yogurt and berries. Great options include:
Maple syrup – adds depth and richness
Agave nectar – light and neutral
Date syrup – sweet and slightly caramel-like
Coconut sugar (for compotes or warm mixes)
These sweeteners are perfect for adding that kiss of sweetness while keeping the recipe clean and fully vegan.
Step 3: Make the Berry Swirl — 100% Plant-Based
Great news — the berry swirl is naturally vegan when you cook it down with just berries, lemon juice, and one of the sweeteners above.
To thicken your berry compote:
Simmer until the juices reduce
Optionally, add 1 tsp of arrowroot starch or cornstarch mixed with water to create a gel-like texture
Let it cool completely before swirling into your yogurt
Step 4: Freeze and Swirl – No Machine Needed
The same no-churn method applies here!
Use your favorite plant-based yogurt and swirl in your berry compote following the same layering and swirling technique. Coconut yogurt in particular holds its texture beautifully and makes for an ultra-creamy finish.
Optional Add-ins for Creaminess:
A spoonful of coconut cream
A splash of plant milk for a looser texture
A tablespoon of cashew butter for added richness
Why This Version Still Works
You’re not sacrificing anything:
Flavor? Still bold and bright thanks to the berries and vanilla.
Creaminess? Totally achievable with the right plant-based yogurt.
Probiotics? Yep — most dairy-free yogurts now include live cultures.
Nutrition? Lower in saturated fat and 100% cholesterol-free.
Berry Swirl Frozen Yogurt is for everyone — including those following dairy-free or vegan lifestyles. With the amazing selection of plant-based yogurts and sweeteners available today, you can create a dessert that’s just as creamy, tangy, and satisfying as the traditional version. Plus, it’s better for your digestion, your skin, and the planet
🧊 How to Store Your Berry Swirl Frozen Yogurt (and Keep It Creamy!)
So, you’ve just whipped up a dreamy batch of Berry Swirl Frozen Yogurt — it’s creamy, fruity, and swirled to perfection. But what if you’re not serving it right away? Or you made a big batch and want to enjoy it over the next few days (or weeks)? That’s where proper storage comes in.
Frozen yogurt, especially homemade and clean-eating versions like this one, can turn icy or lose its creamy texture if not stored correctly. The good news? With a few simple tricks, you can keep your frozen yogurt tasting fresh, scoopable, and smooth for days.
Best Containers for Freezing
The type of container you use makes a big difference. Go for:
Shallow, airtight containers – Freeze your yogurt evenly and allow for easy scooping.
Loaf pans (metal or silicone) – Great for presentation and layering the swirl.
Glass containers with lids – Eco-friendly, freezer-safe, and reduce freezer burn.
Reusable ice cream tubs – Specifically designed to preserve texture and prevent odors.
Avoid containers that are too deep or open-topped — they’ll cause uneven freezing and expose your yogurt to air, leading to ice crystals.
How Long Does It Last in the Freezer?
Homemade frozen yogurt is best enjoyed within 2–3 weeks. After that, texture and flavor may start to decline — especially without added stabilizers or preservatives.
Storage Timeframe:
Freshest Texture: 1–5 days
Good Quality: Up to 2–3 weeks
After 1 month: May develop freezer burn or lose flavor
Pro Tips to Avoid Icy Texture
Because homemade frozen yogurt doesn’t have gums or commercial stabilizers, it can become icy if not handled carefully. Here’s how to keep it smooth:
Press a layer of parchment paper or wax paper directly onto the surface before sealing the lid. This minimizes air exposure and prevents ice crystals.
Wrap tightly with plastic wrap if your container doesn’t have a secure lid.
Avoid frequent thawing and refreezing. Scoop only what you need and put it back quickly.
How to Serve from Frozen
Frozen yogurt, especially homemade, tends to harden more than store-bought varieties. Don’t worry — it just needs a little time to soften before scooping.
Before serving:
Let the container sit at room temperature for 5–10 minutes
Use a wet ice cream scoop for easier, cleaner scooping
If you’re in a rush, microwave the sealed container on low for 5–8 seconds (be cautious — you don’t want to melt it!)
Can I Re-Freeze Thawed Frozen Yogurt?
Not recommended. Thawing and refreezing can introduce moisture and break down the texture, leading to iciness and a grainy mouthfeel. It’s best to only thaw the portion you plan to eat.
Clean Storage Tip of the Week:
Label your container with the date you made it and any special mix-ins (e.g., “Berry Swirl – Coconut Yogurt, 6/8”). It helps you keep track of freshness and reminds you of any custom versions you’ve tried!
Proper storage is the secret to turning your Berry Swirl Frozen Yogurt into a freezer-friendly go-to treat. By using the right containers, preventing air exposure, and knowing how to serve it, you’ll keep each scoop creamy, flavorful, and totally irresistible. So make a batch, swirl it beautifully, freeze it smart — and enjoy it whenever that sweet craving strikes
🧊 Why Is My Frozen Yogurt Too Icy or Hard? (And How to Fix It!)
You followed the recipe, swirled in those beautiful berries, popped your Berry Swirl Frozen Yogurt in the freezer — and a few hours later, it’s hard as a rock or covered in icy crystals 😩
Don’t worry — this is a very common problem with homemade frozen yogurt, especially clean versions that don’t rely on commercial stabilizers or emulsifiers. The good news? There are simple tricks to keep your frozen yogurt soft, creamy, and scoopable every time.
❄️ Common Reasons Frozen Yogurt Turns Icy or Hard
1. Too Much Water Content
If your yogurt base or berry compote contains too much liquid, it can freeze into ice crystals.
Fix:
Use thick Greek yogurt or strain regular yogurt to remove excess water.
Cook berry compote until thick and jam-like. Cool it completely before swirling.
Avoid adding watery ingredients like juice or thin fruit purées.
2. Not Enough Fat
Fat helps give frozen yogurt a smooth, creamy texture and prevents it from freezing too hard.
Fix:
Choose full-fat yogurt — preferably Greek.
For dairy-free options, use full-fat coconut yogurt or add a bit of coconut cream or cashew butter.
Avoid non-fat or low-fat yogurt unless thickened with added healthy fats.
3. Lack of Sweetener
Sugar lowers the freezing point, making frozen treats softer and easier to scoop. If your frozen yogurt is too low in sugar, it will freeze solid.
Fix:
Add natural sweeteners like maple syrup, honey, or agave to balance flavor and texture.
Taste before freezing — it should be slightly sweeter than you think, since freezing mutes sweetness.
4. Improper Freezing Technique
If you simply mix and freeze without any stirring or layering technique, the texture can be icy and uneven.
Fix:
Use the layer and swirl method to distribute flavors and textures.
Stir every 30–45 minutes for the first 2–3 hours while freezing if you’re not using an ice cream maker.
5. Freezing for Too Long
Even perfect frozen yogurt will turn rock-hard if left in the freezer too long without softeners.
Fix:
Let the container sit at room temperature for 5–10 minutes before serving.
Store in shallow, airtight containers and keep near the front of your freezer (not the coldest spot).
6. Overfreezing or Freezer Burn
If your container isn’t properly sealed or stored, freezer burn and moisture loss can ruin your yogurt’s texture.
Fix:
Use tightly sealed, freezer-safe containers.
Press parchment or wax paper against the surface before sealing to prevent air exposure.
Label and date your batch and try to use within 2–3 weeks.
🔧 Bonus Pro Tips to Prevent Icy Texture
Blend in 1–2 tablespoons of corn syrup or alcohol (like vodka or fruit liqueur) to reduce iciness in clean-eating versions — use sparingly if you’re aiming for super clean!
Add a pinch of xanthan gum or arrowroot starch to help stabilize the base.
Serve like soft-serve by freezing only 2–3 hours, then scooping right away.
🌟 Final Scoop:
Homemade frozen yogurt may not have all the artificial softeners commercial brands use — but with a few mindful tweaks, it can be even better. Rich, clean, and naturally refreshing. Remember: the texture starts with the ingredients you choose and how you freeze them. Don’t let a little iciness scare you off — just follow these tips and you’ll be swirling up creamy, crave-worthy froyo every time 🥄💕
Lemon Chia Seed Muffins
Chocolate-Dipped Oranges with Sea Salt
Lucky Leprechaun Frozen Yogurt Bark
🍓 What Toppings Go Well with Berry Swirl Frozen Yogurt?
You’ve mastered the swirl, nailed the creamy texture, and frozen your Berry Swirl Frozen Yogurt to perfection. Now comes the fun part — toppings! 🎉 The right toppings can transform your frozen yogurt from a simple dessert into a showstopping sundae. Whether you’re going for indulgent, healthy, crunchy, or refreshing, the options are endless — and totally customizable.
Let’s dive into the most delicious, creative, and complementary toppings to take your berry swirl to the next level 🍧✨
🍇 1. Fresh Fruit – Bright, Juicy, and Beautiful
Nothing pairs better with a berry swirl than more fruit!
Best options:
Fresh blueberries, raspberries, or strawberries
Sliced banana for natural sweetness
Cubed mango or pineapple for a tropical twist
Thin slices of kiwi for tartness and color
Pomegranate arils for juicy pops
Tip: Choose fruit that contrasts in color and texture with your berry swirl to create visual interest and flavor variety.
🍯 2. Natural Sweeteners – A Drizzle of Magic
For extra indulgence (without refined sugar), try a drizzle of:
Honey – classic pairing with berries
Maple syrup – adds depth and a warm flavor
Date syrup – earthy, sweet, and nutrient-rich
Agave nectar – mild and vegan-friendly
Berry compote – double down on that swirl!
These liquid toppings also soften frozen yogurt slightly for easier scooping and a luxurious mouthfeel.
🥥 3. Crunchy Add-Ons – Texture Heaven
Add some crunch to balance the creamy texture of your froyo.
Try:
Granola – especially with oats, nuts, and dried fruit
Toasted coconut flakes – for a tropical flair
Chopped almonds, pecans, or walnuts – nutty and nourishing
Pumpkin seeds or sunflower seeds – for a healthy crunch
Cacao nibs – bitter, chocolatey crunch that pairs beautifully with berries
Pro Tip: Lightly toast your toppings in a pan for added flavor and aroma!
🍫 4. Chocolatey Extras – Sweet Meets Tart
Chocolate and berries = a match made in dessert heaven 🍫🍓
Dark chocolate chips or chunks – a rich contrast to the tangy yogurt
White chocolate shavings – pretty and sweet
Mini chocolate-covered espresso beans – for a fun grown-up twist
Homemade chocolate shell – just melted coconut oil + cocoa + maple syrup!
If you’re feeling extra indulgent, top with a drizzle of vegan chocolate sauce or sprinkle on crushed dark chocolate cookies.
🌿 5. Fresh Herbs & Floral Accents – For the Fancy Vibe
Add an unexpected twist with garden-fresh garnishes:
Fresh mint leaves – brightens the dish
Basil ribbons – surprisingly sweet and herbaceous
Edible flowers – like pansies or violets for an Insta-worthy finish
Lemon zest – amps up the freshness
These make your frozen yogurt feel elevated, elegant, and perfect for summer entertaining.
🧁 6. Healthy Boosts – Superfood-Style
Want your dessert to double as a wellness boost?
Chia seeds – fiber and crunch
Hemp seeds – nutty and protein-rich
Flaxseed meal – adds a bit of texture and omega-3s
Bee pollen – floral and nutrient-dense
Spirulina-dusted coconut flakes – beautiful and antioxidant-rich
These toppings keep the recipe in line with clean eating while adding a fun nutritional edge.
🥄 7. Make It a Parfait!
Layer your Berry Swirl Frozen Yogurt in a glass with:
Fruit
Granola
A drizzle of almond butter or coconut yogurt
A sprinkle of cinnamon or nutmeg
It’s a great way to create a make-ahead breakfast, snack, or healthy dessert cup that looks as good as it tastes.
Toppings are where creativity meets customization. Whether you’re going for indulgent dessert vibes or a fresh and healthy clean-eating bowl, the right combo of textures and flavors can make your Berry Swirl Frozen Yogurt unforgettable. Mix and match from these ideas, or set up a froyo bar for friends and family to build their own creations!
These partnerships help support our content and keep our recipes free for our amazing readers. We only recommend products and brands we personally use and trust in our own kitchen. Thank you for supporting us! 💛
🍽️ Top 5 Essential Tools for Making Berry Swirl Frozen Yogurt
1. Blender or Food Processor
🛠️ Why You Need It:
A high-powered blender or food processor is essential for smoothly combining the yogurt, sweetener, and vanilla. It also comes in handy if you want to purée the berries instead of cooking them into a compote.
🔗 Highly Rated Option:
🔗 Ninja Professional Blender – 1000-Watt (4.7⭐, 106,000+ reviews)
✅ Powerful, affordable, and versatile — perfect for both yogurt bases and smoothies.
2. Small Saucepan
🛠️ Why You Need It:
To make the luscious berry swirl, you’ll need to simmer the berries down into a thick compote. A nonstick or stainless-steel saucepan ensures even heating and easy cleanup.
🔗 Highly Rated Option:
🔗 Cuisinart 1.5-Quart Stainless Saucepan with Lid (4.6⭐, 10,000+ reviews)
✅ Durable, dishwasher safe, and the perfect size for small-batch sauces and compotes.
3. Loaf Pan or Freezer-Safe Container
🛠️ Why You Need It:
You’ll need a container to layer and swirl your yogurt and compote before freezing. A loaf pan is ideal because it allows for shallow freezing and beautiful swirls.
🔗 Highly Rated Option:
🔗 USA Pan 1 lb Loaf Pan – Nonstick & Heavy Duty (4.8⭐, 8,000+ reviews)
✅ Nonstick, durable, and perfect for freezing or baking — a kitchen multitasker!
4. Silicone Spatula or Spoon
🛠️ Why You Need It:
A silicone spatula makes it easy to mix, layer, and swirl without over-mixing. It’s gentle, flexible, and doesn’t absorb flavors.
🔗 Highly Rated Option:
🔗 GIR Premium Silicone Spatula – Heat Resistant (4.7⭐, 2,000+ reviews)
✅ BPA-free, heat-resistant, and ultra-durable with a comfy grip.
5. Butter Knife or Skewer for Swirling
🛠️ Why You Need It:
This is your secret weapon for getting that signature marbled swirl! A butter knife, chopstick, or wooden skewer helps create defined berry ribbons without blending everything together.
🔗 Highly Rated Option:
🔗 ERCRYSTO Stainless Steel Butter Knife
✅ Lightweight, durable, and the perfect tool for that effortless swirl.
⭐ Why We Recommend These Tools
These five tools are:
Affordable
Multi-use (great for other recipes too!)
Highly rated with thousands of positive reviews
Essential for achieving the perfect texture and presentation
They take the guesswork out of frozen yogurt making and ensure your readers have a fun, mess-free, and delicious experience every time 🍨✨
Berry Swirl Frozen Yogurt
Equipment
- Blender or Food Processor: To mix the yogurt base and optionally purée berries if not making a compote.
- Saucepan: For cooking down the berries into a thick, jammy swirl.
- Loaf Pan or Freezer-Safe Container: Used for layering and freezing the frozen yogurt.
- Silicone Spatula: Ideal for folding and gently mixing ingredients.
- Butter Knife or Skewer: For creating the marbled berry swirl effect.
Ingredients
- 3 Cups Plain Greek yogurt
- 1/2 Cup Honey or agave (adjust based on your sweetness preference)
- 1 Tsp Vanilla extract
- 2 Cups Mixed berries (strawberries, blueberries, raspberries, etc.) fresh or frozen
- 1 Tbsp Lemon juice
- Optional: mint leaves for garnish
Instructions
- Prepare the Berry Sauce:In a small saucepan, combine your mixed berries with the lemon juice and two tablespoons of honey or agave. Cook over medium heat for about 10 minutes, stirring occasionally, until the berries break down into a saucy consistency. Allow the mixture to cool, then puree it in a blender until smooth.
- Mix the Yogurt Base:In a large bowl, whisk together the Greek yogurt, the remaining honey, and vanilla extract until everything is well incorporated and smooth.
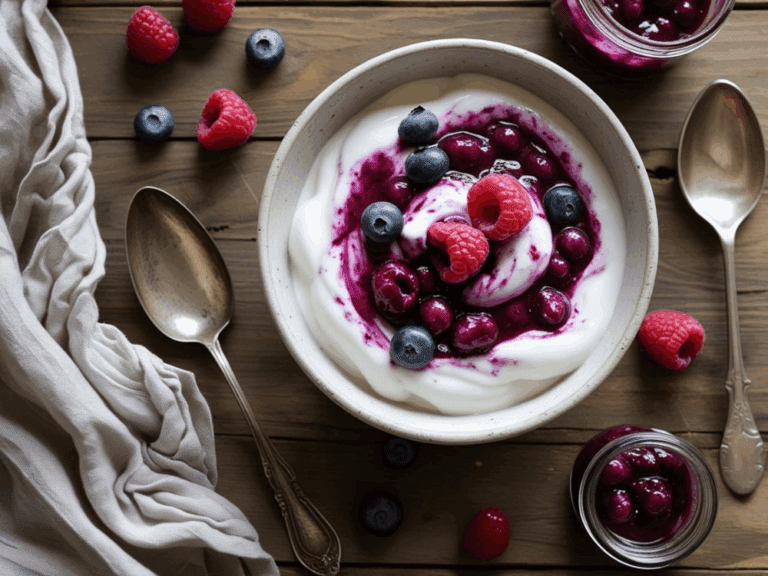
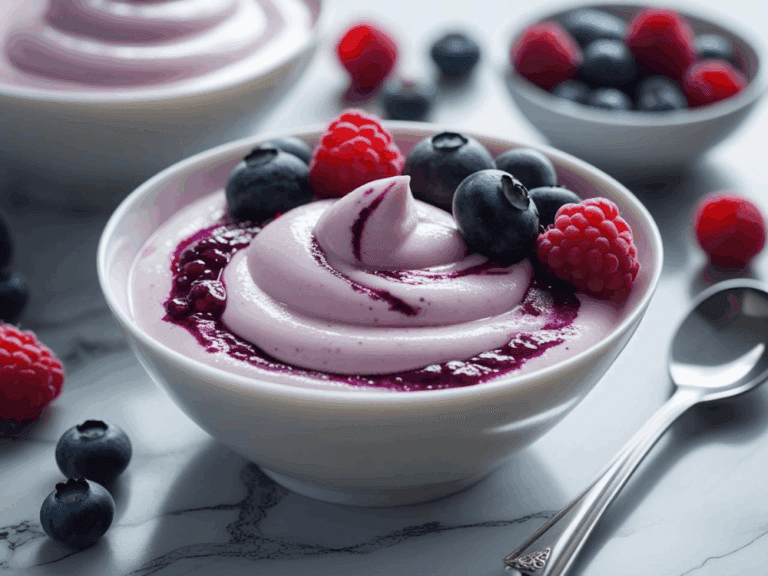
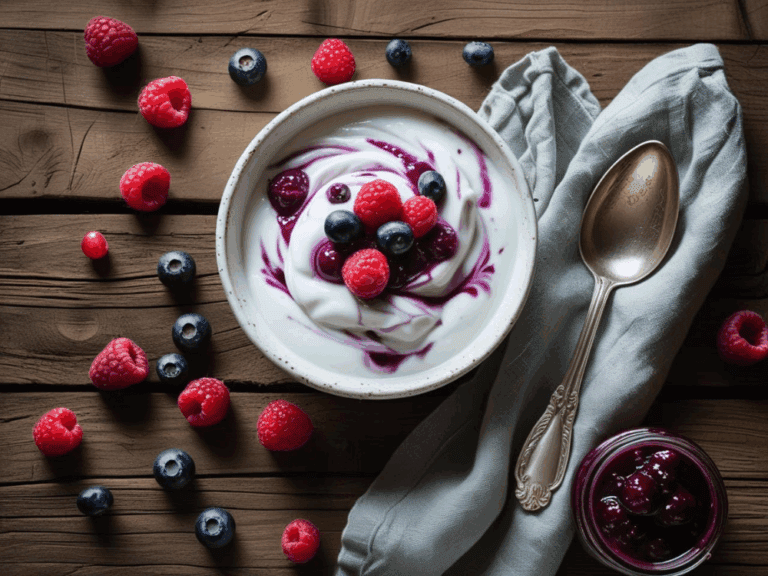
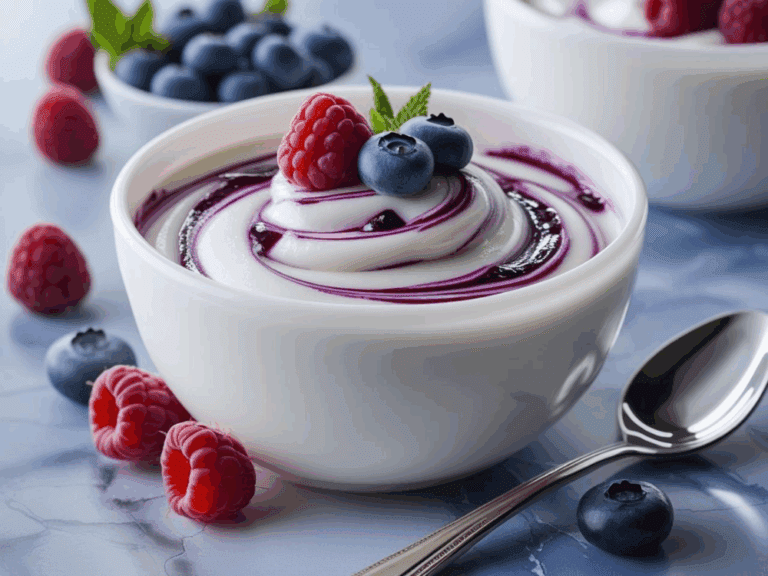
- Swirl It Up:Pour the yogurt mixture into a shallow baking dish. Dollop spoonfuls of the berry sauce over the yogurt and use a knife or a skewer to gently swirl the sauce into the yogurt, creating a beautiful marbled effect.
- Freeze:Cover the dish with plastic wrap and freeze for at least 4 hours, or until firm.
- Serve:Let the frozen yogurt sit at room temperature for a few minutes before scooping. Serve with fresh berries and mint leaves, if desired.
💖 A Sweet, Swirled Ending
There’s something so special about a recipe that’s both nourishing and nostalgic — and this Berry Swirl Frozen Yogurt is just that. It’s a treat you can feel good about, made with real ingredients, vibrant berries, and love in every swirl. Whether you’re cooling off on a summer day, sharing scoops with friends, or sneaking a spoonful straight from the freezer (we won’t tell 😉), this dessert is sure to satisfy both your sweet tooth and your clean-eating goals.
Here’s to making everyday moments a little more joyful — one berry swirl at a time. 🍓🫐💫
Join Now!
❤️ Love this recipe? Don’t miss out on even more delicious, healthy, and easy-to-make recipes like this Berry Swirl Frozen Yogurt!
🍽️ By joining our email community, you’ll gain exclusive access to bonus content, printable recipes, and clean eating tips that make healthy living a breeze.
📬 Enter your email & click below to subscribe — it only takes a minute to join our growing community of food lovers who believe healthy should still taste amazing!

