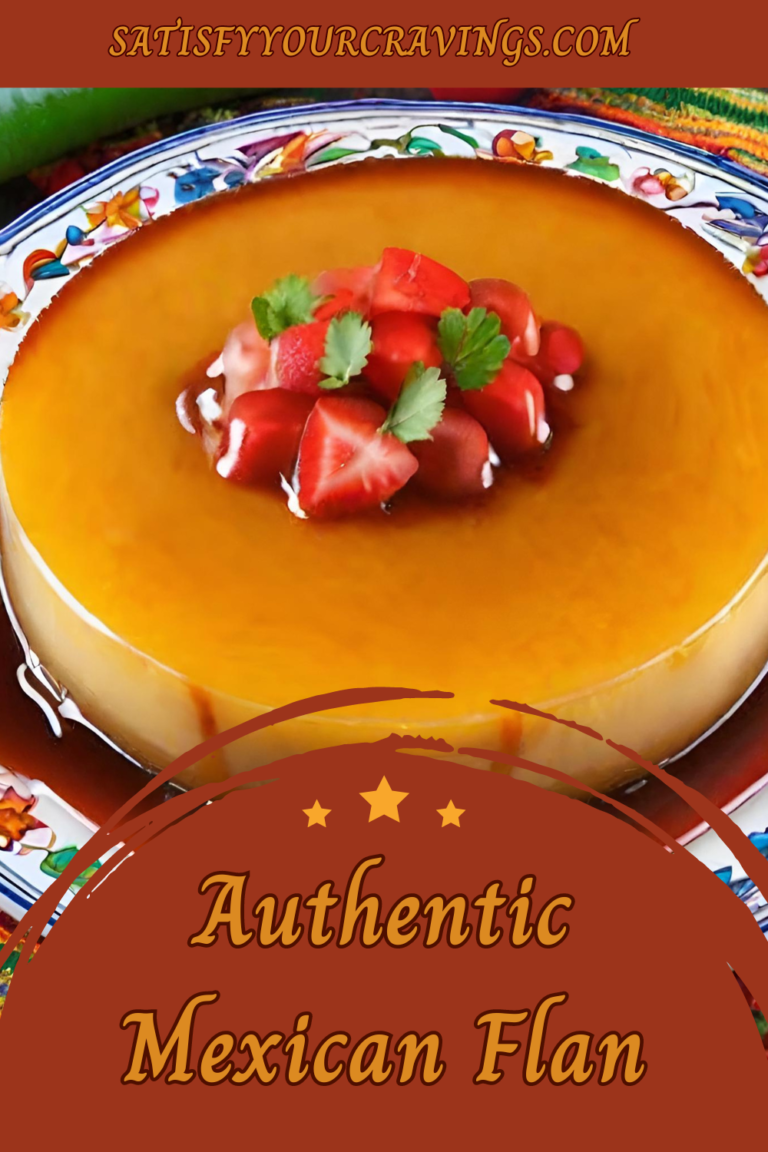
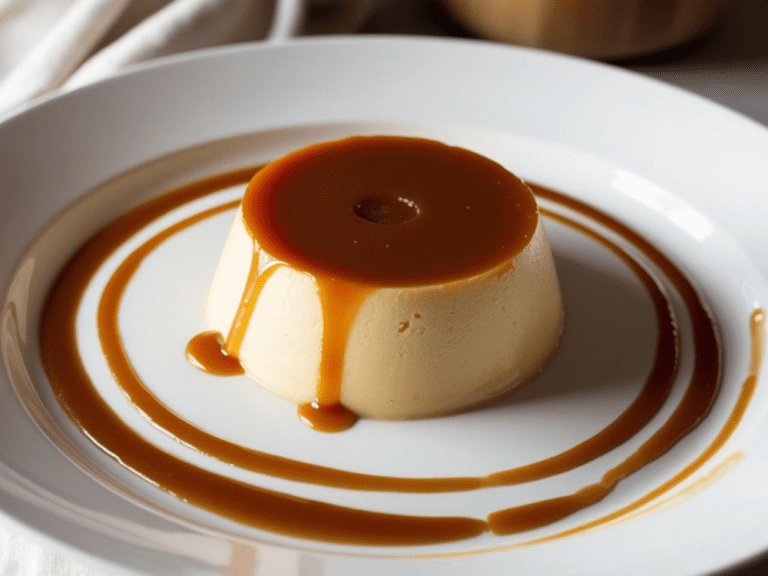
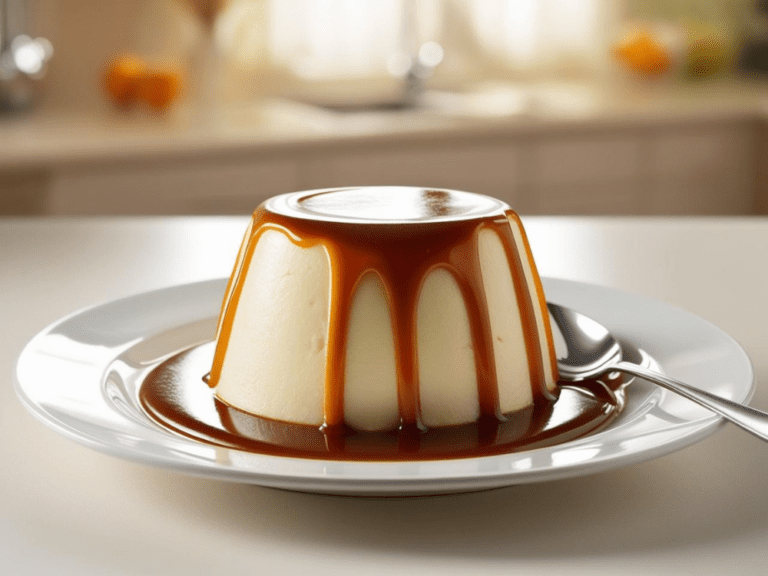
Authentic Mexican Flan
These partnerships help support our content and keep our recipes free for our amazing readers. We only recommend products and brands we personally use and trust in our own kitchen. Thank you for supporting us! 💛
A Classic Dessert with Rich Caramel and Silky Custard
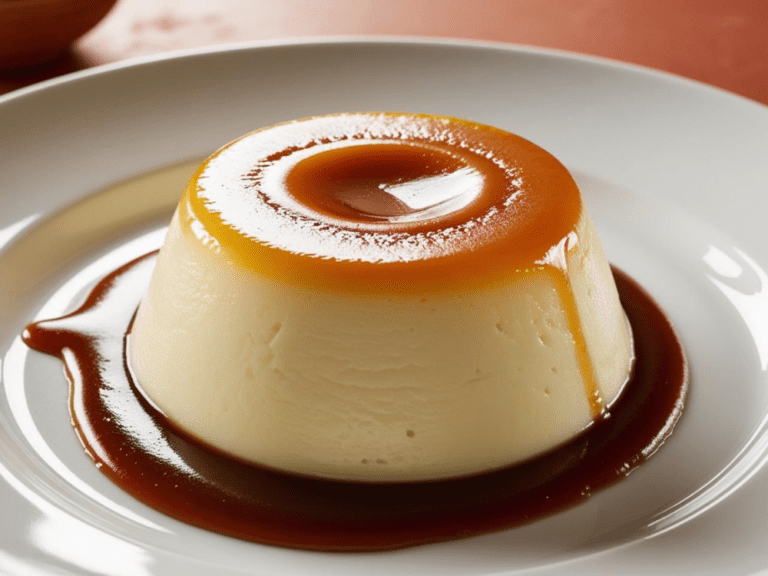
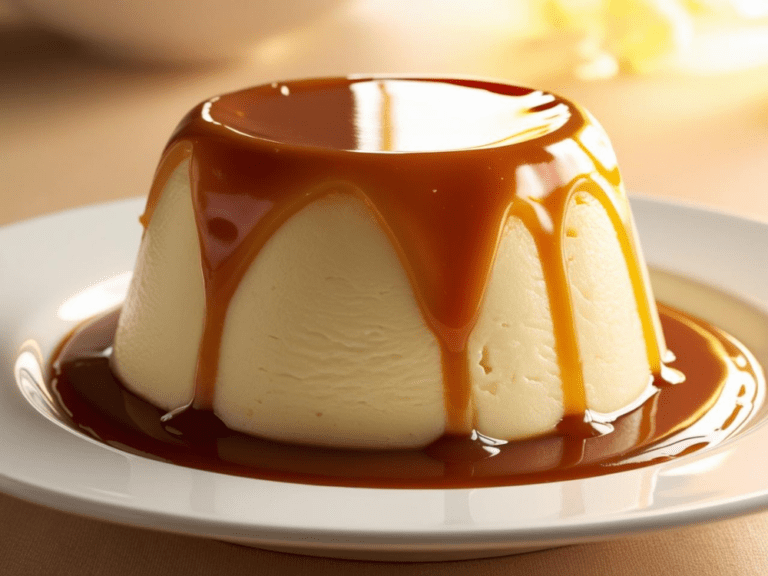
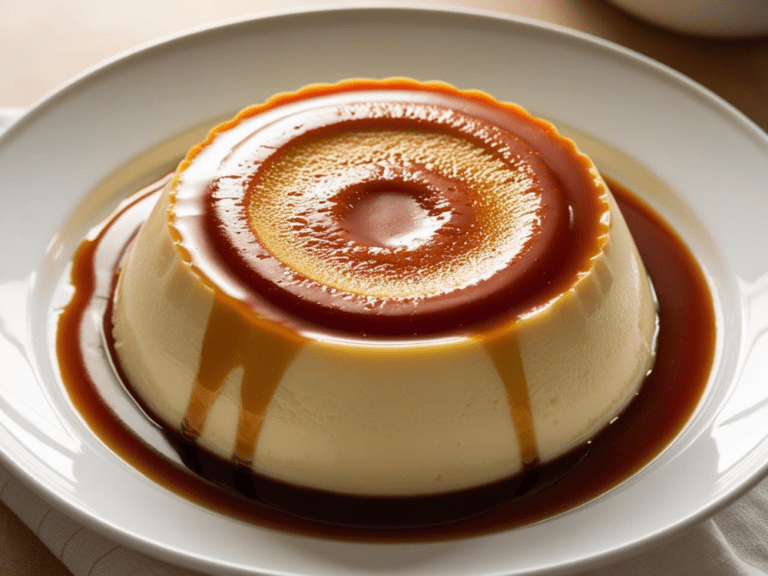
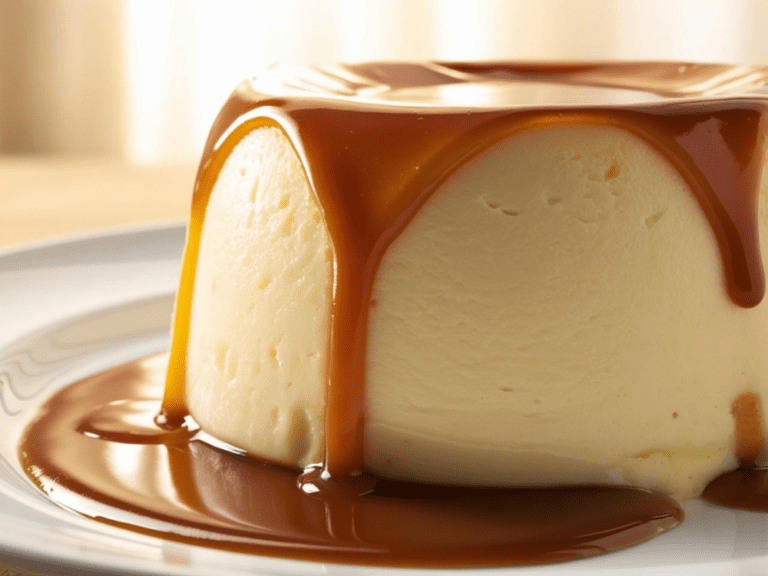
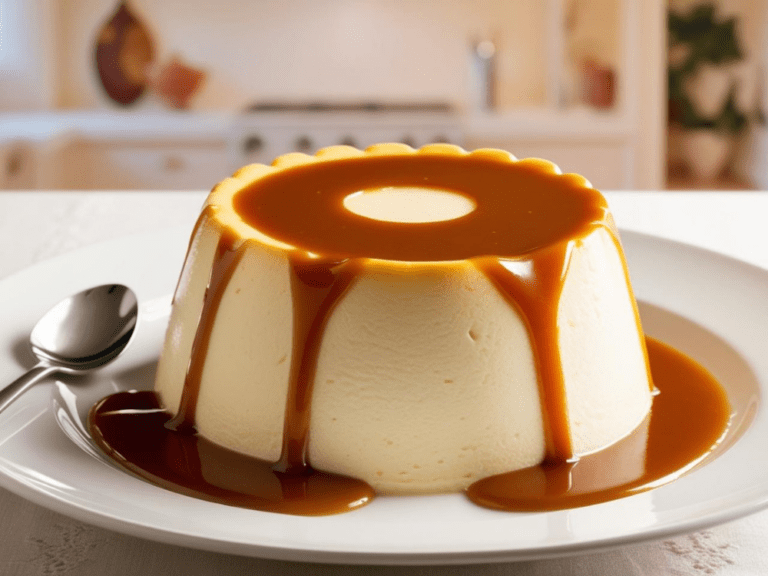
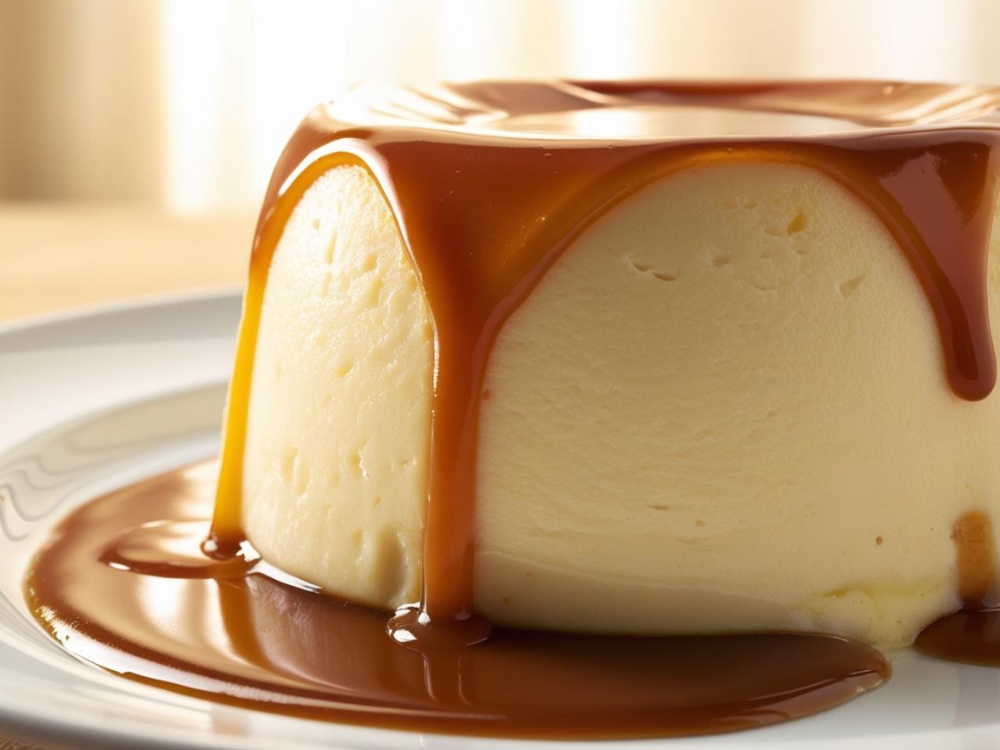
There’s nothing quite like the rich, creamy texture of authentic Mexican flan. This classic dessert is a staple in Mexican cuisine, known for its smooth custard base and glossy caramel topping. The combination of silky vanilla-infused custard and deep amber caramel creates a melt-in-your-mouth experience that’s both simple and indulgent. Whether you’ve had it at a family gathering, a local restaurant, or straight from your abuela’s kitchen, authentic Mexican flan always delivers comfort in every spoonful.
What makes authentic Mexican flan truly special is how effortlessly it comes together with just a handful of ingredients—eggs, milk, sugar, and vanilla. The magic happens when the sugar caramelizes into a rich sauce and the custard is baked to perfection in a gentle water bath. The result? A dessert that’s as elegant as it is easy to make. Whether you’re celebrating a special occasion or just craving something sweet, this authentic Mexican flan recipe will quickly become a favorite in your kitchen.
What Is Mexican Flan Made Of? (And Why These Ingredients Work So Well) 🍮
At first glance, Mexican flan may seem like a simple dessert—but its humble list of ingredients is the reason it’s so universally adored. Behind every slice of its silky custard and caramel sheen lies a perfectly balanced blend of pantry staples that come together to create a show-stopping finale to any meal.
Here’s a deeper look at what goes into an Authentic Mexican Flan, why these ingredients matter, and how they work together to create its signature texture and flavor:
🥫 Sweetened Condensed Milk: The Creamy Sweetheart of the Recipe
This thick, luscious milk is made by removing most of the water from cow’s milk and adding sugar, resulting in a syrupy, rich base. It brings both sweetness and a velvety texture to flan that’s hard to replicate. Unlike regular sugar, sweetened condensed milk also adds body, ensuring the flan is dense without being heavy, and sweet without needing any additional granulated sugar in the custard itself.
✨ Why it works: It creates that melt-in-your-mouth texture and gives flan its signature creamy finish.
🥛 Evaporated Milk: Lightens & Balances the Sweetness
Evaporated milk is milk that’s been heated to remove water content, resulting in a thicker, slightly toasted flavor. It’s less sweet than condensed milk, which helps balance out the sugar in the recipe while still offering creaminess.
Together, the combo of evaporated milk + condensed milk brings a unique light-but-luxurious mouthfeel that’s unmistakably Mexican flan.
💡 Pro Tip: Evaporated milk also helps the flan set better without curdling—making it smooth and sliceable every time.
🛒 Grab this kitchen staple here and keep your dessert game on point.
🥚 Eggs: The Magical Binding Agent
Eggs are the structural foundation of flan. When gently baked, the proteins in the eggs set the custard, creating that delicate jiggle and silky-smooth consistency. They also help the flan firm up enough to hold its shape when inverted.
But here’s the secret: Overbeating or using too many eggs can make your flan rubbery or eggy in flavor. That’s why this traditional ratio of whole eggs to milk gives just enough stability without compromising the custard feel.
🔍 Want to avoid that “eggy” taste? Use room temperature eggs and whisk gently to minimize air bubbles.
🍦 Pure Vanilla Extract: The Flavor Enhancer
Don’t overlook this small but mighty ingredient! Authentic Mexican flan uses pure vanilla extract to round out the sweetness with warm, floral depth. It’s what makes the difference between a good flan and a truly memorable one.
If you’re feeling adventurous (or want to impress guests), try using Mexican vanilla for a deeper, more aromatic finish.
🍯 Granulated Sugar: For the Caramel Crown
And of course, the caramel topping—the first thing you see and the last thing you taste. Just sugar, no water needed. Melted slowly until golden and poured into the mold, it forms a glassy, bittersweet layer that cuts through the custard’s richness and turns into a gorgeous sauce when flipped.
🥄 Mastering the caramel is the key to flan success. It’s all about timing, heat control, and the right pan.
🛒 We recommend this nonstick caramel pan with even heating to make cleanup easy and caramel flawless.
Why These Ingredients Just Work ❤️
It’s not just about what goes in—it’s how they work together:
Sweetened condensed milk adds body and sweetness
Evaporated milk balances it out with creamy texture
Eggs hold everything in place
Vanilla rounds out the flavor
Caramel finishes the dish with dramatic flair
Together, they create a dessert that’s indulgent without being overwhelming, rich but not cloying, and nostalgic while still feeling elegant.
Final Thought:
This short ingredient list is part of flan’s magic. It’s proof that you don’t need fancy ingredients to make something extraordinary. Just a little patience, a lot of love, and the perfect recipe passed down through generations.
Want to make your flan unforgettable? Use quality ingredients and traditional technique—and it’ll always be a showstopper.
👉 Ready to get started? Scroll down to the recipe card and grab our favorite tools and pantry picks to make your flan flawless.
What’s the Difference Between Mexican Flan and Regular Flan? 🇲🇽✨
Flan is a beloved dessert around the world, but did you know there are different versions depending on the country or region? From Spain to the Philippines, France to Puerto Rico, flan takes on slightly different forms—but Mexican flan stands out with its own distinctive richness, texture, and flavor. Let’s explore what makes Mexican flan different from other types of flan and why it’s one of the most crave-worthy custards on the planet 😍
🇲🇽 Mexican Flan: Creamy, Sweet & Caramel-Kissed
Mexican flan is known for its:
Silky, dense texture
Sweet vanilla flavor
Deep amber caramel topping
Ingredients like sweetened condensed milk + evaporated milk
This version is smoother and richer than many other types of flan thanks to the double-milk combo. You won’t typically find cream or whole milk in this recipe—instead, we rely on evaporated milk for creaminess and condensed milk for sweetness and structure. The result? A custard that slices like a dream and melts in your mouth.
🇪🇸 Spanish Flan: Simpler, Eggier, and a Bit More Delicate
Spanish-style flan (or flan de huevo) uses:
Whole milk
Eggs
Sugar
Optional citrus zest or cinnamon
This version is lighter, eggier, and more delicate than the Mexican counterpart. It’s often steamed or gently baked and has a softer, jellier consistency. It’s still topped with caramel but tends to be less sweet overall and is often flavored with orange or lemon peel.
👀 Side-by-side, Spanish flan has more of a custard-pudding texture, while Mexican flan is richer and denser.
🇫🇷 French Crème Caramel: The Fancy Cousin
You’ll sometimes hear people compare flan to crème caramel—and while they’re similar, French crème caramel is made with:
Whole cream or milk
Eggs and sugar
Often no sweetened condensed milk
It’s often cooked very gently, usually in ramekins, and unmolded before serving. It’s elegant and light, but can lack the intense sweetness and richness that people love in Mexican flan. Crème caramel is also typically served as a fine-dining dessert in small portions.
🇵🇷 Puerto Rican Flan: Coconut & Tropical Vibes
Puerto Rican flan (and other Caribbean variations) often introduces coconut milk, cream cheese, or rum into the mix. This gives the flan a slightly tangy, tropical twist, and a softer texture. It’s delicious, but different from the classic Mexican style.
🥄 So… What Makes Mexican Flan The Best?
Here’s why so many people say Mexican flan wins the flavor race:
It’s richer, smoother, and more decadent
The sweetness is perfectly balanced by the toasted caramel layer
It’s the perfect marriage of pantry simplicity and luxurious texture
The ingredients make it fail-proof even for beginners
🔥 And let’s be honest: Nothing tastes like tradition. Mexican flan is more than dessert—it’s a celebration of family, culture, and comfort.
🤓 Quick Comparison Chart
| Type of Flan | Base Ingredients | Texture | Sweetness | Caramel | Flavor Notes |
|---|---|---|---|---|---|
| Mexican Flan | Evaporated + Condensed Milk, Eggs | Silky & Dense | Sweet | Rich | Vanilla & Toasted Sugar |
| Spanish Flan | Whole Milk, Eggs, Sugar | Light & Eggy | Mild | Light | Citrus or Cinnamon |
| Crème Caramel (FR) | Cream or Milk, Eggs, Sugar | Soft & Elegant | Mild | Light | Creamy & Delicate |
| Puerto Rican Flan | Condensed Milk + Coconut/Rum/Cheese | Creamy & Unique | Varies | Rich | Tropical Twist |
🛒 Want to Make Authentic Mexican Flan at Home?
To make flan the traditional Mexican way, here’s what you’ll need:
Final Thought 💬
While every version of flan has its charm, Mexican flan remains a global favorite for a reason. It’s rich, elegant, and simple—all in one slice. Whether you’re honoring your heritage or exploring a new dessert tradition, this classic is the ultimate sweet indulgence that always satisfies.
Try some of our other recipes!
Spring Greens & Edamame Salad with Miso Dressing
Zucchini and Carrot Breakfast Muffins
Spanish-Inspired Chickpea Paella
How Do You Make Caramel for Flan Without Burning It? 🍯 (Master the Trickiest Part of Flan)
Let’s be real—caramel is the part of flan that either makes you feel like a kitchen wizard… or has you soaking burnt pans in regret 😅 But here’s the good news: making caramel for authentic Mexican flan doesn’t have to be intimidating. With the right technique, timing, and tools, you can nail that glossy, golden crown of sweetness every single time.
This section is your no-stress guide to making perfectly smooth caramel for flan—without burning it, crystalizing it, or second-guessing your skills.
🍯 First, What Is Flan Caramel Made Of?
Traditional flan caramel is made with just one ingredient: granulated sugar. That’s it.
There’s no water added in the Mexican method—this is called a “dry caramel.” It’s a bit more advanced than the “wet caramel” method (which adds water), but it gives you that deep, toasty, almost butterscotch-like flavor that pairs beautifully with flan’s creamy custard base.
🔥 Step-by-Step Guide: How to Make Caramel for Flan Like a Pro
Step 1: Use the Right Pan
Use a small, heavy-bottomed saucepan (nonstick is ideal). Avoid lightweight pans, which heat unevenly and can scorch your sugar.
🛒 We love this heavy-duty caramel pan with nonstick coating for even browning and super easy cleanup.
Step 2: Add Sugar – That’s It
Pour ¾ to 1 cup of granulated sugar into the dry pan—no water, no butter, nothing else.
Step 3: Heat Gently
Turn the heat to medium-low and watch closely. Don’t stir at this stage. You’ll see sugar slowly melt into clear puddles. This is good!
💡 Tip: Swirl the pan gently as the sugar melts to help it caramelize evenly. Don’t stir with a spoon yet—it can cause crystals.
Step 4: Look for Amber Gold
Once the sugar is fully liquid and amber-colored, immediately remove it from the heat. It will continue to cook slightly from the residual heat of the pan.
The sweet spot: a rich golden brown with a slightly toasted aroma. If it turns dark brown or smells bitter, you’ve gone too far.
💥 Avoid These Common Caramel Mistakes
🚫 Overheating the sugar – Sugar burns FAST once melted. Keep your eye on it the whole time.
🚫 Stirring too early – This can cause crystallization. Let it melt undisturbed until it’s almost fully liquid.
🚫 Walking away – A watched pot does boil (and a watched caramel doesn’t burn). Don’t multitask during this step.
🚫 Adding cold ingredients – Pouring cold custard onto hot caramel too quickly can cause splattering and hardening.
🍮 How to Pour and Set the Caramel
As soon as your caramel hits that golden amber color:
Immediately pour it into your flanera or cake pan.
Quickly tilt and swirl the pan so the caramel coats the bottom evenly before it sets.
Let it cool while you prepare the custard.
⚠️ Caution: Caramel is extremely hot. Handle your flan mold with oven mitts to avoid burns!
🧼 How to Clean the Pan (Without the Drama)
Burnt-on caramel? Don’t scrub—just soak!
Fill the pan with hot water and let it sit for 20 minutes.
The caramel will dissolve completely.
For stubborn spots, reheat the water in the pan until the sugar melts away.
🧽 Bonus tip: Use a silicone spatula to stir next time—it won’t scratch your pan and helps control the sugar.
✨ The Secret to Restaurant-Worthy Caramel Every Time
If you want that perfectly smooth, toffee-colored finish every time, here’s what the pros do:
Use a digital thermometer and remove caramel at 340–350°F
Add a pinch of sea salt at the end for a salted caramel twist
Work quickly—but don’t panic! Caramel waits for no one, but you’ll get faster with practice.
🛒 Shop Our Favorite Tools for Caramel Success
✅ Nonstick Saucepan – for even melting with no burn spots
✅ Silicone Spatula – stir without scratching your pan
✅ Flan Mold (Flanera) – to swirl and pour like a pro
✅ Oven Mitts – essential for handling hot caramel safely
Final Caramel Wisdom 💬
Caramel is the first thing your guests see and the last thing they taste—so it’s worth doing right. Don’t rush it. Trust the process. And if it takes a couple of tries? That just means more flan for you 😋
You’ve got this. Your flan is about to shine—with a golden caramel top that glistens like dessert gold ✨
Do You Really Need a Water Bath to Bake Flan? 💧 Here’s Why It’s Non-Negotiable for Creamy Results
If there’s one question flan newbies love to ask, it’s this: “Do I really need to use a water bath?” And the short, definitive answer is yes—100% absolutely. If you want smooth, creamy, no-crack, no-curdle, melt-in-your-mouth flan, baking it in a water bath (aka “bain-marie”) is a must.
Let’s break down exactly why it matters, how to do it right, and what tools make the process easy-peasy (plus some pro tips for perfect custard texture).
🧪 Why Flan Needs a Water Bath: The Science Behind the Creaminess
Flan is essentially a delicate custard. It’s made with eggs, sugar, and milk, which means it needs gentle, even heat to set properly. Without a water bath, the oven’s direct heat can:
Scramble the eggs
Cause the flan to bubble or curdle
Create a tough texture or dry outer edges
Lead to cracking on the surface
The water bath acts as a temperature buffer, ensuring the custard bakes slowly and evenly—so it comes out ultra-smooth and luxurious, not grainy or rubbery.
🌡️ Fun fact: Water can’t get hotter than 212°F (100°C), so it regulates the heat and prevents overbaking, even if your oven fluctuates.
🥄 How to Make a Water Bath for Flan (Step-by-Step)
Here’s exactly how to set up a stress-free bain-marie:
Place your flan mold (flanera, cake pan, or ramekins) inside a larger roasting dish or deep baking tray.
Boil water and carefully pour it into the outer dish, until it reaches about halfway up the sides of your flan mold.
Cover the flan mold loosely with foil—this prevents browning or a skin from forming on top.
Bake as directed, then remove the flan mold from the water bath carefully when done.
🔥 Pro Tip: Always add the hot water after placing the pans in the oven to avoid spills. Use a kettle or pitcher for more control.
😱 What Happens If You Skip the Water Bath?
Without a water bath, your flan may:
Cook too quickly and turn rubbery or gritty
Puff up unevenly and deflate when cooled
Crack on top and have a tough edge with a soft center
Taste more like overcooked eggs than smooth custard 😬
In short: You’ll end up with “meh” flan instead of magical flan.
🧰 Best Tools for Water Bath Baking
Want to make setup (and cleanup) way easier? These tools are flan-lovers approved:
🛒 Recommended Picks:
💡 Bonus: A lidded flanera not only bakes flan beautifully but makes flipping it super simple after chilling.
🌟 Pro Tips for Foolproof Water Bath Success
✔️ Use boiling water – lukewarm water won’t protect the custard as effectively.
✔️ Don’t overfill – halfway up the sides of your flan mold is perfect.
✔️ Check for doneness gently – it should jiggle slightly in the center like gelatin, but not be watery.
✔️ Cool in the water bath – let the flan sit in the bath (off the heat) for 10 minutes after baking to avoid sudden temperature shock.
🧊 Can You Steam Flan Instead?
Yes! Some home cooks prefer stovetop steaming, especially for smaller flaneras with lids. The steam mimics the water bath effect, and it’s a great technique if your oven is full or you want to keep things energy-efficient. But if you’re going for the classic oven-baked flan texture, the water bath is still king 👑
Final Thought 💬
The water bath isn’t just some fussy extra step—it’s the secret weapon behind that restaurant-quality flan. If you’ve ever wondered why your homemade flan doesn’t quite have that silky, melt-away texture, skipping the water bath could be the culprit.
So next time you’re prepping your flan, remember: a little hot water = dessert perfection. Your future self (and your tastebuds) will thank you 💖
How Do You Know When Flan Is Done Baking? 🔍 (The Foolproof Way to Get It Just Right)
One of the trickiest parts of making flan isn’t caramelizing the sugar or even flipping it out of the pan—it’s knowing exactly when it’s fully baked. Undercooked flan will collapse or ooze when sliced, while overbaked flan can turn dry, rubbery, or full of bubbles. Neither is the dreamy, silky custard we all crave 😬
So how do you tell when your flan is perfectly set and ready to chill? Here’s an extensive guide to help you recognize all the right signs, plus pro tips to avoid overbaking ever again.
🕵️♀️ The Jiggle Test (Yes, It’s a Thing)
The #1 way to tell when your flan is done is with a good old-fashioned jiggle test:
Gently tap the side of your flan mold or baking dish with a spoon or oven mitt.
The center should wobble slightly like gelatin, while the edges are set and firm.
If it looks liquid in the middle or jiggles like soup, it needs more time.
If it doesn’t jiggle at all, you may have overbaked it.
Think: a gentle, controlled jiggle—not a sloshy wave and not stiff like a brick. That sweet spot in the middle is your golden signal.
🔪 The Knife or Toothpick Test
You can also test doneness by inserting a thin knife or skewer about an inch from the center:
If it comes out mostly clean with just a few moist crumbs, your flan is done.
If it comes out wet or milky, bake it for 5–10 more minutes and check again.
Avoid testing right in the center—custards set from the outside in, and the middle continues cooking after it’s out of the oven.
💡 Important: Only test once or twice. Poking too many holes can create cracks or let water seep in during cooling.
⏳ How Long Should Flan Bake?
Typical bake time for a standard 9-inch flan mold:
At 325°F (163°C): about 55 to 65 minutes
In a water bath (bain-marie): always required for even cooking
Your exact time may vary depending on:
The type of oven (convection vs conventional)
The depth of your mold or ramekins
Whether you covered the flan with foil
⏱️ Set a timer for 50 minutes, then start checking every 5 minutes until you get the perfect jiggle.
🌬️ It Sets More in the Fridge (Don’t Overdo It in the Oven!)
This is a big one: Flan continues to set as it cools. What looks slightly underbaked when it comes out of the oven often firms up beautifully in the fridge.
So if you’re nervous and bake it until it’s completely firm in the oven, it will likely end up overcooked and rubbery by the time it’s served.
🧊 Chill it for at least 4 hours (overnight is even better) for that signature slice-and-melt texture.
😬 Signs You Overbaked Your Flan
Here’s what to look for (and avoid next time):
Tough edges or rubbery texture
Cracks on the surface
Excessive bubbling throughout the custard
Dry mouthfeel or eggy flavor
Overbaking usually means your oven was too hot or the flan was left in too long. Always use a water bath, cover with foil, and trust the jiggle!
🛠️ Tools That Make Flan Timing Easier
Want to get consistent results every time? These flan-friendly tools help take the guesswork out of baking:
🛒 Highly Recommended:
Final Thought 💬
Flan is a dance between heat and time. And like all beautiful things in the kitchen, it rewards patience. Once you learn to watch for the wobble and trust the cool-down process, you’ll never second-guess your flan again.
So go ahead—take it out when it’s still jiggly, let it chill overnight, and then flip it with confidence. What you’ll reveal is a rich, creamy masterpiece that’s perfectly set, beautifully bronzed, and impossible to resist. 🍮💛
Why Does My Flan Have Bubbles or Holes in It? 🫧 (And How to Keep It Silky Smooth)
You followed the recipe, nailed the caramel, and baked your flan to what seemed like perfection… but when you flipped it, you found it was full of tiny bubbles, spongy holes, or even a scrambled texture. Sound familiar?
Don’t worry—you’re not alone. This is one of the most common issues people face when making flan, and luckily, it’s also one of the easiest to fix. So let’s break down exactly why flan gets bubbles or holes, and how you can avoid this texture trap once and for all 🙌
🧪 The Science: Why Bubbles Form in Flan
The smooth, custard-like texture of flan is achieved by gently cooking eggs and milk until just set. But when you introduce too much air or heat, things can go sideways.
Here are the main culprits behind bubbly or holey flan:
Overmixing the custard – Whipping or blending the mixture too aggressively incorporates air, which creates bubbles that expand during baking.
Baking at too high a temperature – Intense heat causes the proteins in the eggs to cook too fast, forming holes and a sponge-like texture.
No water bath or improper setup – Without a proper water bath, your flan is exposed to direct oven heat, leading to uneven cooking and boiling, which bubbles the custard.
Skipping the straining step – Even small air bubbles can make their way into the custard. Straining the mixture helps eliminate them before baking.
🧑🍳 How to Prevent Bubbles in Flan (Step-by-Step Fixes)
Let’s get your flan back to that silky, sliceable perfection it was meant to be:
✅ 1. Mix Gently—Don’t Whisk Like a Mad Chef
Use a whisk or spatula to combine the ingredients slowly and smoothly. If you prefer a blender, pulse in short bursts instead of blending continuously.
💡 Avoid frothing! Your custard should be smooth, not bubbly before it even hits the mold.
✅ 2. Strain the Custard Before Pouring
Use a fine mesh sieve to pour the custard into the caramel-coated mold. This removes:
Any clumps of egg
Air bubbles
Foam on top that could lead to holes
🛒 We highly recommend this fine mesh strainer for a flawless finish every time.
✅ 3. Bake Low and Slow—in a Water Bath
Keep the oven at 325°F (163°C) max. Always bake flan in a water bath, which cushions the heat and prevents the custard from overheating.
✅ 4. Cover Loosely with Foil
Foil over the top helps:
Maintain a moist baking environment
Avoid browning or “cooking” the custard from the top
Trap gentle steam for smoother texture
Just make sure it’s not tightly sealed—a loose cover is perfect.
✅ 5. Chill Slowly and Unmold with Care
Once baked, let the flan cool at room temperature, then refrigerate it for at least 4 hours or overnight. Chilling helps the custard firm up slowly and evenly.
To unmold:
Run a thin knife around the edge
Dip the bottom of the mold in warm water for 30 seconds to loosen the caramel
Invert onto a plate in one smooth motion
✨No need to shake or force—it should slide out like a dream.
🫧 What If You Still See Bubbles?
A few bubbles? Don’t panic. They won’t affect flavor—just texture and appearance. Some people even enjoy the airy texture. But if you’re after that ultra-smooth, restaurant-style finish, follow the steps above and your flan will come out creamy, custardy, and flawless.
🧰 Recommended Tools for Bubble-Free Flan
These items make your flan-making smoother (literally!):
🛒 Our Top Picks:
Final Thought 💬
Those bubbles? They’re just a sign your flan is asking for a little more gentle love. Think of flan like a shy dessert—it doesn’t like being rushed, whipped, or scorched. Slow, steady, and smooth wins the race 🐢💛
And once you’ve got that silky custard glistening with golden caramel on your plate, you’ll see why taking the extra steps is so worth it.
Can I Make Flan Without a Flanera? 🍮 (Yes! Here’s What to Use Instead)
One of the most common questions we get from flan fans is:
“Do I really need a flanera to make authentic Mexican flan?”
And the answer is: Not at all! 🙌
While a traditional flanera (a round, lidded aluminum mold made specifically for flan) can make the process easier and more traditional, it’s not required to enjoy a rich, creamy, caramel-drizzled slice of heaven. In fact, many home bakers use items they already have in their kitchens—with beautiful results.
So let’s dive into the best flanera alternatives, how to adapt your recipe based on what you use, and a few tips to ensure perfect texture and easy flipping—no matter your pan.
🍽️ What Is a Flanera, Anyway?
A flanera is a lightweight metal mold, typically made of aluminum or stainless steel, that has:
A tight-fitting lid
A tall, round shape (like a large ramekin)
A central ring for even heat distribution (optional, like in bundt-style flaneras)
It’s popular in Mexican households because it helps distribute heat evenly and allows for steaming or baking in a water bath with the lid on. But if you don’t have one yet, don’t let that stop you from making flan!
✅ Best Alternatives to a Flanera
You can still achieve delicious results with the following tools:
1. 9-Inch Cake Pan
Perfect for a large batch flan!
Use a standard metal or glass round cake pan with at least 2 inches of depth. Great for baking flan in the oven using a water bath.
🔄 Tip: Grease it lightly before adding caramel so the flan releases more easily.
2. Glass or Ceramic Pie Dish
These are fantastic for oven baking and look beautiful when serving flan directly from the dish.
Make sure it’s oven-safe and deep enough to hold the custard and caramel without overflowing.
3. Ramekins or Small Soufflé Dishes
Want mini flans for individual servings? These are your best bet!
Benefits:
Faster baking time
Easy to portion
Elegant presentation
🥄 Use these for parties, dinner events, or cute “his and hers” flan desserts.
4. Bundt Pan or Angel Food Cake Pan
These are perfect if you want a show-stopping, sliceable flan with a decorative shape.
Just make sure to butter the pan generously and pour the caramel while it’s hot so it coats evenly.
💡 Pro Tip: Place a plate underneath when flipping—caramel flows fast from these!
5. Lidded Stainless Steel Containers
If you’re steaming your flan (like stovetop versions), you can use a small pot or stainless steel bowl with a tight-fitting lid to mimic the flanera’s steam-trapping magic.
💡 Key Adjustments When Using Alternatives
To make sure your flan comes out as dreamy as possible, keep these tweaks in mind:
Watch the bake time. Smaller ramekins bake faster (35–45 minutes), while larger pans take longer (60–75 minutes).
Use foil if there’s no lid. If your container doesn’t have a lid like a flanera, cover it loosely with foil to prevent browning or drying.
Always use a water bath. Regardless of the vessel, your flan needs that gentle heat from a bain-marie
😎 Why You Might Still Want a Flanera (Eventually)
While not required, a flanera is a great investment for frequent flan-makers:
Built-in lid = no foil needed
Perfect size for traditional flan recipes
Designed to heat evenly and unmold easily
A must-have for stovetop flan recipes
Final Thought 💬
Don’t let the lack of a flanera hold you back from making one of the most iconic and beloved desserts in Mexican cuisine. Whether you use a pie dish, ramekins, or your favorite cake pan, what really matters is the love and care you pour into it.
Because when it’s done right—no one’s going to ask what pan you used. They’ll be too busy savoring that rich custard and golden caramel 😋
These partnerships help support our content and keep our recipes free for our amazing readers. We only recommend products and brands we personally use and trust in our own kitchen. Thank you for supporting us! 💛
🛠️ Must-Have Tools for Making Perfect Mexican Flan (Every Time)
To create silky, smooth, restaurant-quality flan at home, having the right tools is just as important as using the right ingredients. These are the top five pieces of kitchen equipment we personally recommend and use to make flan that flips flawlessly, sets like a dream, and impresses every guest. ✨
Whether you’re a beginner or a seasoned baker, these tools will help make your flan-making experience smoother, safer, and more enjoyable.
🔝 Top 5 Pieces of Equipment for Flan Success
🌟 Why We Recommend These Tools
1. Flanera Mold
This traditional mold is specially designed for flan, with a tight-fitting lid that traps steam for even cooking. It’s the easiest way to get that perfectly set custard and smooth flip every time.
🛒 Top Pick on Amazon:
👉 Stainless Steel Flan Mold with Lid – 1.5 Quart
2. Nonstick Saucepan
Caramel can be tricky—but not with the right pan! A heavy-bottomed, nonstick saucepan helps melt sugar evenly without burning, giving you that golden caramel layer essential to authentic Mexican flan.
🛒 Top Pick on Amazon:
👉 Nonstick Saucepan – 2 Quart
3. Fine Mesh Strainer
Want velvety, bubble-free flan? A mesh strainer is your secret weapon. It filters out eggy bits and air bubbles, ensuring a smooth, silky custard with every batch.
🛒 Top Pick on Amazon:
👉 Cuisinart Set of 3 Mesh Strainers – Stainless Steel
4. Large Roasting Pan
You’ll need this for the water bath, which is essential to prevent cracking and overbaking. Look for a pan that’s deep, sturdy, and wide enough to hold your flan mold and boiling water.
🛒 Top Pick on Amazon:
👉 Cuisinart Chef’s Classic Stainless Steel Roaster with Rack
5. Silicone Spatula
This is a small tool that makes a big difference! Stirring your flan custard with a flexible silicone spatula helps incorporate ingredients gently—without whipping in air bubbles that can ruin texture.
🛒 Top Pick on Amazon:
👉 Di Oro Seamless Silicone Spatula – Heat-Resistant & BPA Free
🛍️ Why We Recommend These Products 💬
We’ve selected these tools not just because they’re highly rated—but because they make your flan-making process faster, easier, and more consistent. These are the same kinds of products used in professional kitchens, and they help prevent the most common flan mistakes (like burnt caramel, air bubbles, and overcooked edges).
Whether you’re baking for your family, a holiday, or just to treat yourself, having the right equipment turns flan into a fail-proof dessert you’ll be proud of every time.
✅ Ready to Make Flan Like a Pro?
Equip your kitchen with the tools that turn good desserts into unforgettable ones.
👉 Click any of the links above to shop our favorites on Amazon—and start your flan journey with confidence 💛🍮
Authentic Mexican Flan
Equipment
- Flanera, 9-inch Round Cake Pan, or Ramekins : The mold where the flan will set. A traditional flanera with a lid is ideal, but a cake pan or individual ramekins also work.
- Heavy-Bottomed Saucepan : Used for caramelizing the sugar evenly without burning.
- Whisk or Blender : For mixing the custard smoothly and preventing air bubbles.
- Fine-Mesh Sieve (Optional but Recommended) : Helps strain the custard to remove any egg bits, ensuring a perfectly smooth texture.
- Large Baking Dish or Roasting Pan : Needed for the water bath (bain-marie) to cook the flan gently and evenly.
- Kettle or Measuring Cup for Hot Water : Used to pour hot water into the baking dish for the water bath.
- Aluminum Foil : Lightly covers the flan while baking, preventing over-browning.
- Knife or Thin Spatula : To run along the edges and help release the flan from the mold.
- Serving Plate with a Slight Lip : Essential for flipping the flan and catching the caramel sauce.
Ingredients
- 1 Cup Sugar (for the caramel)
- 1 Can of evaporated milk (12 oz)
- 1 Can of sweetened condensed milk (14oz)
- 3 Large eggs
- 2 Egg yolks
- 1 Tbsp Vanilla extract
- 1/4 Tsp Salt
Instructions
- Prepare the Caramel:In a medium saucepan, melt the sugar over medium heat, stirring constantly to prevent burning. Once it turns a golden amber color, quickly pour it into a round baking dish, swirling to coat the bottom.
- Mix the Custard:In a blender, combine the evaporated milk, condensed milk, eggs, egg yolks, vanilla, and salt. Blend until the mixture is smooth. Pour this over the caramel in the baking dish.
- Bake the Flan:Preheat your oven to 350°F (175°C). Place the filled baking dish in a larger baking pan and add hot water to the outer pan (about halfway up the sides of the flan dish). Bake for about 50-60 minutes, or until set but still slightly jiggly in the center.
- Cool and Serve:Let the flan cool in the water bath, then refrigerate it for at least 4 hours. To serve, run a knife around the edges of the flan, and invert onto a plate, allowing the caramel to flow over the custard.
Notes
Make-Ahead Tips
✅ Prepare 1-2 Days in Advance : Flan can be made up to 48 hours ahead and stored in the fridge until ready to serve. This makes it a stress-free dessert for parties or special occasions. ✅ Unmold Just Before Serving : Keep the flan in its baking dish until you're ready to serve. The longer it sits, the more the caramel will liquefy, making it easier to release. ✅ Speed Up Cooling if Needed : If you need to serve flan the same day, place it in an ice bath for 30 minutes before transferring it to the fridge to chill faster.How to Store Flan Properly
✅ Refrigerate in an Airtight Container : Once fully cooled, cover the flan tightly with plastic wrap or foil and store it in the refrigerator for up to 3-4 days. ✅ Keep It in the Mold Until Serving : Storing it in the baking dish helps prevent it from drying out and keeps the caramel from spilling. ✅ Separate Slices for Leftovers : If you’ve already unmolded the flan, store any leftover slices in an airtight container with the caramel sauce poured over them to keep them moist.Can You Freeze Flan?
Yes, but freezing flan is not ideal because it can slightly alter the texture. If you need to freeze it: ✅ Wrap It Well : Store flan in an airtight, freezer-safe container or wrap it tightly in plastic wrap and foil to prevent freezer burn. ✅ Freeze for Up to 1 Month : Flan can be frozen for up to 1 month. Beyond that, the texture may become grainy. ✅ Thaw Slowly in the Fridge : Move the frozen flan to the refrigerator and let it thaw overnight before serving. Avoid microwaving, as it can ruin the delicate custard.How Long Does Flan Last?
- In the fridge : 3-4 days
- In the freezer : Up to 1 month
The Magic of Homemade Flan
There’s something truly special about making authentic Mexican flan from scratch. From the moment you melt the sugar into golden caramel to the anticipation of flipping the mold and watching the rich sauce cascade over the silky custard, it’s more than just a dessert—it’s an experience. Whether you’re making it for a special occasion, a family gathering, or just to satisfy a craving, flan has a way of bringing people together.
Cooking is about more than just following a recipe—it’s about creating memories, traditions, and moments of joy with the people we love. Maybe it’s your first time making flan, or maybe it’s a recipe that’s been passed down in your family for generations. Either way, every bite carries warmth, nostalgia, and the comforting flavors of home. So grab your spoon, take that first bite, and savor the magic of homemade Mexican flan—because some of the best things in life are sweet, simple, and made with love. 🍮💛
Have you tried this recipe? I’d love to hear how it turned out! Share your thoughts in the comments below!
Join Now!
Love this recipe? Don’t miss out on even more delicious, healthy, and easy-to-make recipes like this Authentic Mexican Flan! By joining our email community, you’ll gain access to exclusive content, bonus recipes, and tips to make clean eating a breeze.
Enter your email & click below to subscribe and start receiving tasty inspiration right away. It only takes a minute to join our growing community of food lovers dedicated to making healthy eating delicious and fun.
These partnerships help support our content and keep our recipes free for our amazing readers. We only recommend products and brands we personally use and trust in our own kitchen. Thank you for supporting us! 💛