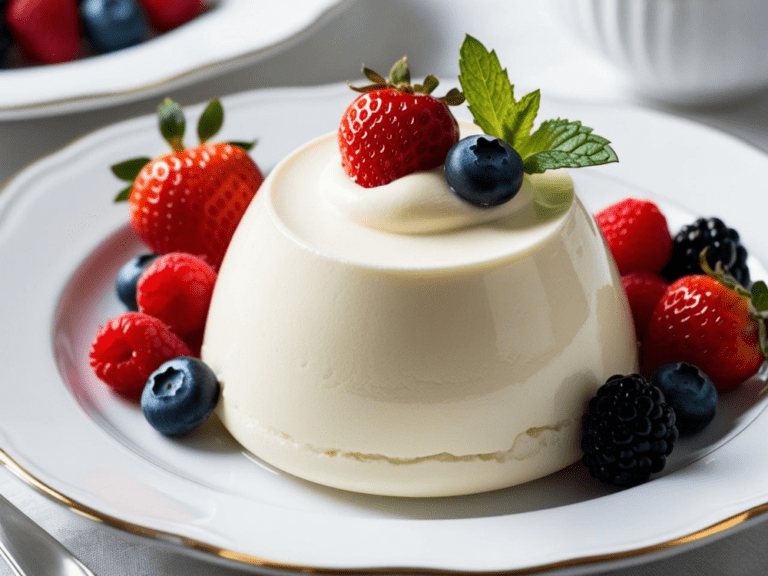
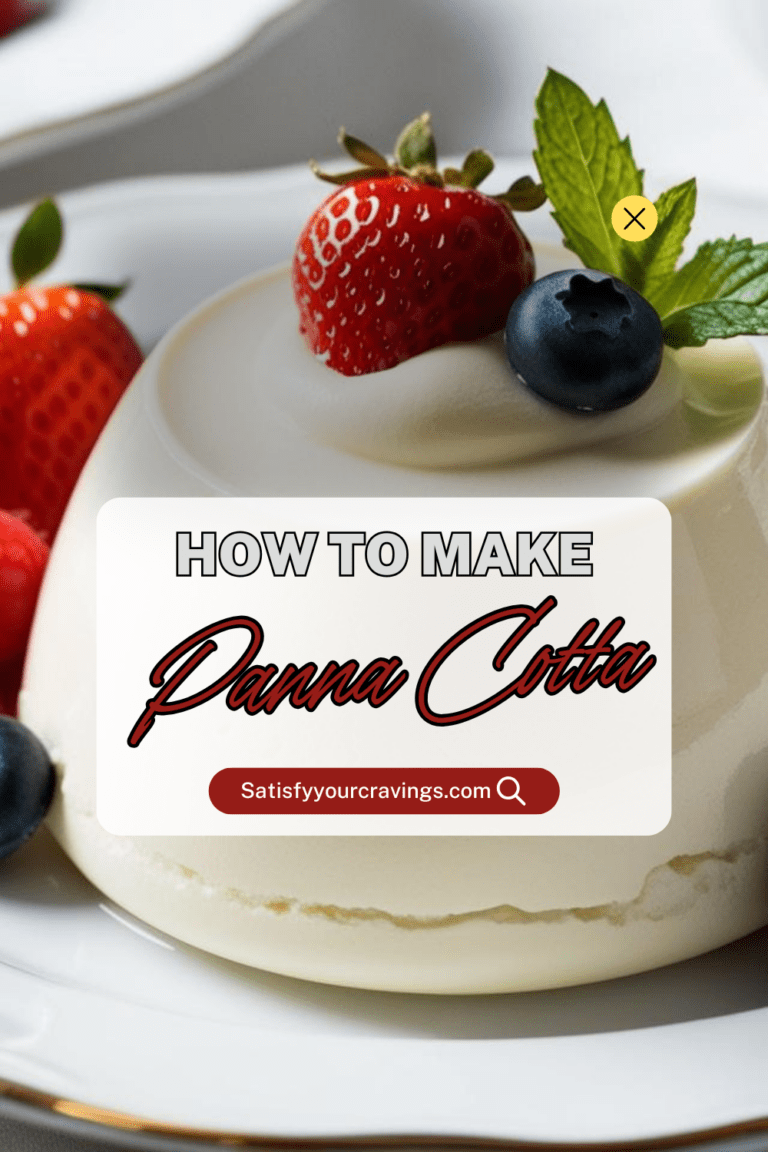
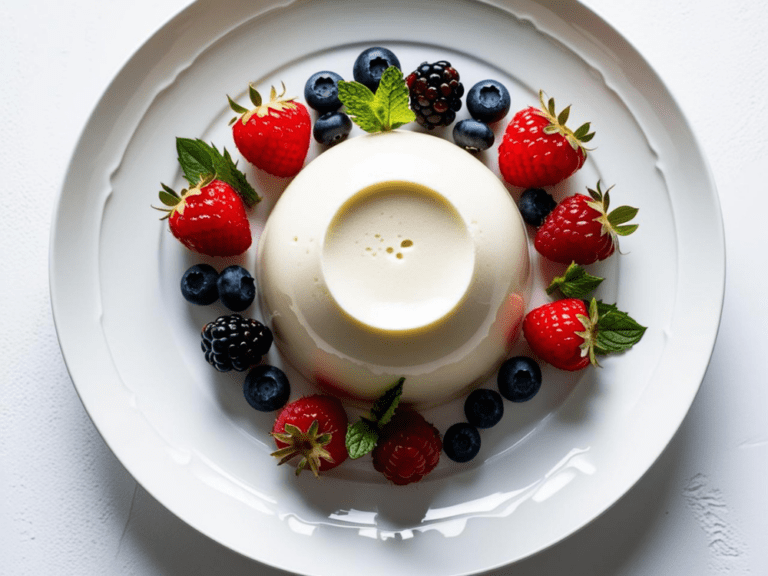
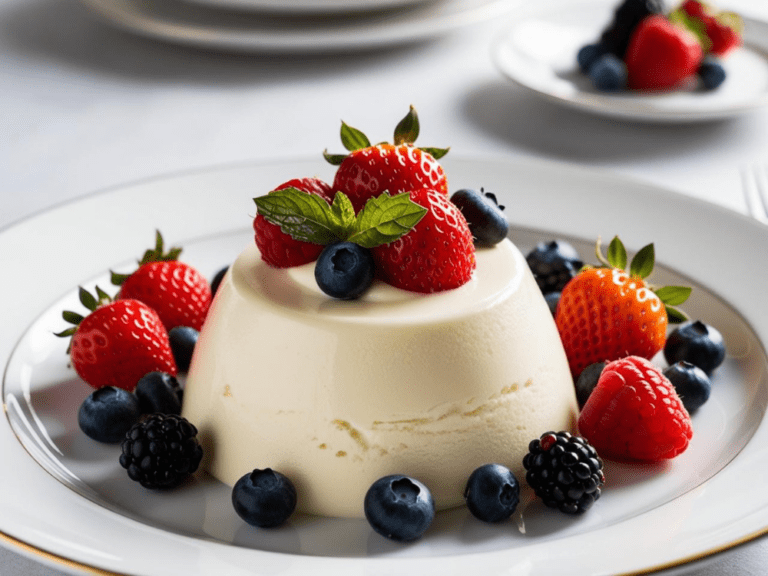
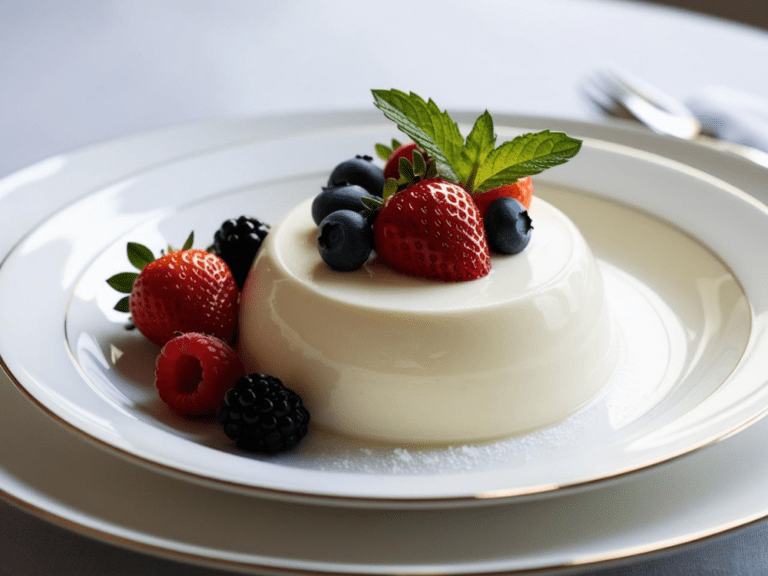
Panna Cotta

A close-up of a smooth panna cotta dessert topped with a strawberry, blueberry, and mint leaves.

Smooth, Creamy, and Effortlessly Elegant

There’s something truly magical about Panna Cotta—a dessert so silky and creamy that it practically melts in your mouth. This Italian classic is known for its rich yet light texture, making it the perfect way to end any meal. Despite its fancy, restaurant-worthy appearance, Panna Cotta is incredibly easy to make at home with just a few basic ingredients. Whether you’re hosting a dinner party, planning a romantic date night, or simply craving something sweet, this recipe is guaranteed to impress.

What makes Panna Cotta so special is its versatility. It pairs beautifully with fresh berries, a drizzle of berry sauce, or even a touch of chocolate for extra indulgence. With minimal effort and no baking required, you can create a dessert that looks elegant and tastes divine. If you’ve never made Panna Cotta before, don’t worry—this step-by-step guide will walk you through everything you need to know. Let’s get started!

A panna cotta dessert topped with berry sauce and fresh strawberries, blueberries, and mint leaves.

Why You’ll Love This Panna Cotta Recipe

If you’ve never made Panna Cotta before, you’re in for a treat! This is one of those desserts that looks impressive but is shockingly easy to pull off. Whether you’re a seasoned home cook or a beginner in the kitchen, this recipe is foolproof and delivers perfect results every time.

1. It’s Silky, Creamy, and Absolutely Irresistible

There’s nothing quite like the texture of Panna Cotta—it’s rich and creamy yet light enough to feel indulgent without being too heavy. Every spoonful has that smooth, melt-in-your-mouth consistency that makes this dessert so luxurious.

2. Surprisingly Simple to Make

You might think Panna Cotta is a complicated, restaurant-only dessert, but it’s actually one of the easiest sweets you can make at home. With just a handful of basic ingredients—cream, sugar, gelatin, and vanilla—you can create something that looks and tastes like it took hours to prepare. The best part? There’s no baking required!

3. Versatile and Customizable

This Panna Cotta recipe is the perfect blank canvas for your creativity. Want to add a little something extra? Try infusing the cream with coffee, chocolate, or citrus zest for a unique twist. Prefer a lighter version? Swap the cream for coconut milk or almond milk. You can also top it with fresh berries, caramel, chocolate shavings, or even a drizzle of honey. The possibilities are endless!

4. Perfect for Any Occasion

Whether you’re hosting a dinner party, celebrating a special occasion, or just craving a fancy dessert for yourself, Panna Cotta fits the bill. It’s elegant enough to impress guests yet simple enough to whip up whenever you’re in the mood for something sweet. Plus, since it needs to chill before serving, you can make it ahead of time—one less thing to worry about when preparing a meal!

5. A No-Bake Dessert That Feels Fancy

Let’s be honest—sometimes, you just want a fancy dessert without turning on the oven. Panna Cotta is the ultimate no-bake treat that feels gourmet but requires minimal effort. It’s a great go-to when you want something special without spending hours in the kitchen.

Once you try this Panna Cotta recipe, you’ll wonder why you didn’t make it sooner. It’s the kind of dessert that makes any meal feel extra special, with barely any effort required. So go ahead—treat yourself to something delicious!

Panna cotta topped with a glossy berry sauce and an assortment of fresh berries on a white plate.

The History of Panna Cotta – An Italian Classic with a Mysterious Past

Panna Cotta is one of those desserts that feels timeless—silky smooth, subtly sweet, and effortlessly elegant. But where did it come from? Unlike other well-documented Italian desserts like Tiramisu or Cannoli, the origins of Panna Cotta are a bit of a mystery. While it’s widely considered a traditional Northern Italian dessert, its exact history is difficult to trace.

An Italian Treasure from Piedmont

Most food historians believe that Panna Cotta originated in the Piedmont region of Northern Italy, a place known for its rich dairy products. The name itself means “cooked cream” in Italian, which perfectly describes the essence of this simple yet luxurious dessert. Early recipes likely involved simmering cream with sugar and using egg whites or gelatin to set the mixture.

While some theories suggest that Panna Cotta has been around for centuries, it didn’t appear in written Italian cookbooks until the early 20th century. This makes it difficult to pinpoint exactly when and how it became a beloved staple of Italian cuisine. What’s certain, though, is that Panna Cotta quickly gained popularity, especially as a light, creamy alternative to heavier custard-based desserts.

A Connection to Ancient Cooking Techniques?

Some food historians speculate that the idea of Panna Cotta may have been inspired by older European and Middle Eastern dessert traditions. Ancient Romans, for example, made desserts using milk and honey, thickened with ingredients like flour or eggs. In the Middle Ages, Arabian influences introduced new thickening agents like gelatin, which could have played a role in the evolution of Panna Cotta as we know it today.

The Influence of Gelatin in the 19th and 20th Centuries

Before the widespread availability of commercial gelatin, early versions of Panna Cotta were likely thickened using egg whites or even fish-based gelatin. However, as gelatin became more accessible in the 19th and 20th centuries, it made the process of making Panna Cotta even simpler, allowing it to achieve that signature smooth and delicate consistency.

Panna Cotta in Modern Cuisine

Over time, Panna Cotta has evolved from a regional specialty into a worldwide sensation. Today, it can be found on dessert menus across the globe, from fine-dining restaurants to home kitchens. Chefs and home cooks alike have experimented with endless variations, incorporating flavors like chocolate, coffee, coconut, and even floral essences like lavender and rosewater.

What makes Panna Cotta so special is its versatility—it pairs beautifully with fresh fruit, berry sauces, caramel, or even a splash of liqueur. Despite its humble ingredients, it remains a symbol of Italian culinary sophistication, proving that sometimes, the simplest dishes are the most timeless.

Whether you’re making a classic vanilla Panna Cotta or putting your own creative twist on it, you’re participating in a long-standing tradition of culinary excellence. It’s a dessert with history, mystery, and above all—an irresistible taste!

Try some of our other recipes!

Raspberry almond thumbprint cookies arranged on a rustic baking tray, with fresh raspberries and almonds scattered around.
Raspberry Almond Thumbprint Cookies
Read More
A rich chocolate raspberry tart with a smooth ganache filling, topped with fresh raspberries and dark chocolate pieces, sitting on a pink background.
Chocolate Raspberry Tart
Read More
Raspberry white chocolate muffins cooling on a wooden surface near a kitchen window, with a soft cloth napkin underneath.
Raspberry White Chocolate Muffins
Read More
A beautifully plated panna cotta surrounded by fresh strawberries, blueberries, raspberries, and mint leaves.

Expert Tips & Tricks for the Best Panna Cotta

If you’ve ever had Panna Cotta, you know that the perfect one is luxuriously smooth, delicately sweet, and melts in your mouth. But achieving that flawless texture isn’t just about following a recipe—it’s about understanding a few key techniques that make all the difference. Whether you’re making Panna Cotta for the first time or looking to perfect your technique, these expert tips will help you get it right every time.


1. Bloom Your Gelatin Properly

One of the most crucial steps in making Panna Cotta is blooming the gelatin correctly. This means sprinkling the gelatin evenly over cold water (or milk) and letting it sit for at least 5 minutes before using it. This allows the gelatin to absorb moisture and soften, preventing clumps when added to the warm cream mixture.

🔥 Pro Tip: Never dump gelatin into hot liquid directly—it will clump and ruin the texture of your dessert!


2. Don’t Boil the Cream

While it might be tempting to crank up the heat to speed up the process, avoid bringing the cream mixture to a boil. Panna Cotta should be smooth and delicate, and overheating the cream can lead to a grainy or curdled texture. Instead, heat the mixture gently over medium-low heat until the sugar dissolves and it’s warm but not bubbling.

🔥 Pro Tip: If you accidentally let it boil, let the mixture cool slightly before adding the gelatin to prevent deactivating its thickening properties.


3. Stir Gently, Not Vigorously

After adding the bloomed gelatin to the warm cream, stir gently until fully dissolved. Avoid whisking too aggressively, as this can introduce air bubbles, which may affect the texture. The goal is to have a perfectly smooth and silky consistency without unwanted bubbles forming on the surface.

🔥 Pro Tip: For an ultra-smooth texture, strain the mixture through a fine mesh sieve before pouring it into molds. This catches any undissolved bits of gelatin or vanilla bean.


4. Use the Right Mold and Serving Dish

You can serve Panna Cotta in elegant glass cups, ramekins, or even unmold it onto plates for a restaurant-style presentation. If you plan to unmold it, lightly grease your molds with neutral oil (like vegetable oil) before pouring in the mixture. This makes it easier to release without breaking.

🔥 Pro Tip: To unmold Panna Cotta effortlessly, dip the bottom of the mold in warm water for 5-10 seconds, then gently invert it onto a plate.


5. Give It Enough Time to Set

Patience is key! Panna Cotta needs at least 4 hours in the refrigerator to set properly, but overnight is even better for the perfect texture. Rushing the process by placing it in the freezer can lead to uneven consistency or icy patches.

🔥 Pro Tip: If you’re making Panna Cotta for a special event, prepare it a day in advance so you don’t have to worry about last-minute prep.


6. Avoid a Rubbery or Too-Firm Texture

If your Panna Cotta turns out too firm or rubbery, chances are you added too much gelatin. The ideal texture should be soft and wobbly, not stiff. Stick to the recommended amount—about 2 ½ teaspoons of gelatin per 3 cups of liquid—for a perfect balance.

🔥 Pro Tip: Want an even softer texture? Slightly reduce the amount of gelatin next time for a more delicate, melt-in-your-mouth experience.


7. Enhance the Flavor with Infusions

While classic Panna Cotta is made with vanilla, you can take it to the next level by infusing the cream with other flavors. Try steeping:
Coffee or espresso – for a bold, rich variation.
Citrus zest – for a refreshing twist.
Lavender or rose petals – for a floral, elegant dessert.
Cinnamon sticks or cardamom – for a warm, spiced version.

Simply add these ingredients to the cream while heating, let them steep for 10-15 minutes, then strain before adding gelatin.

🔥 Pro Tip: For extra flavor depth, use a vanilla bean instead of extract—it adds tiny flecks of vanilla and a richer taste.


8. Get Creative with Toppings and Presentation

One of the best things about Panna Cotta is how versatile it is. Once it’s set, you can top it with:
🍓 Fresh berries (strawberries, raspberries, blueberries)
🍯 A drizzle of honey or caramel sauce
🍫 Chocolate shavings or cocoa powder
🌿 Mint leaves for a pop of freshness

Presentation matters, too! Serve Panna Cotta in elegant glassware for a sophisticated look, or unmold it onto a plate for a professional-style dessert.

🔥 Pro Tip: If using fruit toppings, add them just before serving to keep them fresh and vibrant.


9. Make It Dairy-Free or Vegan

Want to make Panna Cotta without dairy? Swap out the heavy cream and milk for:
🥥 Coconut milk – for a tropical twist.
🌱 Almond or oat milk – for a lighter version.
To make it fully vegan, replace gelatin with agar-agar, a plant-based thickener. Just keep in mind that agar sets firmer than gelatin, so adjust accordingly.

🔥 Pro Tip: If using agar-agar, boil it for at least 1-2 minutes to activate its gelling properties before adding it to the mixture.


10. Fixing Common Problems

🚨 If your Panna Cotta won’t set – Check if you used enough gelatin and let it chill long enough.
🚨 If it’s too firm – Use less gelatin next time for a softer texture.
🚨 If there are lumps – Always bloom gelatin properly and stir gently to avoid clumping.
🚨 If it’s too sweet – Reduce the sugar or balance it with tart toppings like berry compote.

A top-down view of panna cotta garnished with strawberries, blueberries, raspberries, blackberries, and mint leaves.

How to Make Panna Cotta for Special Diets

One of the best things about Panna Cotta is that it’s naturally gluten-free and can be easily adapted for different dietary needs. Whether you’re dairy-free, vegan, keto, or looking for a low-sugar alternative, there’s a way to enjoy this silky, creamy dessert without compromising on flavor or texture. Below, we’ll dive into some of the most popular special diet adaptations and how to tweak the classic recipe to fit your needs.


Dairy-Free Panna Cotta

If you’re lactose-intolerant or simply avoiding dairy, you can still enjoy a luscious, creamy Panna Cotta by swapping out the dairy ingredients for plant-based alternatives.

Best Dairy-Free Substitutes

🥥 Coconut Milk – The most popular alternative! It creates a rich, creamy texture and pairs well with tropical flavors like mango or passion fruit. Use full-fat coconut milk for the best results.
🌰 Almond Milk – A lighter option with a mild, nutty taste. Works best when combined with a small amount of coconut cream to maintain the creamy texture.
🌾 Oat Milk – Naturally sweet and creamy, oat milk makes a great substitute, but be sure to use an unsweetened version to control the sweetness level.
🥛 Cashew Milk – Creamier than almond milk and adds a slightly buttery taste.

How to Make It Dairy-Free

  • Replace the heavy cream and whole milk with your choice of dairy-free milk.
  • Use the same amount of gelatin or its vegan alternative (agar-agar).
  • Consider adding a little vanilla extract or a tablespoon of maple syrup to enhance the flavor.

🔥 Pro Tip: Since plant-based milks are often lower in fat than heavy cream, adding a small amount of coconut cream or cashew cream can help maintain the silky texture of traditional Panna Cotta.


Vegan Panna Cotta (Without Gelatin)

Traditional Panna Cotta relies on gelatin to set, which is derived from animal collagen. But don’t worry—there’s an easy way to make it completely plant-based by using agar-agar, a gelling agent derived from seaweed.

Agar-Agar vs. Gelatin: What’s the Difference?

  • Gelatin produces a softer, more wobbly texture, whereas agar-agar sets slightly firmer.
  • Agar needs to be boiled for 1-2 minutes to activate, whereas gelatin only needs to be dissolved in warm liquid.
  • Agar-agar is flavorless, so it won’t change the taste of your Panna Cotta.

How to Make It Vegan

Replace gelatin with agar-agar: Use 1 teaspoon of agar-agar powder per 2 cups of liquid (adjust based on texture preference).
Use plant-based milk: Coconut, almond, or oat milk work great.
Boil the agar-agar: Unlike gelatin, agar must be boiled for at least 1-2 minutes to fully dissolve and activate.

🔥 Pro Tip: If your vegan Panna Cotta turns out too firm, use less agar-agar next time. If it’s too soft, increase the agar slightly.


Low-Sugar or Keto Panna Cotta

Want to enjoy Panna Cotta without the sugar spike? Good news—this dessert is naturally low-carb, and with a few swaps, it can be made keto-friendly.

Best Sugar Alternatives for Keto & Low-Sugar Panna Cotta

🍃 Stevia – A natural, calorie-free sweetener that works well in small amounts.
💠 Erythritol or Monk Fruit Sweetener – Both of these sugar substitutes taste the most like sugar and won’t impact blood sugar levels.
🍯 Coconut Sugar or Honey – If you’re not strictly keto but want a lower glycemic index, these are great natural alternatives.

How to Make It Keto-Friendly

  • Replace the sugar with erythritol, monk fruit, or stevia (adjust to taste).
  • Use heavy cream or coconut cream for a high-fat, low-carb version.
  • Add a splash of vanilla extract or cinnamon for extra flavor.

🔥 Pro Tip: Sugar substitutes don’t always dissolve as easily as sugar. If using erythritol, make sure to whisk well and strain the mixture before chilling to avoid a grainy texture.


Nut-Free Panna Cotta

If you or someone you’re serving has a nut allergy, avoiding nut-based dairy alternatives is important. Here are some nut-free substitutes:

🥥 Coconut Milk – Creamy and nut-free!
🐄 Lactose-Free Dairy – If dairy isn’t the issue but lactose is, use lactose-free cream.
🌾 Oat Milk – Naturally creamy and nut-free, perfect for a light Panna Cotta.

🔥 Pro Tip: Some store-bought oat milks contain trace amounts of nuts due to processing. Always check labels if making Panna Cotta for someone with a severe allergy.


How to Customize Panna Cotta for Any Diet

Diet TypeSubstitutes & Adjustments
Dairy-FreeCoconut milk, almond milk, oat milk
VeganUse agar-agar instead of gelatin, plant-based milk
Keto/Low-CarbReplace sugar with erythritol or monk fruit
Nut-FreeUse coconut milk or oat milk instead of almond milk
Lactose-FreeUse lactose-free dairy products
A panna cotta dessert presented on a classic white plate, garnished with fresh berries and mint leaves.

Perfect Pairings: What to Serve with Panna Cotta

One of the best things about Panna Cotta—aside from its silky, creamy texture—is how beautifully it pairs with a variety of flavors and accompaniments. Whether you’re looking to balance its rich, velvety smoothness with something tart, crunchy, or indulgent, the right pairing can take this classic dessert to the next level. Below, we’ll explore the best toppings, sauces, drinks, and even light snacks to serve alongside Panna Cotta for a truly unforgettable dessert experience.


1. Fresh Fruits – A Bright, Juicy Contrast

Since Panna Cotta is smooth and creamy, pairing it with fresh fruit adds a refreshing contrast. The slight tartness of fruit cuts through the richness and balances the flavors beautifully.

Best Fruits for Panna Cotta:

🍓 Berries (Strawberries, Raspberries, Blueberries, Blackberries) – Their natural tartness complements the sweet creaminess of Panna Cotta perfectly.
🥭 Mango – Adds a tropical touch and a burst of natural sweetness.
🍊 Citrus (Oranges, Blood Oranges, Grapefruit, Lemon Zest) – Bright and tangy flavors elevate the dessert.
🍍 Pineapple – Works well with coconut-based Panna Cotta for a tropical flair.
🍑 Peaches & Apricots – A softer, juicy option for a summer-inspired pairing.

🔥 Pro Tip: Macerate your berries (toss them with a little sugar and lemon juice) to enhance their flavor and create a natural fruit syrup.


2. Fruit Sauces & Compotes – The Perfect Drizzle

A fruit sauce or compote not only enhances the flavor but also makes Panna Cotta visually stunning. The contrast of a vibrant sauce drizzled over the pale, creamy base is simply irresistible.

Best Fruit Sauces for Panna Cotta:

🍓 Berry Coulis – A simple blend of pureed berries and sugar, slightly thickened to drizzle beautifully over Panna Cotta.
🍋 Lemon or Passionfruit Curd – The tangy, rich texture pairs perfectly with the smooth dessert.
🍒 Cherry or Plum Compote – Cooked fruit with a bit of sugar and spice adds depth and warmth.
🍎 Apple-Cinnamon Reduction – Perfect for a fall-inspired version.

🔥 Pro Tip: Strain your fruit sauces for a smoother, more elegant finish!


3. Caramel & Chocolate Sauces – Pure Indulgence

If you want to make your Panna Cotta extra decadent, adding caramel or chocolate sauce is the way to go.

🍯 Salted Caramel Sauce – The sweet and salty combination takes Panna Cotta to new heights.
🍫 Chocolate Ganache – A warm, glossy chocolate drizzle makes it completely indulgent.
🌰 Nutella or Hazelnut Spread – A dollop on top adds a rich, nutty depth.

🔥 Pro Tip: Heat the sauce slightly before serving to make it easier to drizzle over the dessert.


4. Crunchy Additions – Texture Matters!

Since Panna Cotta is soft and creamy, adding a crunchy element creates an amazing contrast.

🥖 Biscotti – A classic Italian pairing, perfect for dipping.
🍪 Shortbread or Butter Cookies – Buttery and slightly crisp, they complement the smooth texture.
🍯 Candied Nuts (Almonds, Pecans, Walnuts) – Add sweetness and crunch.
🥜 Toasted Coconut or Granola – Works especially well with tropical flavors like coconut Panna Cotta.

🔥 Pro Tip: Serve your Panna Cotta with a thin tuile cookie or a small piece of brittle for an elegant restaurant-style touch.


5. Drinks & Beverages – The Ideal Pairing

Pairing Panna Cotta with the right drink enhances its flavors and makes the experience even more special.

Espresso or Cappuccino – The rich bitterness of coffee contrasts beautifully with the sweet, creamy Panna Cotta.
🍵 Herbal Teas (Chamomile, Earl Grey, Mint, Jasmine) – Light and floral teas bring out the subtle flavors.
🥂 Dessert Wines (Moscato, Riesling, Port, Sauternes) – Sweet wines match the creamy sweetness of the dessert.
🥛 Milk or Almond Milk – A simple, comforting pairing, especially for kids.

🔥 Pro Tip: If serving Panna Cotta after dinner, pair it with an affogato—a scoop of vanilla ice cream topped with a shot of hot espresso—for a truly indulgent treat.


6. Panna Cotta Flavor Pairing Guide

Panna Cotta FlavorBest Pairings
Classic VanillaBerries, caramel, biscotti, espresso
ChocolateOrange zest, hazelnuts, raspberry coulis
Coffee or EspressoDark chocolate, biscotti, whipped cream
CoconutMango, pineapple, toasted coconut flakes
Lemon or CitrusBlueberries, shortbread cookies, honey drizzle
Matcha (Green Tea)White chocolate, black sesame, almond cookies

7. Seasonal & Holiday Pairings

🍂 Fall & Winter: Caramelized apples, cinnamon-spiced pears, roasted nuts, warm chocolate sauce.
🌸 Spring & Summer: Fresh strawberries, mango puree, passionfruit sauce, citrus zest.
🎄 Christmas & Holidays: Cranberry sauce, gingerbread crumbles, peppermint chocolate drizzle.

🔥 Pro Tip: Adjust the toppings and pairings based on the season for a Panna Cotta that always feels fresh and exciting.

A silky panna cotta dessert served on a white plate with fresh fruit and mint.

Frequently Asked Questions About Panna Cotta

Making Panna Cotta might seem simple, but if you’ve ever tried it and ended up with a dessert that was too firm, too soft, or just not quite right, you’re not alone. Whether you’re a first-time maker or a seasoned pro looking for tips, these frequently asked questions will help ensure you get the smoothest, creamiest Panna Cotta every time. Let’s dive in!


1. Why Didn’t My Panna Cotta Set?

If your Panna Cotta is still liquid after chilling, the most common culprit is not enough gelatin or incorrect activation.

Possible Causes:

✅ You didn’t use enough gelatin – Make sure you measure correctly. Typically, 2 ½ teaspoons of powdered gelatin per 3 cups of liquid is the perfect balance.
✅ You didn’t bloom the gelatin properly – Sprinkle gelatin evenly over cold liquid and let it sit for at least 5 minutes before heating.
✅ The gelatin wasn’t fully dissolved – Stir gently and don’t overheat the mixture (keep it warm but not boiling).

🔥 Fix It Next Time: If your Panna Cotta hasn’t set after 6 hours, you may need to reheat the mixture, dissolve extra gelatin in warm liquid, and mix it back in.


2. Why Is My Panna Cotta Too Firm or Rubber-Like?

Nobody wants a Panna Cotta that feels like rubber instead of silk. If yours is too firm, you probably used too much gelatin.

How to Fix It:

✅ Use less gelatin – Stick to the golden ratio of 2 ½ teaspoons per 3 cups of liquid for a soft, wobbly texture.
✅ Add more cream next time – If you’ve already made a batch that’s too firm, try serving it with extra sauce or whipped cream to soften the experience.

🔥 Pro Tip: If you want an extra soft and delicate Panna Cotta, slightly reduce the gelatin to 2 teaspoons per 3 cups of liquid.


3. Can I Make Panna Cotta Without Gelatin?

Yes! If you’re vegan or prefer a plant-based alternative, agar-agar is a great substitute.

How to Use Agar-Agar:

✅ Use 1 teaspoon of agar-agar powder per 2 cups of liquid (slightly less than gelatin).
✅ Unlike gelatin, agar-agar must be boiled for 1-2 minutes to activate properly.
✅ Keep in mind that agar-agar creates a firmer texture than gelatin, so adjust the amount if you prefer a softer consistency.

🔥 Pro Tip: If using agar-agar, strain the mixture before pouring it into molds to remove any undissolved bits.


4. Can I Use Milk Instead of Heavy Cream?

Yes, but keep in mind that Panna Cotta is meant to be creamy, so using only milk will make it less rich.

Best Substitutes:

🥛 Whole milk – A lighter version with a more delicate texture.
🥥 Coconut milk – Great for a dairy-free option and adds a tropical twist.
🌰 Almond or oat milk – Can be used, but the texture won’t be as creamy.

🔥 Pro Tip: For the best balance, use half heavy cream and half milk to keep the silky texture while reducing the richness.


5. How Long Does Panna Cotta Take to Set?

Panna Cotta needs at least 4-6 hours in the refrigerator to fully set. For best results, chill overnight for a perfect consistency.

🔥 Pro Tip: If you’re making Panna Cotta for a party, prepare it the night before so it’s ready to serve without stress.


6. Can I Freeze Panna Cotta?

Technically, yes—but it’s not recommended. Freezing Panna Cotta can alter the creamy texture, making it grainy or icy.

When Can You Freeze It?

❄️ If you must freeze it, wrap it well and let it thaw slowly in the refrigerator for several hours before serving.
❄️ Best for recipes with higher cream content (coconut-based versions freeze better).

🔥 Pro Tip: Instead of freezing, make Panna Cotta up to 48 hours ahead and store it in the fridge.


7. Why Is My Panna Cotta Grainy or Lumpy?

A smooth Panna Cotta should never be grainy! If yours turned out that way, here’s why:

What Went Wrong?

❌ You overheated the cream – Overheating can cause the fats in the dairy to separate, creating a grainy texture.
❌ The gelatin wasn’t fully dissolved – Always strain the mixture before pouring it into molds.
❌ The sugar wasn’t fully dissolved – Stir gently and make sure everything is smoothly incorporated.

🔥 Pro Tip: If you notice lumps while mixing, blend the mixture with an immersion blender for a silkier finish before chilling.


8. How Do I Unmold Panna Cotta Without Breaking It?

Getting Panna Cotta out of its mold can be tricky, but these tricks make it easy:

Easy Unmolding Techniques:

1️⃣ Dip the mold in warm water for 5-10 seconds – This loosens the edges without melting it.
2️⃣ Run a knife around the edge – Use a thin knife and gently separate the sides.
3️⃣ Flip and shake gently – Place a plate over the mold and give it a light shake.

🔥 Pro Tip: Lightly grease your molds before pouring in the mixture for even easier unmolding!


9. What’s the Best Way to Serve Panna Cotta?

You can serve Panna Cotta in two ways:
🥄 In a glass or ramekin – No need to unmold, just top with fruit or sauce.
🍽️ Unmolded on a plate – Looks elegant and fancy!

🔥 Pro Tip: If serving for a dinner party, prepare it in clear glasses or jars for a no-fuss presentation.


10. Can I Make Panna Cotta in Advance?

Yes! Panna Cotta is the perfect make-ahead dessert.

🥶 Fridge: Store for up to 3 days, covered with plastic wrap.
❄️ Freezing: Not recommended, but if necessary, freeze and thaw in the fridge overnight.

🔥 Pro Tip: If making ahead, add fruit toppings just before serving to keep them fresh.

A panna cotta dessert presented on a classic white plate, garnished with fresh berries and mint leaves.

Panna Cotta

Max Dennison
This classic Panna Cotta recipe is a silky, creamy Italian dessert that’s surprisingly easy to make with just a few ingredients. Made with heavy cream, sugar, vanilla, and gelatin, it sets into a smooth, melt-in-your-mouth texture that pairs beautifully with fresh berries, fruit sauces, or caramel. Whether you’re serving it in elegant glasses or unmolding it onto a plate, this no-bake dessert is perfect for any occasion. Plus, with variations for dairy-free, vegan, and low-sugar options, it’s easy to customize. Follow this step-by-step guide for a foolproof Panna Cotta every time!
Prep Time 15 minutes
Cook Time 5 minutes
Chill time: 4 hours
Total Time 4 hours 20 minutes
Course Dessert, Snack
Cuisine Italian cuisine
Servings 6
Calories 300 kcal

Equipment

  • Small Bowl: For blooming the gelatin in cold water.
  • Saucepan: To gently heat the cream, milk, and sugar.
  • Whisk or Spoon: For stirring the mixture and ensuring the gelatin fully dissolves.
  • Fine Mesh Strainer (Optional): To remove any undissolved bits of gelatin or vanilla bean for an ultra-smooth texture.
  • Ramekins, Glasses, or Molds: To pour and set the Panna Cotta. You can use individual serving glasses, silicone molds, or ramekins depending on your presentation preference.
  • Measuring Cups and Spoons – For precise ingredient measurements.
  • Plastic Wrap: To cover the ramekins while chilling to prevent the formation of a skin.
  • Shallow Dish with Warm Water (For Unmolding, Optional): If you plan to serve Panna Cotta inverted on a plate, dipping the mold in warm water for a few seconds helps release it cleanly.

Ingredients
  

  • 2 cups heavy cream
  • 1 cup whole milk
  • ½ cup granulated sugar
  • 1 tablespoon pure vanilla extract or 1 vanilla bean split
  • teaspoons unflavored gelatin
  • 3 tablespoons cold water
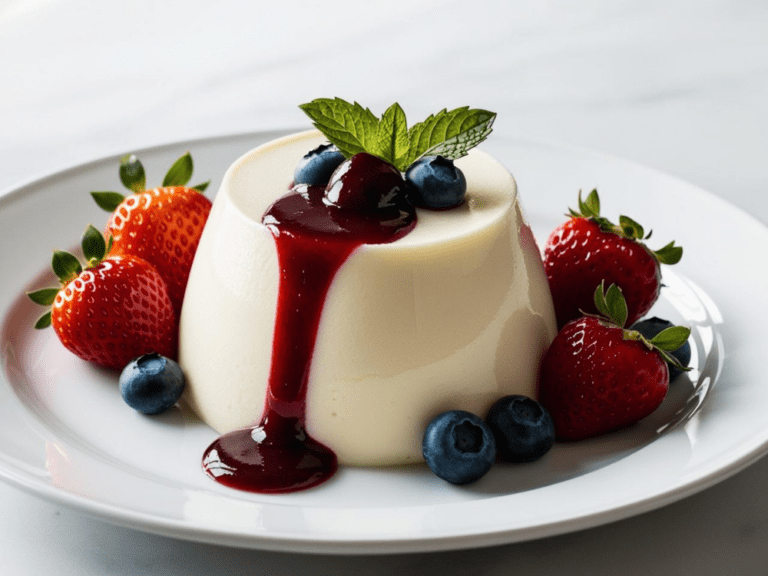
  • Fresh berries or fruit compote for garnish (optional)

Instructions
 

  • Prepare the Gelatin
  • In a small bowl, sprinkle gelatin over cold water and let it sit for about 5-7 minutes to bloom (soften).
  • Heat the Cream Mixture
  • In a saucepan, combine heavy cream, whole milk, and sugar. If you're using a vanilla bean, scrape seeds into the mixture and add the pod as well. Heat gently over medium-low heat, stirring occasionally, until sugar dissolves completely. Avoid boiling.
  • Combine Gelatin and Cream
  • Remove the cream mixture from heat and discard the vanilla pod if used. Stir in the bloomed gelatin until fully dissolved. Add vanilla extract if you're using that instead of a bean. Stir gently to combine evenly.
  • Pour and Chill
  • Divide the mixture evenly into ramekins, glasses, or molds. Let them cool slightly before refrigerating. Chill in the refrigerator for at least 4 hours, ideally overnight, until set.
  • Serve
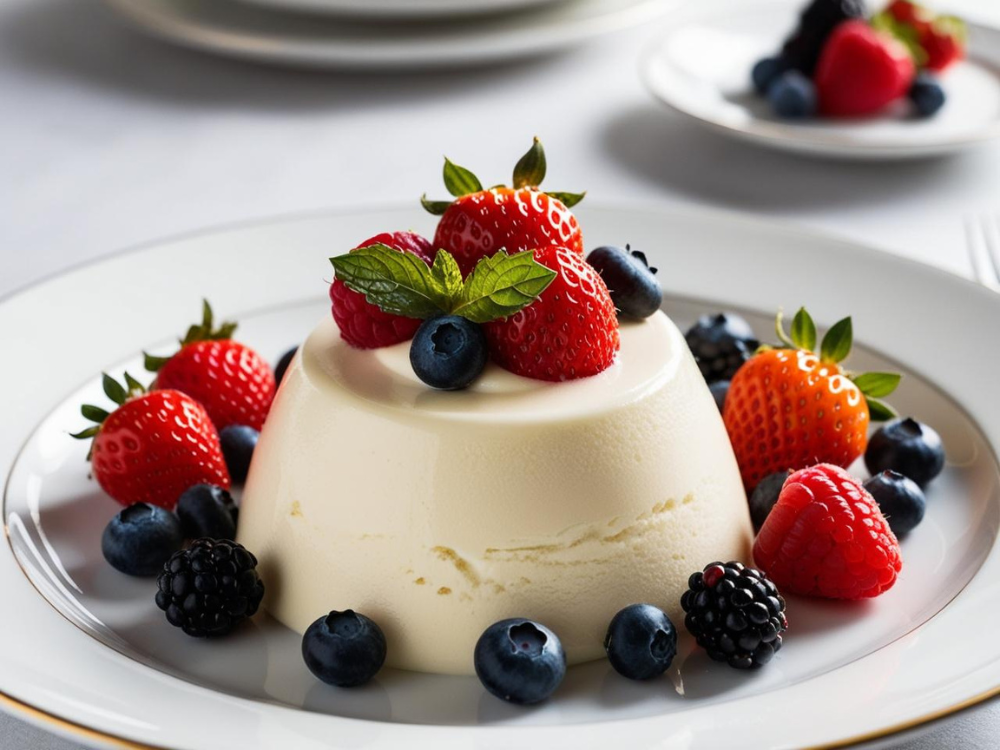
  • To serve, dip each ramekin briefly into hot water to loosen the edges, then invert onto serving plates. Alternatively, serve directly in attractive glasses or cups. Garnish with fresh berries, fruit compote, or even chocolate shavings if desired.

Notes

Make-Ahead Instructions:

✔️ Prepare in Advance: Panna Cotta can be made 1-2 days ahead and stored in the refrigerator until serving.
✔️ Keep Covered: Cover each serving with plastic wrap or an airtight lid to prevent it from absorbing fridge odors or forming a skin on top.
✔️ Add Toppings Later: If serving with fruit, caramel, or chocolate sauce, add the toppings just before serving to keep them fresh and prevent them from sinking into the dessert.

Storage Tips:

🧊 Refrigerator: Panna Cotta keeps well in the fridge for up to 3-4 days, making it a great dessert to prepare ahead of time.
❄️ Freezing (Not Recommended): While you can freeze Panna Cotta, it’s not ideal because freezing can alter the texture, making it grainy or watery when thawed. If you must freeze it, store it in an airtight container for up to 1 month and thaw in the refrigerator overnight before serving.
🔥 Pro Tip: If serving for a party, make Panna Cotta the night before and keep it chilled until ready to serve. This ensures the perfect set and saves time on the day of your event! 😊
Keyword Best Panna Cotta recipe, Classic Italian dessert, Creamy Italian dessert, Easy Panna Cotta, Homemade Panna Cotta, How to make Panna Cotta, No-bake dessert recipe, Panna Cotta recipe, Silky smooth Panna Cotta, Vanilla Panna Cotta
A classic panna cotta served on a white plate with strawberries, blueberries, blackberries, and raspberries.

The Joy of Making Panna Cotta

There’s something so special about making Panna Cotta—a dessert that feels effortlessly elegant yet is so simple to create. With just a handful of ingredients and a little patience, you can whip up a treat that’s creamy, smooth, and bursting with flavor. Whether you’re serving it at a dinner party, surprising a loved one, or just treating yourself to a little indulgence, this timeless Italian dessert always delivers.

What makes Panna Cotta truly wonderful is its versatility. You can keep it classic with vanilla and fresh berries, get creative with chocolate or coffee variations, or make it work for any diet by adjusting the ingredients. No matter how you choose to prepare it, the result is always a dessert that feels special—a little moment of sweetness to enjoy and share.

I hope this guide has given you the confidence to make the perfect Panna Cotta and inspired you to experiment with flavors, toppings, and pairings. If you give this recipe a try, I’d love to hear about it! Share your thoughts in the comments, snap a picture of your creation, and tag me on social media. Let’s keep the love for Panna Cotta alive—one creamy, dreamy bite at a time.

Happy cooking, and enjoy every spoonful! 😊

Join Now!

Love this recipe? Don’t miss out on even more delicious, healthy, and easy-to-make recipes like this Panna Cotta! By joining our email community, you’ll gain access to exclusive content, bonus recipes, and tips to make clean eating a breeze.

Enter your email & click below to subscribe and start receiving tasty inspiration right away. It only takes a minute to join our growing community of food lovers dedicated to making healthy eating delicious and fun.

Subscribe to our newsletter today to receive our exclusive printable weekly meal planner and recipe cards absolutely FREE.
Thank you for subscribing!
0 0 votes
Article Rating
guest
0 Comments
Oldest
Newest Most Voted
Inline Feedbacks
View all comments
Close
Your custom text © Copyright 2025. All rights reserved.
Close
0
Would love your thoughts, please comment.x
()
x