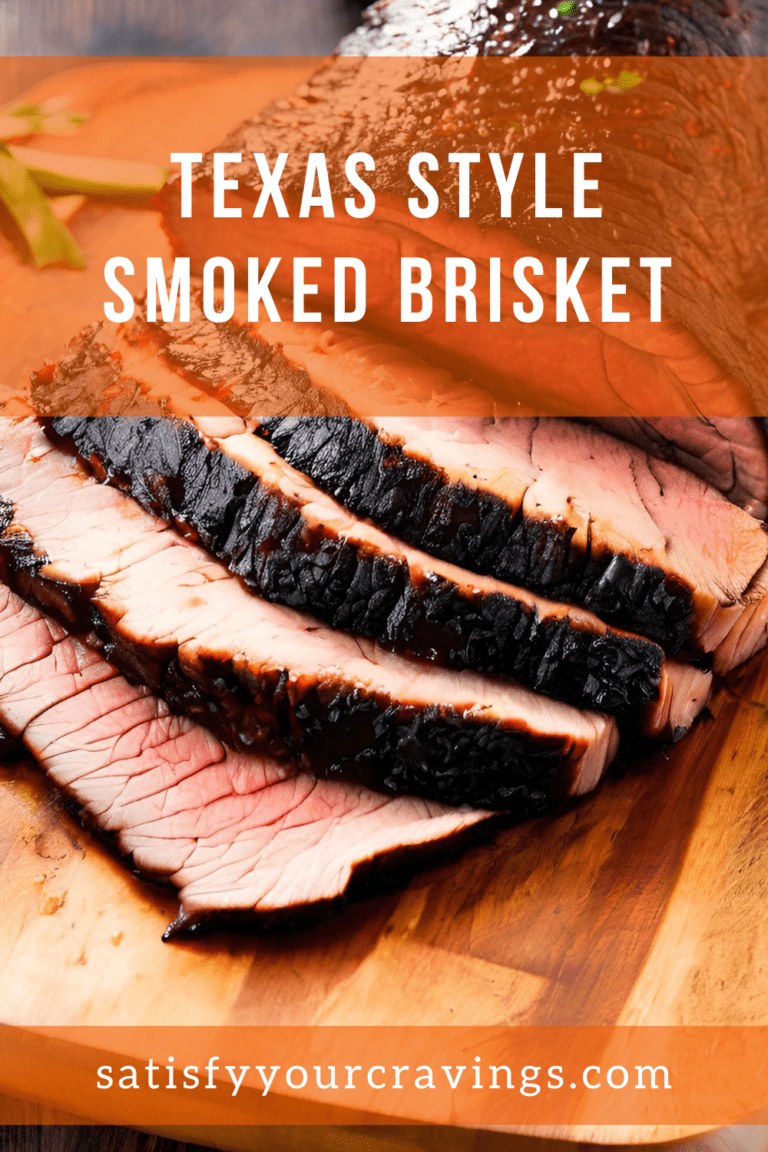
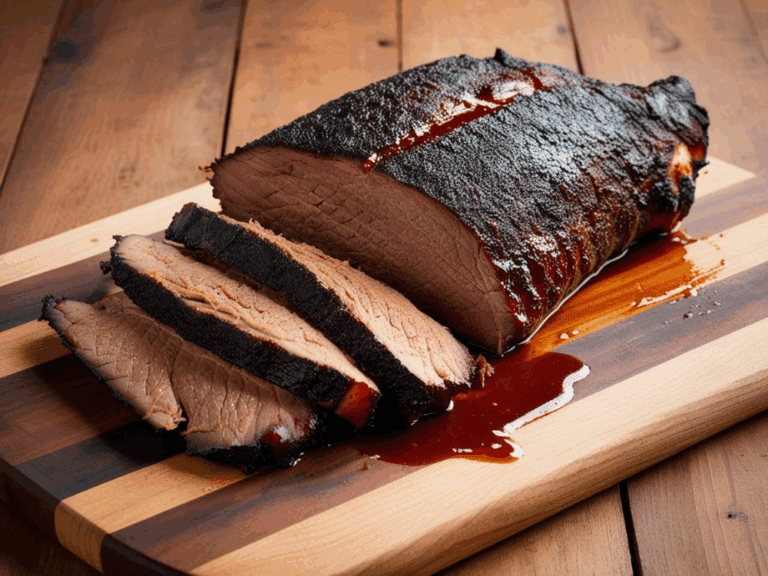
Texas-Style Smoked Brisket
These partnerships help support our content and keep our recipes free for our amazing readers. We only recommend products and brands we personally use and trust in our own kitchen. Thank you for supporting us! 💛
🔥 The Heart of Texas BBQ: Smoked Brisket Done Right
When it comes to barbecue, few dishes are as legendary — or as rewarding — as Texas-style smoked brisket. With its juicy, melt-in-your-mouth center and that deeply flavorful bark, this brisket is more than just a meal — it’s a badge of honor for any pitmaster or backyard cook. Whether you’re firing up your smoker for the first time or you’re a seasoned pro chasing the perfect bite, this recipe guides you through every step with confidence and simplicity.
Crafted with just a handful of ingredients and a whole lot of patience, this brisket recipe celebrates everything that makes Texas BBQ world-famous: low and slow cooking, smoke-kissed flavor, and a commitment to tradition. So grab your tongs, pick your wood, and let’s bring a little slice of Central Texas to your own backyard. Get ready to impress your guests — and yourself. 💪🍖
🥩 Choosing the Best Cut for Smoked Brisket
When it comes to Texas-style smoked brisket, choosing the right cut of meat is just as important as your rub, wood, or smoker setup. The star of the show is beef brisket, but not just any brisket will do. If you want that juicy, fall-apart texture with a gorgeous smoke ring and flavorful bark, it all starts at the butcher counter.
✅ Go for a Full Packer Brisket
The gold standard for Texas BBQ is the “full packer brisket.” This cut includes both the flat and the point:
The flat (or “first cut”) is leaner and slices beautifully.
The point (or “deckle”) is fattier, more marbled, and incredibly flavorful — perfect for burnt ends or juicy chopped brisket.
Most grocery stores only sell the flat because it’s easier to handle and cook in the oven. But for smoking? You want the whole brisket — fat, uneven shape, and all. That’s how pitmasters do it in Texas. Look for packer briskets that weigh 10 to 16 pounds and have a nice thick point.
🏅 USDA Choice vs. Prime
If your budget allows, choose a USDA Prime brisket. These cuts come with superior marbling, which means:
More moisture during the long cook
More flavor
More forgiving results
USDA Choice is also excellent and more affordable — just make sure the meat has visible marbling throughout the flat. Avoid “Select” grade if you’re after competition-worthy brisket.
✂️ Trim with Purpose
When buying your brisket, make sure to leave a fat cap of about ¼ inch. Some store-bought briskets are pre-trimmed — be cautious, as too much trimming leads to dryness. If you’re trimming it yourself:
Remove any hard fat that won’t render down.
Keep a good fat cap on the top side to protect the meat during smoking.
Trim the edges slightly to create a uniform shape for even cooking.
🧊 Pro Tip: Wet-Aged Brisket
Some seasoned BBQers look for wet-aged briskets, which have been vacuum-sealed and stored under refrigeration for several weeks. This aging process naturally tenderizes the meat and boosts beefy flavor. Many packers will have a “pack date” on the label — if you find one that’s been aged for 30+ days, grab it!
⏳ Brisket Smoking Time Guide
One of the biggest questions (and challenges) in smoking brisket is knowing how long it takes to cook — and the truth is, there’s no one-size-fits-all answer. Texas-style brisket is a labor of love, and the cook time depends on a variety of factors including the weight of your brisket, the temperature of your smoker, the type of smoker you’re using, and even the weather. Let’s break it all down so you can plan your smoke with confidence and avoid the dreaded BBQ panic.
📏 Rule of Thumb: 1 to 1.5 Hours Per Pound
A general guideline is to smoke brisket at 225°F (107°C) for about 1 to 1.5 hours per pound. So:
A 10 lb brisket may take 10–15 hours
A 12 lb brisket may take 12–18 hours
A 15 lb brisket may take 15–22 hours
Remember, these are just estimates. Brisket is done when it’s tender, not just when it hits a certain time.
🌡️ Internal Temperature Is King
Rather than watching the clock, watch the internal temperature. Use a good-quality meat thermometer and aim for:
Wrap time: Around 165°F (this is when the “stall” begins)
Done: Between 195°F and 205°F in the thickest part of the flat
The real test? When your probe slides in like soft butter, your brisket is ready. Don’t rush this step — the difference between 195°F and 203°F can mean the difference between chewy and perfect.
🧊 The Stall: What It Is & How to Handle It
Around 150°F–165°F, your brisket will hit what’s known as “the stall.” This is when moisture evaporating from the surface cools the meat and stalls the cooking process — sometimes for hours.
Don’t panic. This is totally normal.
You have two choices:
Power through it unwrapped (better bark, longer cook)
Wrap the brisket in butcher paper or foil at 165°F to push through the stall faster and retain moisture (commonly called the “Texas crutch”)
🌬️ Other Factors That Affect Time
Smoker consistency: If your temperature fluctuates, it can add hours to your cook.
Meat size and thickness: A thick 10 lb brisket may take longer than a thin 12 lb brisket.
Fat content: Fattier cuts take longer to break down.
Weather: Cold, wind, and humidity affect cook times. Smoking on a winter day? Plan for extra hours.
⏲️ Don’t Forget the Rest Time!
Once your brisket is done, it’s not really done.
Let it rest for at least 1 hour, wrapped in butcher paper or foil and placed in a cooler or warm oven. This resting period allows the juices to redistribute, resulting in ultra-moist, tender meat.
You can even hold brisket for 3–4 hours in a cooler wrapped in towels. Many pitmasters finish the brisket early and let it rest during the party prep.
🗓️ Brisket Planning Example:
Serving time: 6:00 PM
Brisket weight: 12 lbs
Estimated cook time: ~15 hours at 225°F
Target finish: 3:00 PM
Rest in cooler: 2–3 hours
Start time: Midnight (yes, brisket love means early mornings or overnight smokes!)
Try some of our other recipes!
🌡️ Ideal Internal Temperature for Brisket
One of the most crucial elements of smoking the perfect Texas-style brisket is knowing exactly when it’s done. Unlike quick-cooking meats like chicken or steak, brisket is a tough cut that needs low and slow heat to break down its connective tissue and fat. Hitting the right internal temperature is key to turning that tough cut into melt-in-your-mouth BBQ heaven. But here’s the thing — it’s not just about temperature. It’s also about feel.
Let’s dive into how to tell when your brisket is ready to come off the smoker — and how to avoid pulling it too early or overcooking it.
🔥 The Magic Number: 195°F to 205°F
For brisket, the sweet spot is between 195°F and 205°F in the thickest part of the flat (the leaner section of the meat). This range allows the collagen and connective tissue to fully break down, resulting in a tender, juicy, sliceable texture.
Below 190°F: The meat will likely still be tough and chewy.
195°F to 200°F: Ideal for slicing brisket. Still firm but tender.
200°F to 205°F: Extra soft and juicy — great for pulled or chopped brisket.
Above 210°F: You risk drying it out unless it’s wrapped and very moist.
Every brisket is slightly different. That’s why temperature is a guide, not a rule.
🧈 The Real Test: “Probe Tender”
The pros don’t just go by numbers — they use the “probe test.” Here’s how to do it:
Use your instant-read thermometer or a skewer
Insert it into the thickest part of the flat
If it slides in with no resistance — like butter — your brisket is done!
It’s normal for the point (fattier end) to get tender first. Focus your test on the flat because it’s leaner and more likely to dry out.
🎯 Multi-Zone Thermometer = Game-Changer
To truly master brisket, invest in a dual-probe or multi-zone meat thermometer. This lets you:
Monitor the internal temp of the brisket
Track the ambient temp of your smoker
Avoid opening the lid and losing heat
Brands like ThermoWorks, Meater, and Inkbird are BBQ community favorites.
⏱️ Trust the Process — Don’t Rush It
A brisket might stall at 150°F–165°F for hours. This is normal! Don’t crank the heat to “speed things up.” That’ll dry it out. Stay the course. Trust the timeline. And check the feel — not just the number.
Also, avoid cutting into your brisket immediately. Let it rest for at least 1 hour after smoking to let the juices redistribute.
📋 Quick Brisket Temp Guide:
| Stage | Temp Range | Notes |
|---|---|---|
| Stall | 150°F–165°F | Can last hours; consider wrapping |
| Wrap Point | ~165°F | Wrap in butcher paper or foil |
| Pull Temp | 195°F–205°F | Start probing at 195°F for doneness |
| Resting Temp | ~170°F | Ideal internal temp after resting hour |
🔥 Secrets to a Perfect Bark on Brisket
If you’ve ever admired that deep, mahogany-colored, slightly crunchy crust on a slice of Texas-style brisket — congratulations, you’ve fallen in love with the bark. The bark is more than just the outside layer of meat; it’s the flavor-packed armor created through a perfect storm of spice, smoke, fat, and time. A good bark is the hallmark of great BBQ, and nailing it can elevate your brisket from “pretty good” to pitmaster-level perfection.
Let’s break down exactly how to develop a bark so good, you’ll want to nibble on it straight off the board.
🌿 What Is Brisket Bark?
Brisket bark is the dark, flavorful crust that forms on the outside of the meat during smoking. It’s the result of:
The spice rub drying and binding to the surface
Maillard reaction (a chemical reaction between amino acids and sugars under heat)
Smoke interacting with the meat surface
Fat rendering and mingling with spices
It’s not burnt — it’s caramelized, smoky, and complex. The perfect bark is slightly crispy, deeply savory, and holds up to slicing without falling apart.
🧂 Start with a Simple, Coarse Rub
In true Texas tradition, less is more. The classic bark-making rub is a 50/50 mix of kosher salt and coarse black pepper.
Here’s why:
Salt draws moisture to the surface and helps with bark formation.
Coarse pepper adds texture and bold flavor.
The simplicity lets the smoke shine and enhances the beef’s natural richness.
Optional: Add a dash of garlic powder, onion powder, or paprika if you want a subtle twist — but avoid sugar in your rub if your goal is thick bark (it tends to burn in long cooks).
💨 Let the Rub Sweat In
After applying your rub, let the brisket rest uncovered at room temp for 30–60 minutes (or refrigerate uncovered overnight). This gives the salt time to pull moisture to the surface, which helps bind the rub to the meat and kickstarts bark formation once it hits the smoker.
🔥 Keep It Low and Slow
Bark needs time to develop. Cooking at 225°F–250°F gives the rub enough time to bond, dehydrate, and go through the Maillard reaction without scorching. High heat can make the bark rubbery or uneven.
🔥 Pro Tip: Avoid spritzing too early or too often — moisture interrupts bark formation in the early stages. Wait until the brisket hits 150°F+ before lightly spritzing (if at all).
🍖 Avoid Wrapping Too Soon
Wrapping brisket early in the cook will steam the bark, softening it and muting the texture. If you want a killer bark:
Wait to wrap until the brisket has hit at least 165°F and developed a solid outer crust.
Use pink butcher paper instead of foil if you do wrap — it allows the brisket to breathe and keeps the bark from turning soggy.
Some hardcore bark fans skip the wrap entirely (“naked brisket”), but this can increase cook time.
🧊 Dry Brine Overnight (Optional)
Want to take it a step further? Dry brine the brisket by salting it 24 hours in advance. This pulls out surface moisture, intensifies flavor, and helps the rub form a better crust. Just don’t overdo the salt when you add your rub.
🌬️ Airflow Matters
Good airflow = better bark. Make sure:
Your smoker is well-ventilated
You’re not overcrowding the cooking chamber
Drip pans or water trays aren’t too close to the brisket, which can steam it
Let that smoke circulate freely around the meat.
📸 Final Bark Check: How Do You Know It’s Good?
You know your bark is just right when:
It’s deep brown or black, not burnt
It cracks slightly when pressed but doesn’t fall apart
It sticks firmly to the meat during slicing
It tastes smoky, peppery, and rich — not bitter or charred

To Wrap or Not to Wrap? The Great Brisket Debate
One of the most fiercely debated topics in the world of brisket smoking is the question: Should you wrap your brisket? While traditional Texas pitmasters have historically let their briskets smoke “naked,” modern BBQ enthusiasts often wrap them partway through the cook. Why? Because wrapping can help bust through the infamous “stall,” preserve moisture, and speed up the cooking process.
But before you roll your brisket in foil or butcher paper, let’s break down the why, when, and how of wrapping — and help you decide what’s best for your smoking style.
🕳️ What Is the Brisket “Stall”?
During a long smoke, brisket hits a temperature plateau around 150°F to 170°F — known as “the stall.” It can last for hours. The surface moisture evaporating from the meat cools it down at the same rate your smoker is heating it, effectively halting internal temperature rise.
This is where many BBQ beginners panic.
Wrapping the brisket helps push through the stall by trapping heat and moisture, allowing the internal temperature to continue rising more quickly and evenly.
📦 The Two Main Wrapping Methods
There are two primary materials used for wrapping brisket:
✅ 1. Aluminum Foil (“The Texas Crutch”)
Pros: Speeds up cooking, keeps brisket extremely moist, retains heat well
Cons: Softens bark significantly, can “steam” the brisket, losing some texture
Best for: Beginners, colder climates, or tighter cook timelines
✅ 2. Pink Butcher Paper (Pitmaster Favorite)
Pros: Breathable, preserves bark texture, allows smoke to continue penetrating, maintains moisture
Cons: Doesn’t trap heat as aggressively as foil, may take a bit longer to cook
Best for: Intermediate to advanced smokers, bark lovers, competition-style results
📝 Pro Tip: If you use butcher paper, make sure it’s unwaxed, food-safe, and heat-resistant. Regular kraft paper won’t hold up in the smoker.
⏰ When Should You Wrap?
The ideal time to wrap brisket is when:
It hits 160°F–170°F internal temperature
It has developed a firm, dark bark
You’ve reached the stall, and cooking has slowed
Wrapping too early can prevent bark from forming, while wrapping too late may cause the meat to dry out.
It’s a delicate balance, and it gets easier with practice. If you’re unsure, wait until your bark looks rich and crusty — then wrap.
🥩 What Happens If You Don’t Wrap?
Going “naked” (unwrapped) can yield a crustier bark and smokier flavor, but it also:
Takes longer to cook (sometimes significantly)
Risks drying out the flat if not carefully managed
Requires a more consistent smoker and watchful eye
Some pitmasters swear by the naked method for flavor and authenticity. But for most backyard BBQers, wrapping is a reliable way to ensure a juicy, tender brisket with great results every time.
🔥 Hybrid Method: Wrap Late
Want the best of both worlds? Try this:
Smoke unwrapped until 170°F
Wrap in butcher paper, not foil
Finish smoking until it hits 203°F
Let rest in a cooler or oven for at least 1 hour
This gives you rich bark and juicy meat.
📦 Summary Chart: Wrap vs. Don’t Wrap
| Method | Pros | Cons |
|---|---|---|
| Foil | Fast, juicy, beginner-friendly | Softer bark, may steam meat |
| Butcher Paper | Bark-friendly, balanced moisture | Slightly longer cook, trickier to use |
| No Wrap | Best bark, pure smoke flavor | Longest cook, higher risk of dryness |
Wrapping isn’t mandatory — but it is a tool, and like any good BBQ tool, knowing when and how to use it can make all the difference.

💧 Keeping Your Brisket Moist: Tips to Prevent Dryness
Few things are more heartbreaking than investing 12+ hours smoking a brisket, only to slice into it and find it dry. Moisture is everything when it comes to the perfect Texas-style smoked brisket. While brisket is known for its rich flavor and satisfying bark, it’s also a notoriously lean and tough cut—especially the flat portion—which makes it prone to drying out if not handled properly.
Thankfully, there are several pro-level techniques to lock in juiciness and ensure your brisket is as tender and moist as it looks on your favorite BBQ YouTube channel. Let’s break them down.
🧈 1. Choose a Well-Marbled Cut
It all starts with the meat. A well-marbled brisket has intramuscular fat that keeps it moist from the inside out during the long cooking process.
👉 Look for:
USDA Prime grade if possible (more marbling)
A full packer brisket with both point and flat
A brisket that’s thicker in the flat (thin flats dry out fast)
Remember, fat equals flavor — and it acts like a built-in moisture reservoir.
✂️ 2. Trim Strategically (But Not Too Much)
While trimming off excess fat helps bark formation and smoke penetration, trimming too aggressively can expose lean areas that dry out faster.
👉 Tips:
Leave about ¼ inch of fat on the top (fat cap)
Remove only the hard fat that won’t render
Avoid exposing the flat too much
This layer of fat provides a protective barrier against dry heat.
🌬️ 3. Maintain a Consistent Smoker Temperature
One of the top causes of dry brisket is temperature fluctuation.
✅ Ideal range: 225°F to 250°F
Big temp swings or excessive opening of the smoker lid can mess with moisture retention. Use a reliable digital thermometer or smoker controller to help regulate the cook and avoid overexposure to dry heat.
💦 4. Use a Water Pan in Your Smoker
This is one of the easiest ways to combat dryness, especially if you’re smoking with indirect heat.
A water pan helps:
Add humidity to the smoke chamber
Create a more stable cooking environment
Prevent the outer layer from drying too quickly
You can also add apple juice, broth, or beer to the water pan for subtle flavor enhancement.
🌡️ 5. Wrap at the Right Time
As discussed earlier, wrapping your brisket once it hits the stall (~165°F internal temp) helps it retain its internal moisture.
Butcher paper is best if you still want a crusty bark
Foil traps more steam and gives you a juicier brisket, but at the cost of bark texture
Wrapping creates a “braising” environment that locks in juices during the second half of the cook.
🌿 6. Spritz (Optional — But Carefully)
Some pitmasters swear by the occasional spritz to prevent the outer layer from drying out and to deepen bark color.
Popular spritz combos:
Apple cider vinegar + water
Beef broth
Beer or cola
Worcestershire + water
👉 Only spritz after the bark has set (around 150°F) and do it every 45–60 minutes to avoid disturbing the rub or cooling the brisket too much.
🧊 7. Rest Before Slicing — It Matters!
Once your brisket reaches 195–205°F internal temp and is probe tender, the temptation to slice right in is real. But don’t do it.
Resting is critical for moisture retention. During rest:
Juices redistribute throughout the meat
Internal temp drops to safe slicing range
Texture improves dramatically
Wrap your brisket in butcher paper or foil, then a towel, and place it in a cooler or warm oven for at least 1 hour (up to 4 hours is even better).
🥩 8. Slice It Right
Even a moist brisket can feel dry if it’s sliced incorrectly.
✅ Always slice against the grain
✅ Cut only what you need and keep the rest wrapped
✅ Use a sharp, long slicing knife for clean cuts
Slicing with the grain makes meat fibers longer and tougher to chew — causing it to feel dry in the mouth, even if it isn’t.
🧊 Bonus Tip: Brisket Fat Injection (Advanced)
Some pros inject their brisket with a beef broth or tallow mixture before cooking to ensure deep, internal moisture. This is more common in BBQ competitions and requires special equipment, but it can give your brisket an ultra-juicy boost if you’re up for experimenting.
📝 In Summary: How to Keep Brisket Moist
| Technique | Benefit |
|---|---|
| Choose well-marbled meat | Natural fat helps retain moisture |
| Trim with care | Preserves protective fat layers |
| Use a water pan | Adds humidity to the smoker |
| Wrap mid-cook | Locks in juices during the stall |
| Spritz wisely | Prevents surface dryness |
| Rest before slicing | Juices redistribute evenly |
| Slice against the grain | Keeps mouthfeel tender |
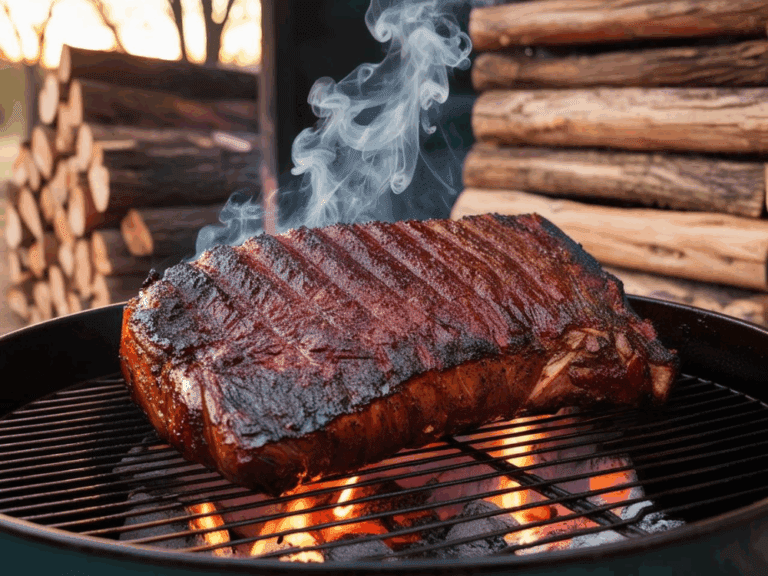
🌳 Best Wood for Brisket Flavor: Choosing the Right Smoke
When it comes to perfecting your Texas-style smoked brisket, your wood choice is just as important as your rub, smoker temperature, or cooking technique. The wood you use determines the depth of flavor, aroma, and color that infuses your meat — making it a signature element of your BBQ game.
But not all woods are created equal. From the boldness of mesquite to the subtlety of fruitwoods, each type adds its own personality to your brisket. So let’s explore the best options and combinations to create that unforgettable smoked flavor.
🪵 The Texas Classic: Post Oak (AKA Live Oak)
Post oak is the king of Texas BBQ — and for good reason.
✅ Flavor profile: Mild to medium smoke with earthy, clean notes
✅ Burn characteristics: Burns slow and clean, consistent heat
✅ Best for: Traditional Central Texas brisket
Why pitmasters love it: Post oak is subtle enough to let the beef shine, yet robust enough to give that authentic smokehouse depth. It doesn’t overpower, and it creates a beautiful reddish smoke ring on your brisket.
If you’re aiming for authentic Texas-style brisket, post oak is your go-to.
🪵 Hickory: Bold and Traditional
Hickory is another classic BBQ wood and a great option if you want a stronger smoke profile.
✅ Flavor profile: Strong, hearty, slightly sweet and nutty
✅ Burn characteristics: Long-burning and hot
✅ Best for: Brisket, pork, ribs
Caution: Too much hickory can become bitter. Use it alone only if you love strong smoke, or mix with oak or fruitwoods for balance.
🪵 Mesquite: Powerful & Distinct (Use With Care)
Mesquite is one of the most potent smoking woods. It burns hot and fast, and produces intense, bold smoke.
✅ Flavor profile: Very strong, earthy, sharp, slightly bitter
✅ Burn characteristics: Hot and fast — not ideal for long smokes
✅ Best for: Small briskets, or blending with milder woods
Tip: For brisket, don’t use mesquite alone for the whole cook — it can overpower the meat and leave an acrid taste. Instead, mix a small amount of mesquite with oak for a bolder Texas twist.
🍎 Applewood: Sweet and Mild
If you prefer a milder smoke flavor or want to smoke for guests who aren’t hardcore BBQ fans, applewood is a great choice.
✅ Flavor profile: Sweet, light, fruity
✅ Burn characteristics: Clean, cool smoke
✅ Best for: Pairing with oak for gentle smoke layering
Applewood won’t give you that deep smoky punch, but it can add a touch of sweetness and complexity when blended with stronger woods.
🌰 Pecan: Sweet, Rich, and Southern
Pecan wood is a favorite among Southern BBQ lovers for its buttery, nutty notes and balanced smoke.
✅ Flavor profile: Sweet, rich, slightly fruity
✅ Burn characteristics: Slow and even burn
✅ Best for: Brisket, turkey, and pork
Pecan adds a gourmet feel to your brisket without overpowering the meat. It pairs beautifully with oak or hickory for a unique, layered flavor.
🍒 Cherry: Gorgeous Color, Subtle Flavor
While cherrywood has a milder smoke profile, it’s beloved for the mahogany hue it gives smoked meats.
✅ Flavor profile: Mild, slightly sweet, fruity
✅ Burn characteristics: Clean and consistent
✅ Best for: Blending for color and a hint of fruitiness
If presentation matters, cherry adds visual appeal — especially when paired with a richer wood like oak or hickory.
🔥 Best Wood Combinations for Brisket
| Combo | Flavor Profile |
|---|---|
| Post Oak + Hickory | Traditional Texas with boldness |
| Oak + Apple | Balanced smoke with a hint of sweet |
| Hickory + Cherry | Deep smoke + rich mahogany color |
| Oak + Pecan | Smooth, nutty, and smoky |
| Oak + Mesquite (25%) | Strong Texas flavor with restraint |
🪓 Wood Formats: Chips, Chunks, Logs, or Pellets?
Wood chips: Best for electric or gas smokers; soak first to slow burning.
Wood chunks: Ideal for charcoal smokers or offset pits; longer burn time.
Logs (split wood): Best for large offset smokers; offers most authentic flavor.
Pellets: For pellet smokers like Traeger or Pit Boss; clean and easy with less smoke density.
✅ Pro Tip: Always use seasoned (dry) wood. Green or wet wood produces harsh, bitter smoke.
🌬️ Final Thoughts: Let the Wood Match Your Style
There’s no one “right” wood for brisket — it depends on your setup, flavor preference, and experience level. If you’re just starting out, oak is your safest and most versatile choice. From there, play with blends until you find your signature smoke flavor.
🔄 Fat Side Up or Down? The Brisket Placement Debate Explained
When it comes to smoking brisket, few topics stir up as much passionate debate as whether to cook it fat side up or fat side down. Ask a dozen pitmasters and you’re likely to get a dozen different answers — and they’ll all swear their way is the only way to get perfect results. So, which method is actually best?
The truth is: it depends. The orientation of your brisket can affect bark formation, heat protection, and even juiciness — but the “right” answer has everything to do with your smoker setup, not just tradition or preference. Let’s break it down so you can make the smartest choice for your BBQ style.
🥩 Understanding the Fat Cap
A whole packer brisket typically has:
A flat side that’s leaner and more uniform
A point side that’s fattier and more marbled
A fat cap — a thick layer of fat on one side of the brisket
This fat cap plays a major role in protecting the meat from direct heat and in retaining moisture during a long, slow cook. The question is: should that cap face up or down?
🔽 Fat Side Down: Best for Most Smokers
Recommended if:
✔️ Your heat source comes from below (common in offset, drum, or kettle smokers)
✔️ You want to protect the meat from harsh radiant heat
✔️ You’re looking for the best bark formation
Benefits:
Acts as a shield between the heat and the lean meat
Helps maintain a more even cook and prevents the flat from drying out
Keeps the bark on top crisp and undisturbed by rendered fat dripping over it
Most professional pitmasters and BBQ competitors cook fat side down for these reasons. It offers more control over heat exposure, especially on long cooks.
🔼 Fat Side Up: The Traditional Argument
Recommended if:
✔️ Your smoker has indirect heat from above or the sides
✔️ You’re cooking in a pellet grill or vertical water smoker
✔️ You believe in the “basting effect” (we’ll get to that)
Benefits (and myths):
Some believe the rendering fat “bastes” the meat as it melts and drips down
In some smoker setups, it can help insulate the top of the brisket if it’s getting too much heat
But here’s the catch:
Fat doesn’t actually penetrate the meat. Instead, it rolls off the surface — meaning the “self-basting” theory doesn’t hold up under scrutiny. If your goal is flavor and texture, bark preservation and moisture retention matter more than fat dripping.
🧪 Science Says…
Fat renders and melts, but it doesn’t soak into the meat fibers
Gravity pulls melted fat down the sides of the brisket, not into it
Smoke adhesion and bark formation occur better on the exposed lean surface
Therefore, the best way to develop bark and preserve the meat’s surface texture is to keep the fat side down, especially in a traditional horizontal smoker.
🔁 The Middle Ground: Flip It Midway?
Some home smokers flip their brisket halfway through to get the benefits of both orientations. While this might sound like a fair compromise, it comes with a risk:
Every flip disrupts bark formation
Juices can be lost when the meat is turned
Temperature consistency is harder to maintain
Unless you’re smoking in a very uneven-heat smoker or you’re working with a small brisket, frequent flipping is usually not recommended.
💡 Quick Tip Based on Smoker Type:
| Smoker Type | Recommended Fat Side |
|---|---|
| Offset Smoker (wood/charcoal) | Down |
| Pellet Grill (Traeger, Pit Boss) | Up or Down (slight indirect heat) |
| Kamado Grill (Big Green Egg) | Down |
| Drum Smoker (Weber Smokey Mountain) | Down |
| Vertical Water Smoker | Up |
| Electric Smoker (Masterbuilt) | Up |
🎯 Bottom Line: What’s Best for You?
Fat Side Down is best for strong direct heat from below
Fat Side Up can work in very gentle, indirect heat setups
If you’re unsure, fat side down is the safer bet — especially if you care about bark
Whatever method you choose, consistency is more important than placement. If your temps stay steady, your wrap timing is right, and you let it rest properly, you’re already ahead of the game.
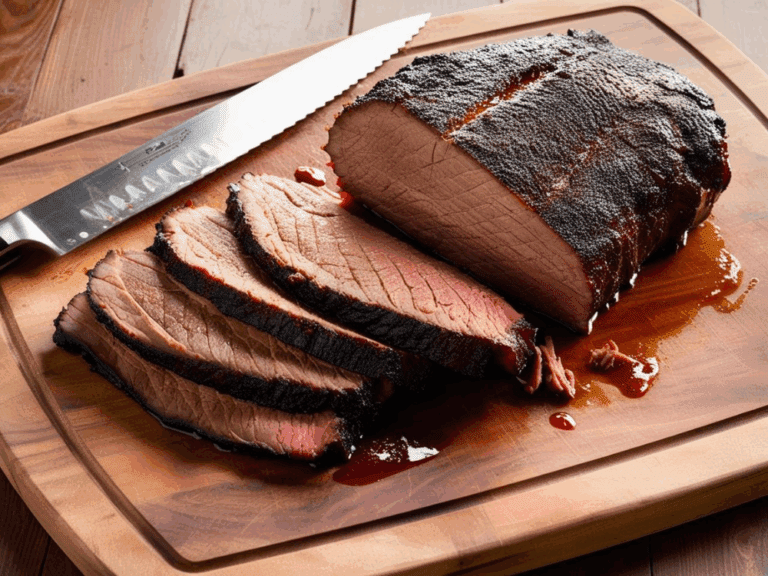
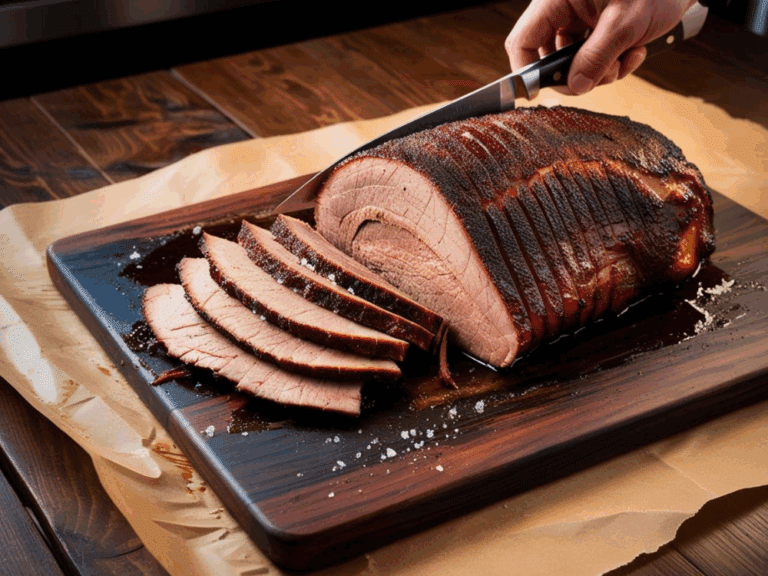
🔪 How to Slice Brisket Like a Pro
You’ve trimmed it, seasoned it, smoked it low and slow for hours, rested it to perfection — now it’s time for the final and most underrated step of the brisket journey: slicing. Cut it the wrong way, and even the juiciest, most flavorful brisket can come out tough and stringy. Cut it the right way, and your guests will rave about how it melts in their mouth like Texas BBQ magic. 🪄
In this section, you’ll learn exactly how to slice a brisket to maximize tenderness, maintain presentation, and serve up that perfect bite every time.
📏 Why Slicing Matters
Brisket is composed of muscle fibers that run in a specific direction — known as the grain. If you slice with the grain, you’re serving long, chewy muscle strands. But when you slice against the grain, you shorten those fibers, making the meat easier to bite and chew.
The catch? A whole brisket actually contains two muscles with different grain directions:
The flat – leaner, runs in one direction
The point – fattier, grain runs differently and often at an angle to the flat
That’s why slicing brisket properly takes a little know-how and technique.
🧊 Step 1: Let It Rest (Again)
Before slicing, your brisket should have rested for at least 1 hour, ideally wrapped in butcher paper or foil inside a cooler. This allows juices to redistribute and settle, preventing them from spilling out and drying the meat once you cut into it.
If you’re slicing straight from the smoker — stop! Resting is essential.
🔎 Step 2: Identify the Flat and the Point
When unwrapping your rested brisket:
The flat is long, rectangular, and lean with even thickness.
The point is thicker, more marbled, and often tapers off into a rounder end.
You’ll see a natural seam of fat that separates them. Use this to your advantage when slicing.
🔄 Step 3: Find the Grain
Before making your first cut, look at the muscle fibers. The grain should be clearly visible, especially in the flat.
👉 Pro tip: When seasoning your raw brisket, make a small cut across the grain on one corner as a guide for slicing later. Once it’s smoked, that grain can be harder to spot!
🔪 Step 4: Slice the Flat — Against the Grain
Start with the flat (it’s usually on the thinner end). Use a long, sharp slicing knife — preferably a brisket or slicing knife with a Granton edge (those dimples help reduce drag).
Slice across the grain into ¼-inch thick slices (thinner for leaner briskets, thicker if it’s ultra-tender).
Keep your slices even and smooth — no sawing motions!
Try to cut on a slight bias (diagonal) for the most attractive presentation.
🍖 Step 5: Separate the Point
Once you reach the fattier, rounded end of the brisket, it’s time to slice the point.
Because the grain changes direction, it’s easiest to:
Cut the point away from the flat along the fat seam
Rotate the point about 90 degrees
Slice against the grain of the point (often more diagonal)
These slices will be thicker, juicier, and packed with smoky richness — perfect for chopped brisket or burnt ends if you want to go that route.
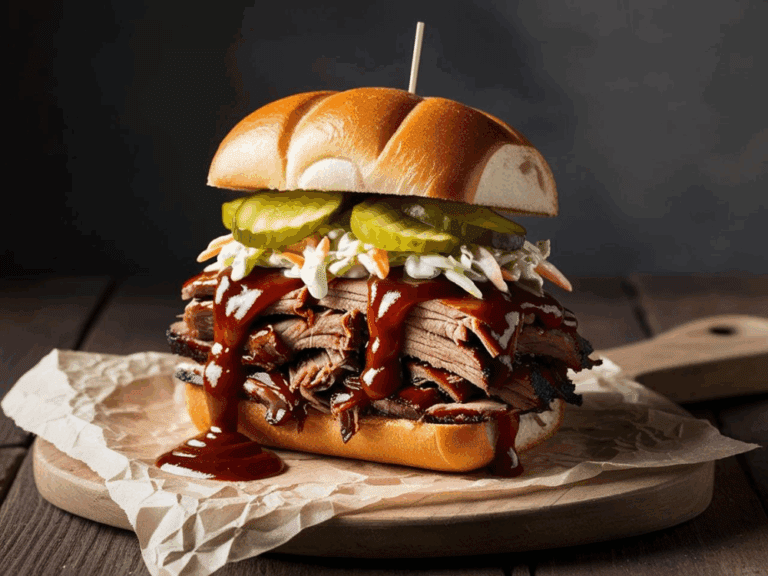
🥪 Optional: Turn the Ends into Burnt Ends
Burnt ends are BBQ gold. Take the cubed pieces from the point, toss them in sauce, and throw them back into the smoker for 30–45 minutes until caramelized.
This creates rich, sticky, smoky bites that people will fight over.
🧽 Step 6: Keep It Moist While Slicing
As you’re slicing:
Keep the rest of the brisket wrapped and warm until ready
Use a cutting board with a groove to catch juices
Baste slices lightly with leftover juices or rendered tallow (optional but magical)
📦 Storing Sliced Brisket
Not serving all at once? Layer slices in a foil pan or vacuum-seal bag with a bit of broth or rendered fat to keep it moist for reheating. More on that in the next section 😉
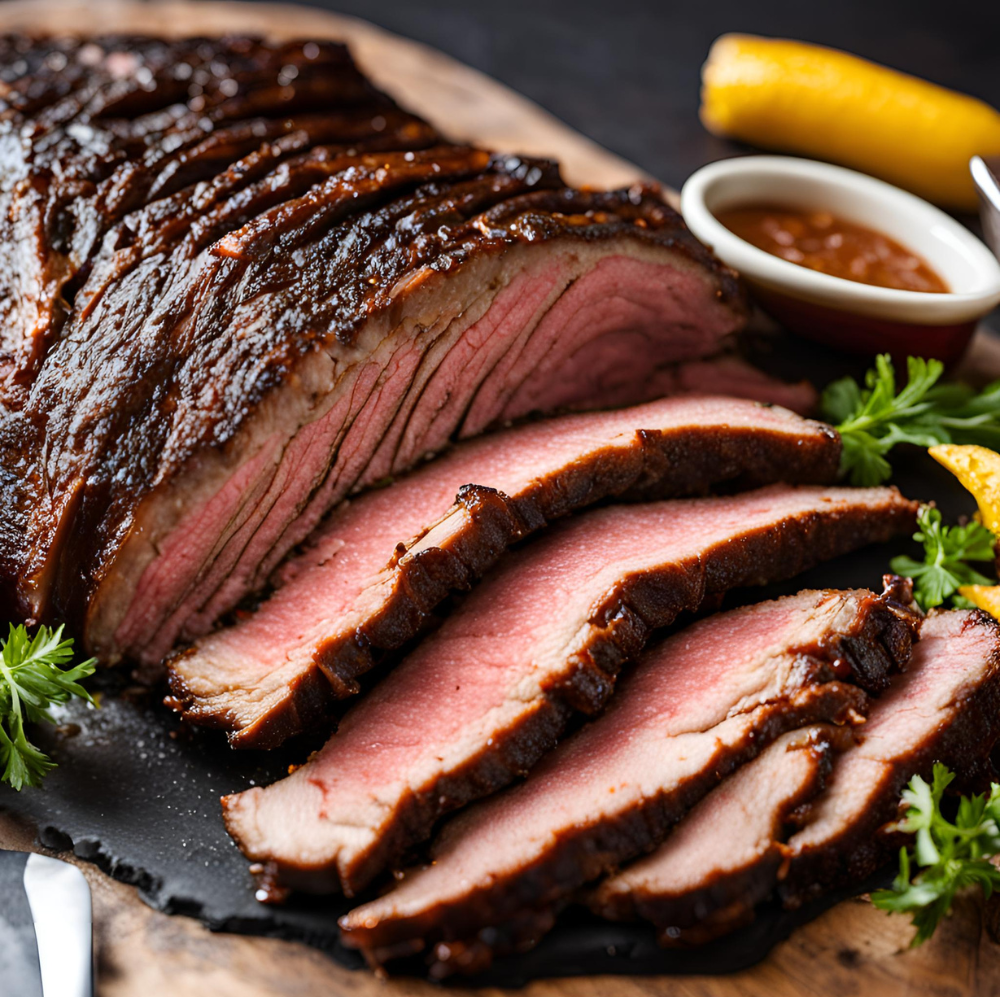
🧂 Final Presentation Tips:
Fan out slices slightly to showcase the smoke ring
Serve flat and point slices separately so guests can choose lean or fatty
Pair with pickles, onions, BBQ sauce, and toast for that classic Texas plate
📋 Quick Recap: How to Slice Brisket Like a Pro
| Step | What to Do |
|---|---|
| 1 | Rest the brisket for at least 1 hour |
| 2 | Identify flat and point sections |
| 3 | Slice the flat against the grain |
| 4 | Separate the point and rotate it |
| 5 | Slice the point against its grain |
| 6 | Keep everything warm and moist as you slice |
Lemon Chia Seed Muffins
Chocolate-Dipped Oranges with Sea Salt
Lucky Leprechaun Frozen Yogurt Bark
♻️ How to Store & Reheat Brisket Leftovers Without Losing Moisture or Flavor
After spending hours crafting the perfect Texas-style smoked brisket, the last thing you want is for your hard work to go to waste when it comes to leftovers. Whether you’re meal-prepping, saving brisket from a cookout, or simply can’t finish a 12-pound beauty in one sitting (totally understandable!), proper storage and reheating are key to preserving that juicy, smoky goodness.
In this section, we’ll walk you through the best ways to store, freeze, and reheat leftover brisket — without drying it out or losing that delicious flavor you worked so hard to build.
🧊 How to Store Leftover Brisket in the Refrigerator
Leftover brisket can stay tender and flavorful for up to 4 days in the fridge if stored correctly.
✅ Best Practices:
Slice only what you plan to eat. Keep the rest of the brisket whole or in larger pieces to preserve moisture.
Wrap it tightly in butcher paper or foil, or store it in an airtight container.
Add a splash of moisture like beef broth, leftover drippings, or even a bit of BBQ sauce before sealing. This helps prevent it from drying out during storage.
👉 Storage Tip: If you’ve already sliced the brisket, stack the slices in a foil pan with a little broth, and cover tightly with foil.
❄️ How to Freeze Brisket (Yes, It Freezes Beautifully)
If you have more leftovers than you’ll eat in a few days, freezing is a great option. Brisket freezes well and can be just as tasty when reheated with a little care.
✅ Freezing Instructions:
Let the brisket cool completely.
Vacuum seal it, or wrap it tightly in plastic wrap and then foil.
For sliced brisket, layer slices with parchment paper for easy portioning.
Label and date your package.
Freeze for up to 2–3 months for best quality.
👉 Optional: Freeze with a bit of jus or broth to maintain moisture during thawing.
🔥 How to Reheat Brisket Without Drying It Out
This is where most people go wrong. Reheating brisket requires a gentle touch — high heat will zap the moisture right out of it. Instead, reheat it low and slow, just like you cooked it.
🔁 Best Reheating Methods:
1. Oven (Best for Whole or Sliced Brisket)
Preheat oven to 250°F
Place brisket (sliced or whole) in a baking dish
Add a splash of broth or pan drippings
Cover tightly with foil
Heat for 20–30 minutes (longer if whole), until internal temp reaches 155–160°F
✅ Bonus: Add BBQ sauce for extra moisture and flavor at the end.
2. Sous Vide (Best for Sliced Vacuum-Sealed Brisket)
Heat water bath to 165°F
Place vacuum-sealed brisket in the bath
Heat for 1–2 hours, depending on thickness
✅ This method preserves moisture perfectly — ideal if you vacuum-sealed leftovers.
3. Stovetop Steam (Great for Quick Reheating)
Place sliced brisket in a steamer basket over simmering water
Steam for 5–10 minutes, covered, until heated through
✅ Gentle, fast, and great for small portions.
4. Microwave (Quick but Risky)
Use only if you’re in a rush
Place brisket in a microwave-safe dish
Add broth or sauce and cover with a damp paper towel
Heat in 30-second bursts, flipping between rounds
⚠️ Caution: Microwaving tends to dry out brisket quickly. Use sparingly.
🍽️ Creative Ways to Use Leftover Brisket
Don’t just reheat — repurpose!
Brisket Tacos: Shred, sauté with onions, and serve in tortillas
Brisket Grilled Cheese: Layer with sharp cheddar on sourdough
Brisket Hash: Mix with potatoes, eggs, and peppers
BBQ Brisket Nachos: Top tortilla chips with chopped brisket, beans, and cheese
Brisket Chili: Use chopped brisket in place of ground beef
🚫 Common Mistakes to Avoid
| Mistake | Why It’s a Problem | Fix |
|---|---|---|
| Slicing all brisket at once | Speeds up drying | Slice only as needed |
| Storing without moisture | Leads to dry, tough texture | Always add broth or drippings before sealing |
| Reheating at high temps | Zaps juices and flavor | Use low and slow methods |
| Microwaving uncovered | Dries out meat quickly | Always cover and use moisture |
📋 Summary: Brisket Leftovers 101
Refrigerate: Up to 4 days (tightly wrapped + moisture)
Freeze: Up to 3 months (vacuum-sealed or double-wrapped)
Reheat low and slow: Oven or sous vide is best
Get creative: Use in tacos, sandwiches, nachos, and more
These partnerships help support our content and keep our recipes free for our amazing readers. We only recommend products and brands we personally use and trust in our own kitchen. Thank you for supporting us! 💛
🔧 Top 5 Must-Have Tools for Perfect Texas-Style Smoked Brisket
Crafting the perfect Texas-style smoked brisket requires more than just quality meat and patience—it demands the right tools to ensure precision, flavor, and presentation. Here’s our curated list of the top five essential tools every brisket enthusiast should have in their arsenal:
1. Wireless Meat Thermometer
Achieving the ideal internal temperature is crucial for a tender and juicy brisket. A reliable wireless meat thermometer allows you to monitor your brisket’s temperature without constantly opening the smoker, ensuring consistent cooking.
Recommended Product: ThermoPro TP829 1000ft Wireless Meat Thermometer
2. Brisket Slicing Knife
A sharp, long slicing knife ensures clean cuts, preserving the brisket’s juiciness and presentation. The right knife glides through the meat, reducing tearing and retaining moisture.
Recommended Product: SliceX 12″ Brisket Slicing Knife
3. Pink Butcher Paper
Wrapping your brisket in pink butcher paper helps retain moisture while allowing the meat to breathe, resulting in a tender brisket with a flavorful bark.
Recommended Product: Pink Butcher BBQ Paper Roll (24 Inch by 150 Feet)
4. Large Cutting Board
A spacious cutting board provides ample room for slicing and serving your brisket, ensuring cleanliness and ease during the process.
Recommended Product: GREENER CHEF 30 Inch 3XL Extra Large Bamboo Cutting Board
5. BBQ Rub Shaker
Evenly distributing your rub is essential for consistent flavor. A dedicated BBQ rub shaker ensures your seasoning is applied uniformly across the brisket.
Recommended Product: CUSINIUM 10 oz Seasonings Spice Shakers
Why We Recommend These Tools:
Precision: The wireless thermometer ensures your brisket reaches the perfect temperature without guesswork.
Efficiency: A sharp slicing knife and large cutting board make the slicing process smooth and efficient.
Flavor: Using pink butcher paper and a rub shaker enhances the brisket’s taste and texture.
Investing in these tools not only elevates your brisket game but also enhances your overall BBQ experience.
Note: The product links provided are for convenience and reference. Always ensure the products meet your specific needs and preferences before purchasing.
Texas Style Smoked Brisket
Equipment
- Smoker or Grill: A quality smoker (offset, pellet, or kamado-style) for maintaining low and slow heat over several hours.
- Meat Thermometer: A digital or wireless thermometer to monitor internal temperature accurately without opening the smoker too often.
- Sharp Brisket Knife: A long slicing knife (preferably 12 inches) for clean, even slices without tearing the meat.
- Cutting Board: A large, sturdy cutting board (preferably with juice grooves) to handle the size and moisture of a full brisket.
- Pink Butcher Paper or Foil: For wrapping the brisket during the stall phase to retain moisture while preserving bark texture.
- Charcoal or Wood Chips/Chunks: For fuel and smoke — post oak is the Texas favorite, but hickory, pecan, or fruitwood can be blended.
- Rub Shaker or Small Mixing Bowl: To apply or mix your seasoning blend evenly across the brisket surface.
- Tongs and BBQ Gloves: For safe handling and transferring of the hot brisket during and after smoking.
- Aluminum Pan or Drip Tray: To catch drippings and keep the smoker cleaner (optional, but helpful).
- Cooler or Warming Oven: For resting the brisket after cooking, allowing juices to redistribute for the best texture.
Ingredients
- 1 Whole beef brisket (10–12 pounds)
- ¼ Cup Kosher salt
- ¼ Cup Coarse black pepper
- 2 Tbsp Garlic powder
- 2 Tbsp Onion powder
- 2 Tbsp Paprika
- 1 Tbsp Cayenne pepper
- ¼ Cup Worcestershire sauce
- ¼ Cup Apple cider vinegar
- 1 Cup Beef Broth
- Wood chips Oak or hickory for authentic Texas flavor
Instructions
Preparation:
- Start by trimming the brisket, leaving about 1/4 inch of fat cap for flavor and moisture retention.
- In a small bowl, mix the kosher salt, black pepper, garlic powder, onion powder, paprika, and cayenne pepper to create the dry rub.
Seasoning:
- Rub the brisket generously with Worcestershire sauce and apple cider vinegar.
- Apply the dry rub evenly over the entire brisket, making sure to cover all sides. Let it sit at room temperature for about an hour.
Smoking Setup:
- Preheat your smoker to 225°F. Use oak or hickory wood chips for an authentic Texas flavor.
- Place a water pan in the smoker to maintain moisture and temperature stability.
Smoking:
- Place the brisket fat side up on the smoker grate. Close the lid and smoke for about 6 hours, maintaining a steady temperature of 225°F.
- During smoking, spritz the brisket every hour with a mixture of apple cider vinegar and beef broth to keep it moist.
Wrapping:
- After 6 hours, or when the internal temperature reaches around 165°F, wrap the brisket tightly in butcher paper or aluminum foil. This process, known as the "Texas Crutch," helps to retain moisture and speed up the cooking process.
Final Smoking:
- Return the wrapped brisket to the smoker and continue cooking until the internal temperature reaches 200-205°F. This usually takes another 6–8 hours.
- Use a meat thermometer to check the doneness. The probe should slide in with little to no resistance, indicating a tender brisket.
Resting:
- Remove the brisket from the smoker and let it rest, still wrapped, in a cooler or warm oven for at least 1 hour. This allows the juices to redistribute, ensuring a moist and flavorful result.
Serving:
- Unwrap the brisket and slice against the grain into 1/4 inch thick slices. Serve with your favorite barbecue sides and enjoy the succulent, smoky goodness!
❤️ Bringing People Together, One Slice at a Time
There’s something truly special about a well-smoked Texas-style brisket — it’s more than just a meal; it’s a ritual, a celebration, and a labor of love. From the first moment you fire up your smoker to that final tender slice, this recipe invites you to slow down, savor the process, and share something deeply satisfying with the people you love.
Whether you’re cooking for a backyard BBQ, a holiday gathering, or just because you’re craving that authentic smoky flavor, this brisket delivers every time. So take pride in your craft, embrace the journey, and know that every smoky bite is worth the wait.
Happy smoking, friend — and don’t forget to save those leftovers for tacos tomorrow! 🌮🔥
Join Now!
❤️ Love this recipe? Don’t miss out on even more delicious, healthy, and easy-to-make recipes like this Texas-style brisket!
🍽️ By joining our email community, you’ll gain exclusive access to bonus content, printable recipes, and clean eating tips that make healthy living a breeze.
📬 Enter your email & click below to subscribe — it only takes a minute to join our growing community of food lovers who believe healthy should still taste amazing!
These partnerships help support our content and keep our recipes free for our amazing readers. We only recommend products and brands we personally use and trust in our own kitchen. Thank you for supporting us! 💛