Buttermilk Biscuits
Disclosure: This post may contain affiliate links. As an Amazon Associate, Satisfy Your Cravings earns from qualifying purchases. We may also participate in additional affiliate programs, accept sponsorships, or use other monetization methods throughout our site.
These partnerships help support our content and keep our recipes free for our amazing readers. We only recommend products and brands we personally use and trust in our own kitchen. Thank you for supporting us! 💛
The Best Buttermilk Biscuits You’ll Ever Make 🧈✨
There’s just something magical about a warm, flaky buttermilk biscuit fresh from the oven. Crisp on the outside, pillowy on the inside, and rich with buttery flavor — it’s the kind of recipe that brings people together and turns any meal into a moment of comfort. Whether you’re serving them with breakfast, pairing them with gravy, or using them to sop up a cozy bowl of soup, these classic Southern-style biscuits are a must-have in your baking rotation.
The best part? They’re surprisingly simple to make with just a handful of pantry staples and a few pro tips for sky-high results. In this post, I’ll show you exactly how to master the perfect buttermilk biscuit from scratch — with flaky layers, golden tops, and melt-in-your-mouth texture. Let’s bake some homemade joy, one buttery biscuit at a time 🥰🍽️
🧁 What’s the Secret to Fluffy Buttermilk Biscuits?
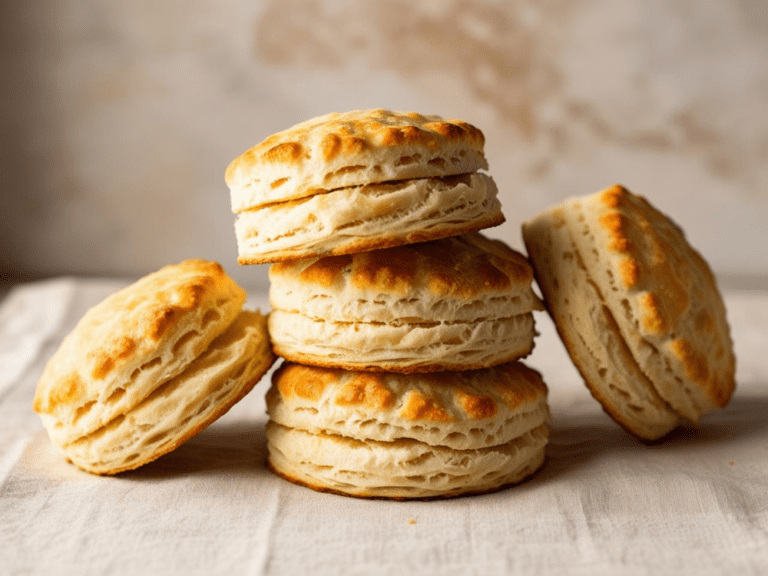
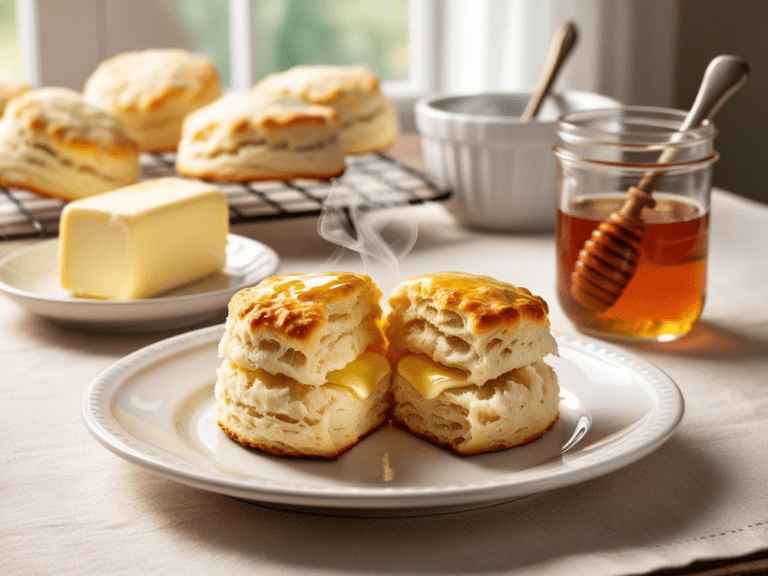
If you’ve ever wondered how to achieve those mile-high, pillowy soft buttermilk biscuits with buttery layers and a golden crust — you’re not alone. Fluffy biscuits are a southern classic, and they’re easier to master than you think when you understand the key techniques. Here’s everything you need to know:
1. Use COLD Ingredients — Especially the Fat 
Cold butter (or shortening) is non-negotiable. The colder the fat, the more it resists melting when mixed with the flour. This creates pockets of fat that, when exposed to the oven’s heat, steam up and puff your biscuit layers.
Pro Tip:
Cube your butter and pop it in the freezer for 10–15 minutes before adding it to the flour.
2. Don’t Overwork the Dough 
Overmixing or kneading biscuit dough too much develops the gluten in the flour, making your biscuits tough and dense instead of tender and airy. Mix just until the dough comes together, and then stop.
The goal: A slightly shaggy, soft dough that holds its shape without being overly smooth.
3. Layer the Dough Like a Pro (Lamination Technique) 
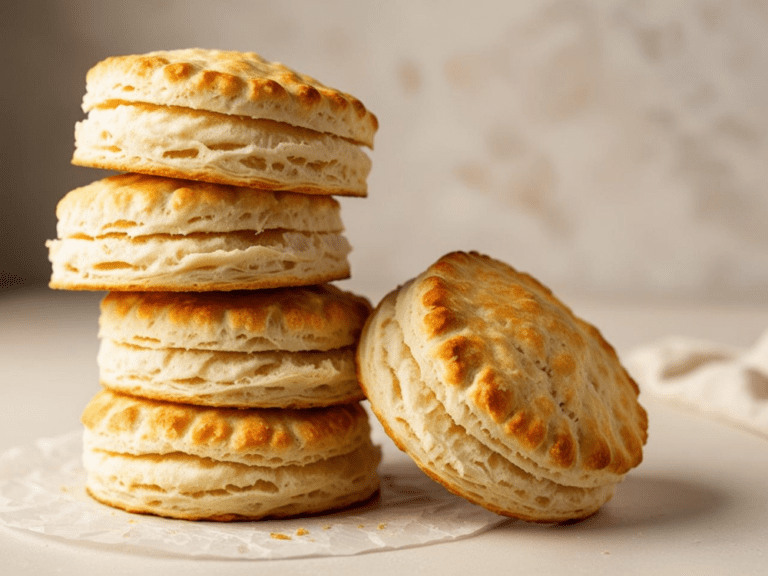
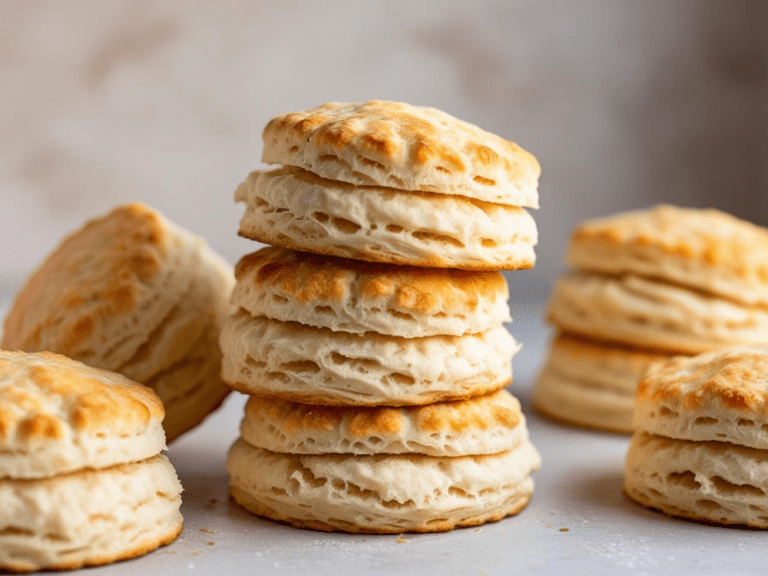
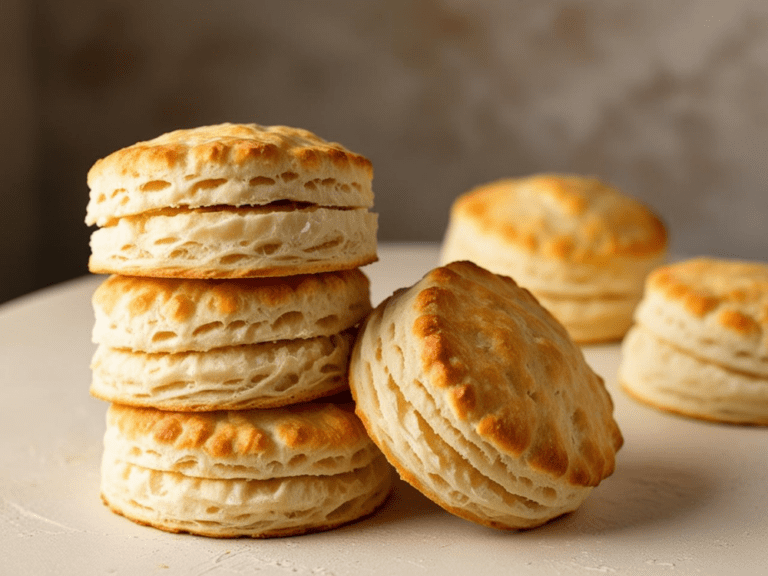
This is the magic step! After mixing the dough, gently flatten it out and fold it over itself (like folding a letter) 2 to 3 times. Then gently pat it out again and cut your biscuits. This creates visible layers and incredible flakiness and rise.
4. Don’t Twist the Biscuit Cutter 
When cutting out your biscuits, press the cutter straight down and pull straight up. Twisting the cutter seals the edges, preventing the biscuits from rising as tall and fluffy as they should.
5. Bake at a High Temperature (425–450°F)
A hot oven is key for that dramatic puff and golden crust. The high temperature quickly turns the cold butter into steam, causing the biscuits to lift and expand.
Bonus Tip: Place the biscuits close together on the baking sheet. This helps them support each other as they rise, resulting in taller biscuits.
6. Use Real Buttermilk for Tang and Texture 
Buttermilk isn’t just for flavor — the acidity also reacts with baking soda to create carbon dioxide, giving your biscuits a lift. Plus, it contributes to the soft, tender crumb that defines a good biscuit.
No buttermilk? Make your own: Mix 1 cup of milk with 1 tablespoon of lemon juice or vinegar. Let it sit for 10 minutes before using.
7. Cut Your Biscuits Thick 
Rolling your dough too thin is one of the most common biscuit mistakes. Aim for at least ¾ to 1 inch thick before cutting. Thicker dough = fluffier biscuits.
Fluffy buttermilk biscuits are all about technique, not just ingredients. Keep things cold, be gentle, fold your dough, and don’t forget to bake hot. With a little love and attention to detail, you’ll have sky-high biscuits every single time!
🥛 Can I Make Buttermilk Biscuits Without Buttermilk?
Yes, you absolutely can make tender, flaky buttermilk biscuits without actual buttermilk — and they’ll still taste amazing! Whether you ran out or simply don’t keep it on hand, there are simple and effective substitutes you can use that deliver nearly identical results in flavor, rise, and texture.
Here’s everything you need to know about how to make buttermilk biscuits — even when there’s no buttermilk in your fridge!
Why Is Buttermilk Used in Biscuit Recipes?
Before we dive into substitutions, it helps to understand what buttermilk does in biscuit recipes. Buttermilk brings:
-
Tangy flavor that balances the richness of butter
-
Acidity that reacts with baking soda or baking powder to create rise
-
Tenderness by breaking down gluten for a softer crumb
So, when substituting buttermilk, we want something that checks those boxes: acidity, creaminess, and moisture.
The Best Buttermilk Substitutes for Biscuits
1. Milk + Lemon Juice or Vinegar (Best DIY Substitute)
This classic combo mimics the acidity of buttermilk perfectly.
How to Make It:
-
Add 1 tablespoon of lemon juice or white vinegar to a measuring cup.
-
Fill with milk (preferably whole milk) to reach 1 cup.
-
Stir and let it sit for 5–10 minutes to curdle slightly.
Tip: This is the best option if you want to keep your biscuits tangy and fluffy!
2. Plain Yogurt or Greek Yogurt + Milk
Yogurt adds tang and creaminess, which is ideal for biscuits.
How to Use It:
-
Mix ½ cup of plain yogurt with ½ cup of milk to equal 1 cup of buttermilk substitute.
Great for adding extra tenderness and moisture!
3. Sour Cream + Water or Milk
Sour cream is another tangy, creamy substitute that works beautifully.
How to Use It:
-
Mix ½ cup sour cream with ½ cup milk or water.
Perfect for richer, softer biscuits with a slight tang.
4. Cream of Tartar + Milk
If you don’t want to use lemon or vinegar, this pantry-friendly solution works in a pinch.
How to Use It:
-
Add 1½ teaspoons of cream of tartar to 1 cup of milk.
-
Stir and use just like buttermilk.
What Not to Use as a Substitute
-
Straight milk: It lacks acidity, so your biscuits may not rise properly or have the same tangy flavor.
-
Sweetened or flavored yogurts: These can throw off the taste and moisture balance.
Pro Biscuit Tip: Adjust Leavening if Needed
If you’re using a buttermilk substitute, make sure your recipe contains baking soda to help activate the acid. No baking soda? Then double-check that there’s enough baking powder (which already contains an acid) to help with lift.
So, can you make buttermilk biscuits without buttermilk? 100% YES. Whether you use lemon juice, yogurt, or sour cream, your biscuits can still turn out soft, flaky, and full of flavor. Don’t let missing ingredients stop you from baking up a batch of warm, golden perfection
Try some of our other recipes!
Spring Greens & Edamame Salad with Miso Dressing
Clean Cuisine / Dinner Delicacies 91
0
Roasted Cauliflower and Chickpea Wraps
Clean Cuisine 267
0
Spring Detox Salad with Lemon Vinaigrette
Clean Cuisine / Dinner Delicacies 138
0
🥐 Why Are My Biscuits Not Flaky?
If your biscuits are turning out dense, flat, or cakey instead of light and flaky with those dreamy layers, don’t worry — you’re not alone. Biscuit flakiness is part technique, part ingredients, and part baking science. Let’s break down all the possible reasons your biscuits aren’t achieving those perfectly layered, buttery heights — and how to fix them. 👇✨
1. Your Butter (or Fat) Was Too Warm 🧈🔥
Flaky biscuits rely on cold butter or shortening to create pockets of steam as they bake. If your fat is too warm when you mix it into the flour, it melts too early and blends in instead of forming distinct layers.
💡 Solution:
-
Use cold butter straight from the fridge (or freeze it for 10–15 minutes before grating or cubing).
-
Chill the dough before baking if it gets too warm while shaping.
2. You Overmixed the Dough 🙅♀️
One of the most common mistakes! Overmixing develops the gluten in the flour, resulting in tough, dense biscuits rather than tender and flaky ones.
💡 Solution:
-
Mix just until the dough comes together. It should look slightly shaggy — not smooth like bread dough.
-
Handle the dough as little as possible, and use light hands when kneading or shaping.
3. You Didn’t Layer or Fold the Dough ✉️
Flakiness = layers. The secret to creating those beautiful, pull-apart biscuit layers is laminating the dough — a process similar to making puff pastry, but simpler.
💡 Solution:
-
After mixing, pat the dough into a rectangle, fold it over like a letter, and repeat 2–3 times before cutting.
-
This creates visible layers and builds structure for rise and flakiness.
4. You Twisted the Biscuit Cutter 🔄❌
It might seem harmless, but twisting your biscuit cutter can seal the edges, preventing them from rising properly in the oven.
💡 Solution:
-
Always press your cutter straight down and lift it straight up.
-
If you don’t have a round cutter, use a sharp knife or even a floured glass — no twisting!
5. Your Oven Wasn’t Hot Enough 🔥
Biscuits need a blast of high heat to activate the baking powder and puff up quickly. A lukewarm oven won’t cut it.
💡 Solution:
-
Preheat your oven fully to 425–450°F (218–232°C) before your biscuits go in.
-
A hot oven creates immediate steam from the cold butter, which lifts and separates the dough layers.
6. Your Dough Was Rolled Too Thin 📏
If your biscuit dough is too flat, you won’t get much rise — and flakiness will suffer.
💡 Solution:
-
Roll or pat your dough to at least ¾ inch to 1 inch thick before cutting.
-
Thicker dough = more space for the steam to lift layers!
7. You Used the Wrong Flour 🌾
High-protein flour (like bread flour) forms more gluten, which can lead to tougher biscuits.
💡 Solution:
-
Use all-purpose flour or a low-protein flour like White Lily (a Southern favorite for biscuits).
-
Avoid bread flour, and don’t use whole wheat unless specifically called for in the recipe.
8. You Didn’t Use Enough Leavening 🧪
Biscuits rely on baking powder (and sometimes baking soda) to rise. If your leavening is expired or you didn’t use enough, your biscuits will be flat and dense.
💡 Solution:
-
Always check the freshness of your baking powder (it should fizz in water).
-
Follow the recipe exactly for leavening measurements — too little or too much can ruin the texture.
Flaky Biscuits Are a Combo of Cold + Technique
If you’ve ever wondered “Why aren’t my biscuits flaky?” — now you know! The key is cold ingredients, gentle handling, proper folding, and a hot oven. With a little practice, you’ll be pulling apart those buttery, sky-high layers like a biscuit pro 🧈💖
❄️ Can I Freeze Biscuit Dough?
Yes, you can 100% freeze biscuit dough — and you should if you want ultra-flaky, fresh-from-the-oven biscuits on demand! Whether you’re meal prepping for the week, making a double batch for the holidays, or simply want to avoid waste, freezing biscuit dough is a fantastic time-saver that preserves texture, flavor, and rise.
Let’s break down exactly how to freeze, store, and bake biscuit dough the right way 👇
🧊 Why Freeze Biscuit Dough?
Freezing biscuit dough locks in the butter’s coldness, which is actually ideal for flaky results. When baked from frozen, the butter releases steam more slowly, creating tender, sky-high layers. Plus, it gives you fresh biscuits on demand — no mixing bowls needed.
🥶 How to Freeze Biscuit Dough (Step-by-Step)
✅ Step 1: Prepare the Dough
Make your biscuit dough according to the recipe, including cutting out the biscuits with your favorite round cutter.
✅ Step 2: Flash Freeze
Place the unbaked biscuits on a parchment-lined baking sheet in a single layer, making sure they don’t touch. Freeze them for 1–2 hours, or until completely solid. This prevents them from sticking together later.
✅ Step 3: Store in a Freezer Bag
Once frozen, transfer the biscuits to a large freezer-safe zip-top bag or airtight container. Label it with the date and bake instructions.
-
Storage Time: Up to 2–3 months for best flavor and texture.
-
Optional: Separate layers with parchment paper if stacking.
🍳 How to Bake Frozen Biscuit Dough
You don’t need to thaw the biscuits first — they bake beautifully from frozen!
🔥 Baking Instructions:
-
Preheat your oven to 425°F (218°C).
-
Place frozen biscuits on a baking sheet, about 1 inch apart.
-
Brush the tops with a little milk or melted butter (optional).
-
Bake for 18–22 minutes, or until golden brown and fully cooked through.
-
The tops should be crisp, and the centers tender and fluffy!
❓Can I Freeze Biscuit Dough After Shaping Into a Log or Disc?
Yes! If you’re using a slice-and-bake style biscuit recipe or prefer to cut after thawing, you can freeze the whole dough disc or log.
Instructions:
-
Wrap the disc tightly in plastic wrap and then foil.
-
Freeze up to 2 months.
-
Let thaw in the fridge overnight before cutting and baking.
However, pre-cut biscuits freeze and bake more reliably with consistent height and shape.
💡 Bonus Tips for Success
-
Use quality freezer bags to prevent freezer burn.
-
Don’t skip flash-freezing — it keeps the shapes intact and prevents clumping.
-
Always label your bags with the date + instructions (future you will thank you!).
👩🍳 Pro Tip: Freeze Baked Biscuits, Too!
Short on time? You can also freeze fully baked biscuits! Just cool completely, wrap individually, and store in a freezer bag.
To reheat:
-
Warm in a 350°F oven for 10–12 minutes, or microwave for 30 seconds.
They won’t be quite as flaky as freshly baked dough, but they’ll still be warm, buttery, and satisfying!
So can you freeze biscuit dough? Absolutely — and it might just be your new favorite kitchen hack! 🧈 Whether you’re prepping for a brunch party or stocking the freezer for busy mornings, frozen biscuit dough gives you buttery, flaky biscuits anytime with zero stress. Bake from frozen, and serve fresh with jam, honey, or gravy… whenever the craving hits.
🌾 What Flour Is Best for Biscuits?
When it comes to baking light, fluffy, and tender biscuits, the type of flour you use can make or break the final result. You might be surprised how much protein content, brand, and even regional flour types can affect the texture of your biscuits.
Let’s break it all down — so you can choose the best flour for biscuits and get those tall, flaky layers every single time. 👇✨
🥇 The Best Overall: Low-Protein (Soft Wheat) Flour
The gold standard for biscuits — especially in the American South — is soft wheat flour with a low protein content. Why? Because less protein means less gluten formation, resulting in a tender, delicate crumb rather than a chewy or tough one.
🏆 Top Pick: White Lily All-Purpose Flour
-
Protein content: ~8–9%
-
Made from soft winter wheat
-
Known for producing ultra-light, fluffy, and tender biscuits
-
A Southern pantry staple for generations
💡 Note: White Lily is an all-purpose flour, but its soft wheat base makes it behave more like pastry flour. It’s hard to beat for classic, flaky buttermilk biscuits!
🥈 Great Alternatives If You Don’t Have White Lily
1. Pastry Flour
-
Protein content: ~8–9%
-
Milder gluten development
-
Results in soft, delicate biscuits
Pastry flour is a fantastic substitute for White Lily if you want tender results. However, it may lack the structural strength for super tall layers unless used with proper folding techniques.
2. All-Purpose Flour (Regular Supermarket Brands)
-
Protein content: ~10–11.5%
-
Good for general use, but results may be a bit denser
This flour will work — especially if it’s a lower-protein brand (like Gold Medal). But if you’re using something like King Arthur (which has a higher protein content), expect your biscuits to be slightly less fluffy and more structured.
✅ To counter this, try using a mix of all-purpose and cake flour, or just handle the dough more gently.
⚠️ What Flour Not to Use for Biscuits
❌ Bread Flour
-
Protein content: 12–14%
-
Designed for chewy, gluten-rich baked goods like bread and pizza
-
Will create tough, overly chewy biscuits
❌ Whole Wheat Flour (on its own)
-
High in fiber and protein
-
Absorbs more liquid, which leads to dense and dry biscuits
-
Can be used in small amounts mixed with white flour for a rustic flavor — just not as the main flour
📏 A Quick Biscuit Flour Comparison Chart:
Flour Type | Protein % | Best For | Flakiness | Tenderness |
---|---|---|---|---|
White Lily AP Flour | ~8–9% | Ultimate biscuits | ⭐⭐⭐⭐⭐ | ⭐⭐⭐⭐⭐ |
Pastry Flour | ~8–9% | Light, tender biscuits | ⭐⭐⭐⭐ | ⭐⭐⭐⭐⭐ |
AP Flour (Gold Medal) | ~10–10.5% | Good general-purpose biscuits | ⭐⭐⭐ | ⭐⭐⭐⭐ |
AP Flour (King Arthur) | ~11.7% | Denser biscuits with structure | ⭐⭐ | ⭐⭐ |
Bread Flour | 12–14% | Avoid for biscuits | ⭐ | ⭐ |
Whole Wheat (solo) | 13–14% | Very dense, rustic biscuits | ⭐ | ⭐ |
✨ Choose the Right Flour for the Biscuit You Want
If you’re aiming for classic Southern-style biscuits, look for White Lily or soft wheat pastry flour. If you’re working with standard all-purpose flour, you can still make delicious biscuits — just handle the dough lightly and don’t skip the folding technique to encourage layers.
✅ Pro Tip: If you’re using high-protein flour, add 1–2 tablespoons of cornstarch per cup to help lower the protein content and mimic soft flour texture.
📏 Pro Tips for Tall, Fluffy Biscuits Every Time
We’ve all dreamed of those mile-high biscuits — golden on the outside, buttery and pillowy-soft on the inside, with flaky layers you can pull apart like pages of a warm, buttery book. Whether you’re a beginner baker or a seasoned home cook, the secret to achieving tall, fluffy buttermilk biscuits is all about technique and precision.
Here’s how to guarantee impressive rise, unbeatable texture, and bakery-style results every single time 👇
1. Keep Everything as Cold as Possible ❄️
The colder the ingredients, the better the rise. Cold butter (or shortening) creates steam when it hits a hot oven, which helps the biscuits puff up tall.
✅ What to Chill:
-
Butter (freeze for 10–15 minutes before using)
-
Buttermilk or milk
-
Even the flour and mixing bowl if your kitchen is warm!
2. Don’t Overmix or Overknead the Dough 🙅♀️
Overworking biscuit dough develops gluten, which can make biscuits tough and prevent them from rising fully. You want a shaggy, soft dough — not smooth like bread dough.
💡 Pro Tip: Mix with a spoon or your hands until just combined. Stop as soon as everything holds together.
3. Use the Letter-Fold Method (Lamination) for Height ✉️
This is the real biscuit game-changer. Folding the dough creates stacked layers, which help the biscuits rise tall and form visible flakiness.
✅ How to Do It:
-
Pat dough into a rectangle
-
Fold into thirds like a letter
-
Rotate, pat out again, and repeat 2–3 times before cutting
This technique gives your biscuits those signature sky-high layers!
4. Cut Biscuits with a Sharp Cutter (No Twisting!) 🔪
A clean, sharp edge allows the biscuits to rise evenly. Twisting the cutter seals the edges, preventing full lift.
🚫 Don’t twist. Just press straight down and lift the cutter up.
✔️ If you don’t have a biscuit cutter, use a sharp knife to slice square biscuits for even easier shaping and zero waste.
5. Cut the Dough Thick — Don’t Roll It Too Thin! 📏
For tall biscuits, your dough needs height before it goes into the oven.
📐 Roll or pat to ¾ to 1 inch thick. Thinner dough = flat biscuits.
It may seem like overkill, but thick-cut dough = big, puffy biscuits that rise even higher in the oven!
6. Place Biscuits Close Together on the Baking Sheet 👯♀️
This one’s a sneaky secret: placing your biscuits close together — almost touching — helps them climb as they bake, supporting each other and directing their rise upward instead of outward.
✅ Bonus: Biscuits baked this way also stay softer on the sides.
7. Use a Hot Oven (425–450°F) and Bake on the Middle Rack 🔥
A fully preheated oven is key! High heat causes the cold butter to release steam quickly, which puffs up the dough and creates those fluffy layers.
Bake Tip: Use the center rack for even heat circulation and browning.
8. Brush the Tops Before Baking (Optional, But Beautiful) 🧈
Brushing the tops with milk, cream, or melted butter adds flavor and a golden finish. Just avoid brushing the sides — that can prevent the biscuits from rising properly.
🧁 Summary Cheat Sheet: Your Tall, Fluffy Biscuit Checklist
✅ Cold ingredients
✅ Don’t overmix
✅ Fold the dough
✅ Cut thick
✅ Sharp, straight-down cuts
✅ Place biscuits close together
✅ Bake hot (425–450°F)
✅ Optional: brush tops for a golden finish
Creating tall, fluffy biscuits is more than just following a recipe — it’s about knowing why each step matters. With these simple but powerful tips, you’ll get bakery-worthy buttermilk biscuits that rise to the occasion every time.
Serve them warm with butter, jam, or gravy — and prepare for the compliments to roll in 😍✨
Spring Greens & Edamame Salad with Miso Dressing
Clean Cuisine / Dinner Delicacies 91
0
Zucchini and Carrot Breakfast Muffins
Sunny Side Up Breakfast Delights 112
0
Spanish-Inspired Chickpea Paella
Dinner Delicacies 120
0
🧈 Butter vs. Shortening vs. Lard – What’s Best for Biscuits?
If you’ve ever found yourself standing in your kitchen wondering whether to use butter, shortening, or lard for your buttermilk biscuits, you’re not alone! Each fat brings something unique to the table — affecting texture, flavor, rise, and flakiness. Choosing the right one (or combo!) depends on what kind of biscuit experience you’re after: flaky and flavorful, ultra-tender, or authentically Southern.
Let’s break down the pros, cons, and best uses of each — so you can decide which fat is really best for your perfect biscuit. 👇✨
🧈 Butter: The Flavor Favorite
💖 Why Use It:
Butter is beloved for one reason: flavor. It adds a rich, slightly salty, deeply satisfying taste that no other fat can match. It also creates flaky layers when used cold and cut into the flour.
✅ Pros:
-
Unbeatable flavor
-
Creates flaky layers when cold
-
Easily accessible and all-natural
❌ Cons:
-
Has a lower melting point, so it softens quickly
-
Can lead to slightly drier biscuits if overbaked
-
May spread more than shortening-based biscuits
🔥 Best For:
-
Flaky, golden biscuits with maximum buttery taste
-
Anyone who wants to lean into that homemade, comforting biscuit experience
🥄 Shortening: The Texture Champion
💖 Why Use It:
Shortening, like Crisco, is a solid, shelf-stable fat that’s often used in traditional American baking. Because it has a higher melting point, it stays solid longer during baking, creating a biscuit that’s tender, soft, and very tall.
✅ Pros:
-
Makes very tender biscuits
-
Holds its shape well = taller rise
-
Long shelf life, easy to store
❌ Cons:
-
Lacks flavor — can taste “flat” unless mixed with butter
-
Some brands may contain trans fats (check the label!)
-
Processed (less appealing for clean eating)
🔥 Best For:
-
Ultra-soft, tender biscuits
-
Biscuits that need to hold a shape (e.g. for stacking or cutting)
🐖 Lard: The Old-School Southern Secret
💖 Why Use It:
Lard is the traditional fat of Southern grandmas and biscuit masters. When rendered properly (from pork fat), it creates incredibly flaky, moist biscuits with a subtle richness — and it performs similarly to shortening, but with natural flavor.
✅ Pros:
-
Flaky and tender texture
-
Natural, with a mild flavor
-
Higher melting point = excellent structure
❌ Cons:
-
Not vegetarian-friendly
-
Harder to find good-quality, non-hydrogenated lard
-
Slight porky flavor if not rendered well
🔥 Best For:
-
Authentic Southern biscuits
-
Recipes passed down through generations
-
Flaky + tender combo in one
🧈🥄 Combo Tip: Use Half Butter + Half Shortening (or Lard)
Want the flavor of butter with the lift and tenderness of shortening or lard? Do what many Southern cooks do — use a 50/50 split.
✅ Why it works:
-
Butter = flavor + some flake
-
Shortening or lard = moisture + structure
This combo gives you the best of both worlds: a tender, tall biscuit with beautiful layers and rich flavor.
🧁 Summary Comparison Chart
Fat Type | Flavor | Flakiness | Tenderness | Rise | Best For |
---|---|---|---|---|---|
Butter | ⭐⭐⭐⭐⭐ | ⭐⭐⭐⭐ | ⭐⭐ | ⭐⭐ | Flavorful, flaky biscuits |
Shortening | ⭐ | ⭐⭐ | ⭐⭐⭐⭐ | ⭐⭐⭐⭐ | Tall, tender, soft biscuits |
Lard | ⭐⭐⭐ | ⭐⭐⭐⭐ | ⭐⭐⭐⭐ | ⭐⭐⭐ | Traditional Southern biscuits |
Butter + Shortening | ⭐⭐⭐⭐ | ⭐⭐⭐⭐ | ⭐⭐⭐⭐ | ⭐⭐⭐⭐ | Balanced biscuits with flavor and rise |
So, What’s the Best Fat for Biscuits?
There’s no one-size-fits-all answer — it depends on your taste preferences and texture goals. If you want maximum flavor, butter is your best friend. If you love soft, sky-high biscuits, reach for shortening. And if you want to go full Southern traditionalist, lard is your secret weapon.
But if you ask seasoned bakers, the best biscuits often come from a mix of fats — like butter + shortening or butter + lard — giving you golden flavor, pillowy tenderness, and flaky perfection all in one bite. 😍
This post contains affiliate links. As an Amazon Associate, We earn from qualifying purchases. We only recommend products We love and use—thanks for your support!
🛠️ The 5 Must-Have Tools for Perfect Buttermilk Biscuits (And Our Top Amazon Picks!)
To craft the perfect batch of buttermilk biscuits, having the right tools can make all the difference. Below are five essential pieces of equipment that will elevate your biscuit-making experience. Each item is highly rated, budget-friendly, and available on Amazon.
1. Biscuit Cutter Set – HULISEN Stainless Steel Round Cutters
Why we recommend it:
Achieving tall, evenly shaped biscuits requires a sharp, sturdy cutter. The HULISEN Biscuit Cutter Set includes five stainless steel round cutters with thin, sharp edges that slice cleanly through dough without sealing the edges, ensuring optimal rise.
Key Features:
-
Set of 5 cutters ranging from 1.5 to 3.5 inches
-
Made of high-grade stainless steel; rust-proof and dishwasher safe
-
Comfortable arched handles for easy pressing
Link: HULISEN Biscuit Cutter Set on Amazon
2. Pastry Blender – Spring Chef Dough Blender
Why we recommend it:
Incorporating cold butter into flour is crucial for flaky biscuits. The Spring Chef Dough Blender features heavy-duty stainless steel blades that make cutting butter into flour effortless, ensuring a consistent, crumbly texture.
Key Features:
-
Durable stainless steel construction
-
Ergonomic handle for a comfortable grip
-
Highly rated with over 25,000 reviews
Link: Spring Chef Dough Blender on Amazon
3. Rolling Pin – Farberware Classic Wood Rolling Pin
Why we recommend it:
Rolling out biscuit dough to the right thickness is essential. The Farberware Classic Wood Rolling Pin offers a smooth surface and comfortable handles, allowing for even pressure and consistent dough thickness.
Key Features:
-
Made of durable hardwood
-
Comfortable, easy-grip handles
-
Smooth rolling action for uniform dough
Link: Farberware Classic Wood Rolling Pin on Amazon
4. Baking Sheet – Nordic Ware Natural Aluminum Commercial Baker’s Half Sheet
Why we recommend it:
A reliable baking sheet ensures even heat distribution for perfectly baked biscuits. The Nordic Ware Half Sheet is made of pure aluminum, providing superior heat conductivity and a durable, warp-resistant design.
Key Features:
-
Made of pure aluminum for even baking
-
Reinforced steel rim prevents warping
-
Spacious surface accommodates multiple biscuits
Link: Nordic Ware Half Sheet on Amazon
5. Pastry Brush – OXO Good Grips Silicone Basting & Pastry Brush
Why we recommend it:
Brushing biscuits with butter or milk before baking adds flavor and promotes browning. The OXO Good Grips Silicone Brush is heat-resistant, easy to clean, and designed to hold and distribute liquids evenly.
Key Features:
-
Heat-resistant silicone bristles
-
Tapered outer bristles for even spreading
-
Dishwasher safe for easy cleaning
Link: OXO Good Grips Silicone Pastry Brush on Amazon
Equipping your kitchen with these tools will not only enhance your biscuit-making process but also ensure consistent, delicious results every time. Happy baking!

Buttermilk biscuits
Ingredients
Equipment
Method
- Preheat and Prepare:Start by preheating your oven to 425°F (218°C). Line a baking sheet with parchment paper to prevent sticking.
- Mix Dry Ingredients:In a large bowl, sift together the flour, baking powder, baking soda, sugar, and salt. This ensures your biscuits are lump-free and light.
- Add Butter:Use a pastry blender or your fingers to cut the cold butter into the flour mixture until it looks like coarse crumbs. It’s these little pockets of butter that will give your biscuits their flaky layers.
- Buttermilk Time:Make a well in the center of your flour mixture and pour in the cold buttermilk. Stir gently with a fork until the mixture just begins to come together. It should be somewhat sticky; don’t overmix!
- Shape and Cut:Turn the dough out onto a floured surface, and gently pat it into a rectangle about 1 inch thick. Fold it over and gently flatten again. Repeat this process 3 times. Use a round cutter to cut out the biscuits. Push straight down without twisting the cutter to ensure even rising.
- Bake to Perfection:Place the biscuits on the prepared baking sheet, making sure they touch each other for support. Bake for about 12-15 minutes or until golden brown on top.
- Cool and Serve:Let them cool slightly on a wire rack before serving warm.

🥰 Bring Comfort to Your Kitchen, One Biscuit at a Time
There’s something undeniably special about a fresh-from-the-oven buttermilk biscuit — golden on the outside, tender and flaky on the inside, and made with love. Whether you’re serving them for a cozy Sunday breakfast, pairing them with homemade gravy, or enjoying one warm with butter and jam, these biscuits have a way of turning simple moments into cherished memories.
So go ahead — gather your ingredients, trust the process, and bake a batch to share (or keep all to yourself — we won’t tell 😉). Here’s to buttery layers, full hearts, and the kind of comfort only homemade biscuits can bring.
Happy baking, friend! 🧈💛
Join Now!
If you enjoyed this Buttermilk Biscuit, don’t miss out on even more fresh, nourishing, and easy-to-make recipes like this! By joining our email community, you’ll get exclusive content, bonus recipes, and expert tips to help you make clean eating simple, flavorful, and fun.
✨ Enter your email & click below to subscribe—you’ll start receiving tasty inspiration right away! It only takes a minute to join our growing community of food lovers who are dedicated to making healthy meals both exciting and effortless!