Cinnamon Crescent Rolls

Easy & Delicious Cinnamon Crescent Rolls – A Sweet Treat in Minutes!

There’s nothing better than the smell of Cinnamon Crescent Rolls baking in the oven. The combination of warm cinnamon, buttery layers, and sweet vanilla glaze makes these pastries an irresistible treat for any time of day. Whether you’re enjoying them with your morning coffee, serving them as a quick dessert, or whipping up a batch for a cozy brunch, Cinnamon Crescent Rolls bring that perfect balance of flaky, sweet, and melt-in-your-mouth goodness. And the best part? They’re incredibly easy to make with just a handful of ingredients!

Using store-bought crescent dough, a simple cinnamon-sugar filling, and a drizzle of homemade glaze, you can create a bakery-style treat in no time. Unlike traditional cinnamon rolls that require hours of rising and rolling, Cinnamon Crescent Rolls come together in minutes—no fuss, no stress, just delicious homemade flavor. If you’re looking for a quick and satisfying way to enjoy the comforting taste of cinnamon rolls without all the work, this recipe is for you!

Warm, golden-brown cinnamon crescent rolls drizzled with creamy vanilla glaze on a white plate.

Why You’ll Love These Cinnamon Crescent Rolls

There’s nothing quite like biting into a warm, flaky pastry filled with sweet cinnamon sugar and topped with a luscious vanilla glaze. Cinnamon Crescent Rolls bring all the comforting flavors of a classic cinnamon roll but without the time-consuming process. They’re soft, buttery, and melt in your mouth with every bite. Whether you’re enjoying them for breakfast, an afternoon pick-me-up, or a quick dessert, these rolls are the perfect way to satisfy your sweet tooth without spending hours in the kitchen.

One of the biggest reasons to love Cinnamon Crescent Rolls is their simplicity. Traditional cinnamon rolls require yeast, kneading, rising time, and rolling out dough—not exactly ideal when you want something quick and delicious. This recipe skips all that hassle by using store-bought crescent dough, making it possible to go from craving to eating in under 30 minutes. That means you can have fresh, homemade pastries without all the work!

Not only are these rolls easy to make, but they’re also incredibly versatile. Want to add a little crunch? Sprinkle in some chopped pecans or walnuts. Craving something richer? Try adding a cream cheese filling or a drizzle of melted chocolate. You can even turn them into apple cinnamon crescent rolls by tucking in thin apple slices before rolling them up. The possibilities are endless, which means you can make this recipe your own every time you bake them.

These rolls are also perfect for any occasion. Need a quick breakfast idea? They pair beautifully with a hot cup of coffee or tea. Hosting brunch? Serve them alongside fresh fruit and eggs for a well-rounded meal. Looking for a last-minute dessert? These rolls taste just as good after dinner as they do in the morning. They’re a crowd-pleaser, and no one will ever guess how easy they were to make.

And let’s not forget about the warm, comforting aroma that fills your kitchen while they bake. There’s something nostalgic about the scent of cinnamon and butter mingling in the air—it instantly makes your home feel cozy and inviting. Whether you’re making them for yourself or sharing them with loved ones, Cinnamon Crescent Rolls bring that homemade, fresh-from-the-oven magic that’s hard to resist.

So if you’re looking for a sweet treat that’s quick, easy, and absolutely delicious, these Cinnamon Crescent Rolls are the answer. Once you try them, they’ll become a go-to recipe in your kitchen—because who doesn’t love a warm, cinnamon-swirled pastry that’s ready in minutes?

Freshly baked mini cinnamon crescent rolls on a white plate, lightly dusted with cinnamon sugar.

A Brief History of Crescent Rolls and Cinnamon Rolls

Ever wondered where the delicious, flaky Cinnamon Crescent Rolls get their inspiration? These sweet treats are a perfect blend of two iconic pastries: the rich and gooey cinnamon roll and the light, buttery crescent roll. Both have deep roots in baking history, dating back centuries, and each has evolved into a beloved staple across the world.

The History of Crescent Rolls

The classic crescent roll, with its delicate layers and unmistakable shape, has origins that trace back to Austria. According to legend, the croissant (which inspired the modern crescent roll) was first created in the late 1600s to celebrate Austria’s victory over the Ottoman Empire. The pastry was shaped like a crescent moon—the symbol on the Ottoman flag—to commemorate the moment. French bakers later perfected the laminated dough technique, creating the buttery, flaky croissant that we know today.

Crescent rolls as we recognize them now—fluffier, slightly less buttery than croissants, and easy to prepare—became popular thanks to industrialization and modern baking. Pillsbury revolutionized the industry in the 1960s when they introduced refrigerated crescent roll dough in a can. Suddenly, home bakers could make fresh, flaky rolls in minutes without having to master the art of laminating dough. This convenience made crescent rolls a household staple, setting the stage for countless creative recipes, including the Cinnamon Crescent Rolls we love today.

The History of Cinnamon Rolls

While crescent rolls originated in Europe, cinnamon rolls have an even richer history that spans multiple cultures. The combination of dough, butter, sugar, and cinnamon has been around for centuries, but the modern cinnamon roll has its deepest roots in Sweden. The Swedish kanelbulle, or “cinnamon bun,” has been a beloved treat since at least the 18th century. Sweden even celebrates National Cinnamon Bun Day every year on October 4th!

The cinnamon roll made its way to America in the 20th century, where it became even richer and sweeter. Unlike Swedish versions, which are often less sugary and served with pearl sugar, the American cinnamon roll became larger, doughier, and coated in thick cream cheese frosting or icing. The Cinnabon empire, founded in 1985, helped cement the cinnamon roll as one of the most iconic baked goods in the U.S.

How They Came Together: The Birth of Cinnamon Crescent Rolls

Given their histories, it was only a matter of time before crescent rolls and cinnamon rolls merged into one delicious, easy-to-make treat. Home bakers discovered that using crescent roll dough as a shortcut for cinnamon rolls created a pastry that was both buttery and flaky yet still had that classic cinnamon-sugar flavor. This innovation meant you could enjoy the taste of a fresh, homemade cinnamon roll in a fraction of the time—no kneading, no rising, no waiting.

Cinnamon Crescent Rolls are the best of both worlds: the light, flaky texture of a crescent roll and the rich, spiced sweetness of a cinnamon roll. Whether you see them as a modern baking hack or a natural evolution of two classic pastries, there’s no denying their appeal. They’re quick, they’re easy, and they bring a touch of history to every delicious bite!

Try some of our other recipes!

Plate of four zucchini and carrot muffins with oats and tea in the background.
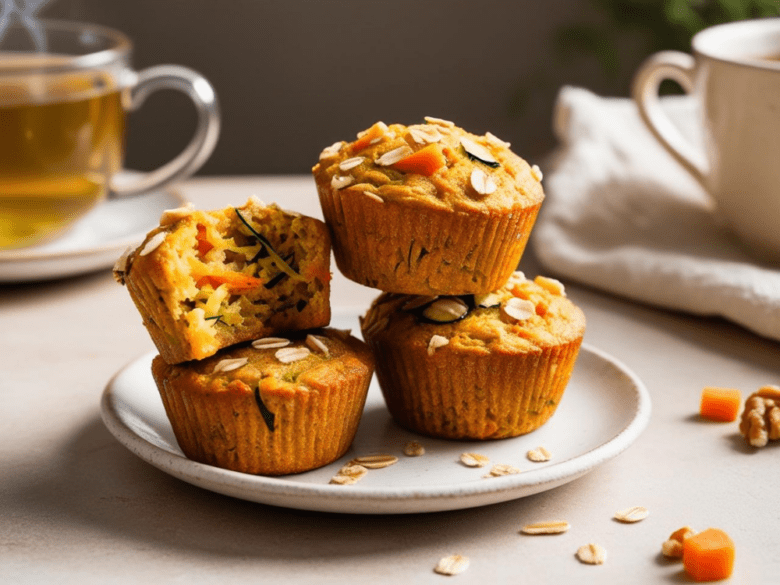
Zucchini and Carrot Breakfast Muffins
Read More
Four lemon chia muffins with lemon slices and spring flowers in the background.
Lemon Chia Seed Muffins
Read More
Creamy carrot cake oatmeal in a two-toned ceramic bowl topped with yogurt, grated carrots, and walnuts
Carrot Cake Oatmeal
Read More

Ingredients & Substitutions for the Best Cinnamon Crescent Rolls

One of the best things about Cinnamon Crescent Rolls is how simple they are to make. You don’t need a long list of fancy ingredients or any special baking skills—just a few basic pantry staples that come together to create a warm, buttery, cinnamon-filled treat. But what if you’re missing an ingredient or need to make a swap? No worries! This guide will walk you through each ingredient, why it’s important, and the best substitutions you can use to fit your dietary needs or personal preferences.


The Essential Ingredients

1. Crescent Roll Dough

What it does: This is the star of the recipe, providing a light, flaky, and buttery base without the hassle of making dough from scratch. Store-bought crescent roll dough is a huge time-saver and ensures a perfectly tender texture every time.

Substitutions:

  • Puff Pastry – If you want an even flakier, crispier roll, use puff pastry sheets. Just cut them into triangles and proceed as usual.
  • Homemade Crescent Dough – If you prefer a from-scratch approach, you can make your own crescent roll dough with flour, yeast, butter, and milk.
  • Biscuit Dough – This will create a slightly denser roll, but it still works if you don’t mind a different texture.

2. Butter (Softened or Melted)

What it does: Butter gives these rolls their rich, decadent flavor and helps the cinnamon sugar stick to the dough.

Substitutions:

  • Vegan Butter – Works just as well for a dairy-free option.
  • Coconut Oil – This gives a slightly different taste but still keeps the rolls moist and flavorful.
  • Applesauce – If you want to cut back on fat, you can brush a thin layer of unsweetened applesauce onto the dough instead of butter.

3. Granulated Sugar

What it does: Sugar caramelizes in the oven, giving the rolls a sweet, slightly crunchy coating inside.

Substitutions:

  • Brown Sugar – Adds a richer, slightly molasses-like flavor and works just as well.
  • Coconut Sugar – A great natural alternative with a mild caramel taste.
  • Maple Sugar or Date Sugar – A less processed option that still provides sweetness.

4. Ground Cinnamon

What it does: Cinnamon is the key to that classic cinnamon roll flavor—it’s warm, slightly spicy, and pairs perfectly with the buttery dough.

Substitutions:

  • Pumpkin Pie Spice – If you love extra warmth, this blend of cinnamon, nutmeg, and cloves works beautifully.
  • Apple Pie Spice – A great alternative if you want a slightly fruitier undertone.
  • Cardamom – Adds a subtle floral-spiced note for a unique twist.

5. Powdered Sugar (For the Glaze)

What it does: Powdered sugar creates that smooth, sweet vanilla glaze that takes these rolls to the next level.

Substitutions:

  • Granulated Sugar + Cornstarch – Blend 1 cup granulated sugar with 1 tablespoon cornstarch in a blender until it becomes powdery.
  • Coconut Sugar Powder – A less refined option that works well for a more natural glaze.
  • Honey or Maple Syrup – Can be used instead of a powdered sugar glaze for a drizzle effect.

6. Milk (For the Glaze)

What it does: Thins out the powdered sugar to create a pourable glaze.

Substitutions:

  • Almond Milk, Oat Milk, or Coconut Milk – Great dairy-free alternatives.
  • Heavy Cream – For a richer, thicker glaze.
  • Water – Works in a pinch if you don’t have milk on hand.

7. Vanilla Extract (For the Glaze)

What it does: Adds a smooth, sweet depth of flavor to the glaze.

Substitutions:

  • Maple Extract – Adds a slight maple undertone.
  • Almond Extract – Creates a nuttier, more unique glaze flavor.
  • Coconut or Caramel Extract – For an extra touch of flavor variation.

Bonus Add-Ins for Extra Flavor

If you want to take your Cinnamon Crescent Rolls to the next level, try adding some of these extras:

  • Chopped Nuts – Pecans or walnuts add a nice crunch.
  • Mini Chocolate Chips – A sweet chocolatey surprise inside.
  • Raisins or Dried Cranberries – Perfect for a fruity twist.
  • Cream Cheese Filling – Spread a thin layer of sweetened cream cheese before rolling for an extra indulgent treat.
  • Caramel Drizzle – Replace the vanilla glaze with caramel sauce for a richer finish.
Eight golden-brown cinnamon crescent rolls arranged on a platter with a drizzle of vanilla glaze.

Pro Tips for the Best Cinnamon Crescent Rolls

Making Cinnamon Crescent Rolls is already quick and easy, but a few simple tricks can take them from good to absolutely irresistible. If you want your rolls to be extra flaky, perfectly golden, and bursting with sweet cinnamon flavor, these pro tips will help you master the recipe like a pro.


1. Use Cold Crescent Roll Dough

One of the biggest mistakes people make is letting the crescent roll dough get too warm before baking. Crescent dough is similar to puff pastry in that the butter inside needs to stay cold to create flaky layers. If the dough gets too soft, the rolls can become dense instead of light and airy. To avoid this:

  • Keep the dough refrigerated until you’re ready to roll it out.
  • If your kitchen is warm, pop the unbaked rolls into the fridge for 10 minutes before baking to help them hold their shape.

2. Don’t Overload with Butter

While butter is essential for flavor and richness, too much can make the rolls greasy and cause the filling to spill out while baking. A thin, even layer is all you need to coat the dough without overwhelming it. If you want extra buttery flavor, brush the tops with melted butter after they come out of the oven instead of overloading the filling.


3. Get the Cinnamon-Sugar Ratio Just Right

The cinnamon-to-sugar balance is key to achieving that perfect sweet and spiced flavor. If you use too much sugar, the filling can become overly sticky, and if there’s too little, the cinnamon flavor won’t shine through. A 1:4 ratio of cinnamon to sugar is the sweet spot—meaning for every 1 teaspoon of cinnamon, you’ll want about 4 teaspoons (or 1 tablespoon) of sugar.

For deeper flavor, try using brown sugar instead of white sugar. It adds a subtle caramel-like richness that pairs beautifully with the cinnamon.


4. Roll the Dough Gently but Firmly

The way you roll up your Cinnamon Crescent Rolls can make a big difference in their final texture:
Too loose? The filling will leak out during baking.
Too tight? The rolls may not bake evenly or could become dense.
Just right? A gentle but firm roll ensures they stay intact while still baking up light and fluffy.

Start rolling from the wide end of the crescent triangle and tuck the edges slightly as you go to keep the filling inside.


5. Space the Rolls Evenly on the Baking Sheet

Crescent rolls expand while baking, so be sure to leave enough space between each roll to allow for proper airflow. If they’re too close together, they may bake unevenly, and the sides might not crisp up as well. For best results:

  • Use parchment paper or a silicone baking mat to prevent sticking.
  • Arrange the rolls at least 1-2 inches apart so they have room to rise.

6. Bake Until Golden Brown, Not Just Set

Timing can make or break the texture of your Cinnamon Crescent Rolls. If you take them out too soon, they may be doughy inside. If you bake them too long, they can become dry. The best way to know they’re done:
✔ The tops should be golden brown (not just pale).
✔ The edges should be slightly crisp but still soft to the touch.
✔ If you’re unsure, gently lift one roll—if the bottom is golden brown, they’re ready!

If your oven runs hot or uneven, check them a couple of minutes before the suggested baking time ends to prevent overbaking.


7. Let Them Cool Slightly Before Adding Glaze

It’s tempting to drizzle on the glaze immediately, but patience is key! If the rolls are too hot, the glaze will melt into the rolls instead of sitting on top in a delicious, creamy layer. Let them cool for 5-10 minutes before drizzling so the glaze stays thick and beautiful.

For an extra pro touch, double-glaze your rolls—drizzle once when they’re slightly warm so it melts in just a little, then drizzle again once they’re fully cooled for a bakery-style finish.


8. Elevate Your Glaze Game

A simple vanilla glaze is classic, but if you want to take it up a notch, try these variations:

  • Maple Glaze – Swap vanilla extract for maple extract and add a drizzle of maple syrup.
  • Cream Cheese Glaze – Mix softened cream cheese with powdered sugar and milk for a rich, tangy topping.
  • Caramel Drizzle – Replace the glaze with warm caramel sauce for an extra indulgent treat.

9. Make Them Even More Special with Add-Ins

While classic Cinnamon Crescent Rolls are perfect as is, adding extra flavors can make them even better. Try mixing these into your cinnamon-sugar filling before rolling them up:
Chopped nuts (pecans, walnuts, or almonds) for a crunchy texture.
Mini chocolate chips for a gooey, chocolatey twist.
Raisins or dried cranberries for a fruity contrast.
A layer of cream cheese for extra richness.
Thinly sliced apples or pears for an autumn-inspired variation.


10. Store & Reheat Them the Right Way

These rolls are best fresh, but if you have leftovers, here’s how to keep them tasting just as good:

  • To store: Keep them in an airtight container at room temperature for up to 2 days, or refrigerate for up to 5 days.
  • To reheat:
    ✔ Microwave for 10-15 seconds for a quick warm-up.
    ✔ Reheat in the oven at 300°F (150°C) for 5-7 minutes to restore crispiness.
    ✔ Air fryer at 300°F for 2-3 minutes for the best texture.

If they seem dry after storing, add a fresh drizzle of glaze before serving to bring them back to life!

Cinnamon swirl crescent rolls drizzled with icing, arranged on a white plate with a dusting of cinnamon sugar.

How to Serve Cinnamon Crescent Rolls for the Ultimate Experience

Sure, Cinnamon Crescent Rolls are delicious straight from the oven, but with the right pairings and presentation, they can become an unforgettable treat for any occasion. Whether you’re serving them for breakfast, brunch, dessert, or even a special holiday gathering, there are plenty of ways to elevate these sweet, flaky pastries. Here’s how to make the most of every bite!


1. The Perfect Breakfast Pairing

Start your morning with a warm, freshly baked Cinnamon Crescent Roll alongside a hot beverage for a cozy, comforting breakfast. Here are some classic pairings:

Coffee & Espresso – The rich, slightly bitter notes of coffee balance out the sweetness of the cinnamon and glaze. A cinnamon-spiced latte or vanilla-flavored coffee makes an especially great match.

Tea – If you prefer tea, opt for black tea with a splash of milk, chai tea for extra spice, or an herbal cinnamon or vanilla blend to complement the flavors in the rolls.

Milk – A glass of cold milk (dairy or plant-based) is the simplest, yet most nostalgic, way to enjoy Cinnamon Crescent Rolls. It’s perfect for kids and adults alike!

Smoothies – For a more refreshing and balanced breakfast, pair your roll with a healthy smoothie. A banana cinnamon smoothie or a vanilla almond protein shake can make it a more filling start to the day.


2. Brunch-Ready Spread

Hosting brunch? Cinnamon Crescent Rolls fit right in with both sweet and savory dishes. Arrange them on a serving platter alongside:

Fresh Fruit – The natural sweetness of berries, sliced apples, or citrus helps balance the richness of the rolls. A fruit salad with honey-lime dressing makes a light, refreshing side.

Yogurt & Granola – A bowl of Greek yogurt topped with honey and crunchy granola provides a creamy, tangy contrast that complements the cinnamon flavor.

Scrambled Eggs & Bacon – A little protein rounds out your brunch spread. The salty, savory contrast of eggs and bacon pairs beautifully with the sweet rolls.

Whipped Butter & Honey – Serve extra toppings like honey butter, maple syrup, or flavored cream cheese for guests to customize their rolls.

Mimosas or Spiced Apple Cider – For a festive brunch, serve Cinnamon Crescent Rolls with a light mimosa or a warm spiced cider for a seasonal touch.


3. Dessert-Style Indulgence

Want to turn these rolls into a full-on dessert? A few small additions can make them even more decadent:

Vanilla Ice Cream – Warm Cinnamon Crescent Rolls with a scoop of vanilla or caramel ice cream is a next-level dessert. Let the ice cream melt slightly over the rolls for the ultimate indulgence.

Caramel or Chocolate Drizzle – Instead of (or in addition to) the vanilla glaze, drizzle warm caramel or melted chocolate over the top. A sprinkle of sea salt enhances the flavors even more!

Whipped Cream & Cinnamon Sugar – Top the rolls with a swirl of whipped cream and a dash of cinnamon sugar for a bakery-style treat.

Nutty Crunch – Sprinkle chopped pecans, almonds, or walnuts over the glaze for extra texture and flavor.

Stuffed with Cream Cheese – Slice them in half and spread a little sweetened cream cheese inside for a cheesecake-like filling.


4. Holiday & Seasonal Ideas

Cinnamon Crescent Rolls are a wonderful addition to holiday meals or seasonal gatherings. Here’s how to serve them for different occasions:

Christmas Morning – Serve with hot cocoa and a dusting of powdered sugar for a festive, snowy look.

Thanksgiving Brunch – Add a pumpkin spice glaze or serve alongside cranberry sauce for a fall-inspired twist.

Easter Breakfast – Pair with pastel-colored fruit salads and a citrusy glaze (lemon or orange zest mixed into the icing) for a bright springtime treat.

Valentine’s Day – Shape the crescent rolls into hearts before baking, and drizzle them with pink or red icing for a romantic touch.

Halloween Party – Use orange-tinted icing or add a spooky chocolate drizzle to make them a fun seasonal treat.


5. Fun Ways to Serve for Kids

Kids love Cinnamon Crescent Rolls, and you can make them even more fun by serving them in creative ways:

Cinnamon Roll Dippers – Cut the rolls into bite-sized pieces and serve with small bowls of icing, caramel, or melted chocolate for dipping.

DIY Topping Bar – Let kids customize their rolls with sprinkles, mini chocolate chips, crushed graham crackers, or fruit.

Stuffed with Marshmallow & Chocolate – Add a mini marshmallow and chocolate chips inside before rolling for a s’mores-style treat.

Rolled into Pinwheels – Instead of rolling them into a crescent shape, roll them into tight pinwheels for a cinnamon “cookie” look.

Mini Crescent Rolls – Cut the dough into smaller triangles before rolling so kids can enjoy a bite-sized version.


6. Make-Ahead Serving Tips

If you’re planning to serve Cinnamon Crescent Rolls for an event or gathering, here are a few ways to prep them ahead of time:

Make the dough-filled rolls ahead of time and store them unbaked in the fridge overnight. Pop them in the oven in the morning for fresh rolls with no effort.

Bake them ahead and freeze – These rolls freeze beautifully. Just bake, let them cool, and freeze them in an airtight container. Reheat them in the oven at 300°F (150°C) for 5-7 minutes, then add the glaze fresh.

Prepare the glaze in advance – The icing can be made a day or two ahead and stored in the fridge. Let it come to room temperature before drizzling over warm rolls.

A cozy kitchen setting with cinnamon crescent rolls on a plate, accompanied by a cup of steaming coffee.

Frequently Asked Questions About Cinnamon Crescent Rolls

If you’ve never made Cinnamon Crescent Rolls before, you might have a few questions about how to get them just right. Even though this recipe is super simple, little tweaks can make a big difference in how they turn out. Below are some of the most commonly asked questions, along with tips and tricks to make sure your rolls turn out perfectly every time!


1. Can I Use Homemade Dough Instead of Crescent Rolls?

Absolutely! If you prefer a homemade touch, you can use your own crescent dough or even a soft yeast dough. Just roll it out into a thin sheet and cut it into triangles before filling and rolling them up. Keep in mind that homemade dough may take longer to bake, so adjust the time accordingly and keep an eye on them.

If you want something closer to traditional cinnamon rolls, you can use biscuit dough or even puff pastry for a flakier texture.


2. Can I Make These Ahead of Time?

Yes! If you’re prepping for a busy morning or a brunch gathering, you can assemble the Cinnamon Crescent Rolls the night before and store them in the fridge. When you’re ready to bake, just pop them in the oven and add a couple of extra minutes to the bake time since they’ll be cold.

If you want to freeze them, bake the rolls first and let them cool completely. Store them in an airtight container or zip-top bag, and freeze for up to 3 months. To reheat, bake at 300°F (150°C) for 5-7 minutes or microwave for 10-15 seconds. Add the glaze fresh for the best texture!


3. How Do I Keep the Filling from Leaking Out?

One of the most common issues when making Cinnamon Crescent Rolls is the cinnamon-sugar filling melting and oozing out onto the baking sheet. While a little leakage is normal, here’s how to keep most of the filling inside:

Don’t overload with butter – Too much melted butter can cause the filling to spill out. Use a thin, even layer.
Press the edges lightly – Before baking, gently press down on the ends of the rolls to help seal in the filling.
Chill before baking – If your kitchen is warm, pop the unbaked rolls in the fridge for 10 minutes before baking. This firms up the butter and helps hold everything together.


4. What’s the Best Way to Get Evenly Baked Rolls?

If some of your rolls turn out golden brown while others look pale, your oven might have hot spots. To ensure an even bake:

Space them out properly – Leave at least 1-2 inches between each roll on the baking sheet.
Use parchment paper – This prevents the bottoms from overbaking.
Rotate the pan halfway through baking – This helps them brown evenly.

If your oven tends to run hot, try lowering the temperature by 10-15°F and baking them a little longer.


5. How Can I Make These More Flaky and Buttery?

For an extra flaky texture, try these tricks:

Use a high-quality butter – Real butter gives the best flavor and texture.
Brush melted butter on top before baking for a glossy, golden finish.
Layer the dough – If you have time, lightly roll out the crescent dough, brush with butter, and fold it in half before rolling into crescents. This creates more layers.


6. Can I Make These Without the Glaze?

Of course! The vanilla glaze adds an extra touch of sweetness, but these rolls are just as good without it. If you prefer a different topping, try:

✔ A dusting of powdered sugar for a simple, elegant look.
✔ A drizzle of honey or maple syrup for natural sweetness.
✔ A spread of cinnamon butter for extra richness.


7. Can I Make a Healthier Version of These?

Yes! While Cinnamon Crescent Rolls are definitely a treat, you can make a few tweaks for a slightly healthier option:

Use whole wheat crescent roll dough (if available) for more fiber.
Replace white sugar with coconut sugar or a natural sweetener like monk fruit.
Swap butter for coconut oil for a dairy-free option.
Make a lighter glaze by using Greek yogurt instead of powdered sugar.

They’ll still be sweet and delicious but with a little less guilt!


8. How Do I Store Leftovers?

If you have leftover rolls (which doesn’t happen often because they’re so good!), store them properly to keep them fresh.

Room temperature: Store in an airtight container for up to 2 days.
Refrigerator: Keeps them fresh for up to 5 days, but they may dry out slightly.
Freezer: Freeze baked rolls for up to 3 months.

To reheat, warm them in the microwave for 10-15 seconds or in the oven at 300°F for 5-7 minutes.


9. Can I Add Extra Fillings?

Definitely! One of the best things about Cinnamon Crescent Rolls is how easy they are to customize. Here are some fun add-ins to try:

Chopped nuts – Pecans, walnuts, or almonds add a great crunch.
Mini chocolate chips – A melty, chocolatey surprise inside.
Raisins or dried cranberries – A fruity twist that pairs perfectly with cinnamon.
Thinly sliced apples or pears – For a fall-inspired flavor.
Sweetened cream cheese – Spread a thin layer of cream cheese before rolling them up for a cheesecake-like filling.


10. Can I Double the Recipe?

Yes! If you’re making these for a crowd, you can easily double or triple the recipe. Just use multiple baking sheets and bake them in batches. If you have a large enough oven, you can bake two trays at once—just rotate them halfway through to ensure even baking.

For a party platter, arrange the rolls in a circular pattern on a large plate and drizzle the glaze over all of them at once for a beautiful presentation.

Cinnamon crescent rolls arranged on a white plate, showing the soft, fluffy layers inside.
Golden-brown cinnamon crescent rolls on a white plate, drizzled with white icing, and sprinkled with cinnamon sugar, showcasing their flaky texture and inviting aroma.

Cinnamon Crescent Rolls

Max Dennison
Cinnamon Crescent Rolls are the perfect quick and easy treat when you’re craving something sweet and cozy. Made with soft, flaky crescent roll dough, a rich cinnamon-sugar filling, and a drizzle of homemade vanilla glaze, these rolls bring all the flavors of classic cinnamon rolls without the extra time and effort. Whether you're serving them for breakfast, brunch, or dessert, they come together in minutes and always taste amazing. With just a few simple ingredients, you can whip up a batch of warm, buttery goodness that’s sure to be a hit with family and friends!
Prep Time 10 minutes
Cook Time 12 minutes
Total Time 22 minutes
Course Breakfast, Dessert
Cuisine American cuisine
Servings 8
Calories 180 kcal

Equipment

  • Baking sheet: To bake the rolls evenly.
  • Parchment Paper or Silicone Baking Mat – To prevent sticking and make cleanup easier.
  • Small bowl: For mixing the cinnamon-sugar filling.
  • Butter knife or pastry brush: To spread the butter evenly on the dough.
  • Measuring spoons: For accurate cinnamon-sugar ratios.
  • Whisk or fork: To mix the glaze smoothly.
  • Spoon or piping bag: For drizzling the glaze over the rolls.

Ingredients
  

  • 8 oz 1 Can of refrigerated crescent dough
  • 1/4 Cup Unsalted butter, melted
  • 1/2 Tbsp Granulated sugar
  • 1 Tbsp Ground cinnamon
  • 1/4 Cup Chopped pecans (optional for a crunchy twist)

For the icing:

  • 1/2 Cup Powdered sugar
  • 1-2 Tbsp Milk
  • 1/2 Tsp Vanilla extract

Instructions
 

  • Preheat and Prepare: Start by preheating your oven to 375°F (190°C). Line a baking sheet with parchment paper for an easy cleanup.
  • Mix the Filling: In a small bowl, combine the granulated sugar and ground cinnamon. This simple mixture will create a heartwarming filling that's both sweet and spicy.
  • Shape the Rolls: Unroll the crescent dough on a clean surface and separate it into triangles. Brush each triangle with melted butter, then sprinkle a generous amount of the cinnamon-sugar mixture over the top. If using, sprinkle chopped pecans here as well.
  • Roll 'em Up: Starting at the wider end, roll each triangle tightly to form the crescent shape. Place them on the prepared baking sheet with the tip underneath to prevent unrolling.
  • Bake to Perfection: Bake for 10-12 minutes or until golden brown. The aroma filling your kitchen will be irresistible!
  • Icing on the Cake: While the rolls bake, whisk together the powdered sugar, milk, and vanilla extract to make the icing. Adjust the milk to get your desired consistency.
  • Finishing Touches: Once the rolls are done, let them cool slightly before drizzling with the icing. Serve warm for a melt-in-your-mouth experience.

Notes

Make-Ahead Instructions:

If you want fresh, warm Cinnamon Crescent Rolls without the morning hassle, you can easily prepare them in advance:
Unbaked Rolls: Assemble the rolls as usual, then place them on a baking sheet, cover tightly with plastic wrap, and refrigerate overnight. When ready to bake, remove from the fridge, let them sit at room temperature for 5-10 minutes, and bake as directed.
Freezing Unbaked Rolls: Roll and fill the crescents, then place them on a tray in the freezer until solid. Transfer to an airtight container or freezer bag, and store for up to 3 months. Bake straight from frozen at 350°F (175°C), adding a few extra minutes to the baking time.
Make-Ahead Glaze: Prepare the glaze ahead of time and store it in an airtight container in the fridge for up to 3 days. Let it come to room temperature before drizzling over the warm rolls.

How to Store Leftovers:

At Room Temperature: Store cooled rolls in an airtight container for up to 2 days. If they start to dry out, warm them slightly before serving.
Refrigerator: If you want to keep them fresh longer, store them in the fridge for up to 5 days. Place in an airtight container or wrap individually in plastic wrap to prevent them from drying out.
Freezer: For longer storage, freeze fully baked rolls in a freezer-safe container or zip-top bag for up to 3 months. Thaw at room temperature or reheat directly from frozen.

How to Reheat:

Oven: Preheat to 300°F (150°C) and bake for 5-7 minutes for the best texture.
Microwave: Heat individual rolls for 10-15 seconds for a quick warm-up.
Air Fryer: Reheat at 300°F (150°C) for 2-3 minutes to restore crispiness.
For extra freshness, drizzle fresh glaze over reheated rolls before serving. Enjoy!
Keyword 30-Minute Cinnamon Rolls, Best Crescent Roll Dessert, Cinnamon Crescent Rolls Recipe, Cinnamon Sugar Crescent Rolls, Crescent Dough Cinnamon Rolls, Easy Breakfast Pastries, Easy Cinnamon Rolls with Crescent Dough, Flaky Cinnamon Crescent Rolls, Homemade Crescent Roll Cinnamon Rolls, Quick Cinnamon Roll Recipe

Carrot Cake Oatmeal

🥕 If you’ve ever wished you could eat carrot cake for breakfast—this is your sign. This cozy Carrot Cake Oatmeal recipe tastes just like your favorite dessert, but it’s made with wholesome ingredients like oats, carrots, banana, and warm spices. It’s naturally sweetened, packed with fiber, and perfect for busy mornings or weekend brunch. Whether you’re craving something comforting, clean, or kid-approved, this breakfast bowl checks all the boxes.

If you’re searching for a healthy oatmeal recipe with carrots, or wondering how to make carrot cake-inspired oats—this easy stovetop recipe is your go-to. It’s great for meal prep, dairy-free, gluten-free adaptable, and ridiculously delicious. 🧡

Quinoa and Blueberry Breakfast Bake

Looking for a wholesome, protein-packed breakfast that’s easy to make and perfect for meal prep? This Quinoa and Blueberry Breakfast Bake is a delicious, naturally sweetened dish made with fluffy quinoa, juicy blueberries, warm spices, and a hint of maple syrup. It’s gluten-free, dairy-free, and meal-prep friendly, making it the ultimate nourishing breakfast for busy mornings. Enjoy it warm or cold, topped with Greek yogurt, nut butter, or extra fruit for a satisfying and energizing start to your day! Try this easy breakfast bake and make mornings effortless and delicious. 🫐🥣✨

Peanut Butter Banana Protein Pancakes

If you’re looking for a healthy, protein-packed breakfast that actually tastes like a treat, then these Peanut Butter Banana Protein Pancakes are about to become your new morning obsession! Made with simple, wholesome ingredients like oat flour, ripe bananas, and creamy peanut butter, these pancakes are naturally sweet, ultra-fluffy, and ridiculously satisfying. Whether you’re fueling up for a busy day or just craving something comforting yet nutritious, Peanut Butter Banana Protein Pancakes hit the spot. Plus, they’re easy to make, kid-approved, and perfect for meal prep! Stack them high, drizzle with extra peanut butter, and get ready to dig in!

Step-by-step process of making homemade crescent dough, showing ingredients on the counter, dough being kneaded on a floured surface, shaped crescents on a baking sheet before and after rising, and the final golden-brown crescent rolls fresh out of the oven, ready to be served.

Homemade Crescent Dough

Max Dennison
Making homemade crescent dough is easier than you think and gives your Cinnamon Crescent Rolls an extra buttery, flaky texture. This simple dough is made with flour, yeast, butter, milk, sugar, and salt, creating a soft, pliable base perfect for rolling and baking. Unlike store-bought dough, homemade crescent dough has a richer, fresher taste and allows you to control the ingredients. With just a little kneading and rising time, you’ll have a delicious, from-scratch alternative that takes your crescent rolls to the next level!
Prep Time 15 minutes
Cook Time 12 minutes
Rising Time: 1 hour
Total Time 1 hour 27 minutes
Course Breakfast, Brunch, Dessert
Cuisine American cuisine
Servings 7 Servings

Equipment

  • Mixing bowl: To combine and knead the dough.
  • Measuring Cups and Spoons: For accurate ingredient measurements.
  • Whisk or fork: To mix dry and wet ingredients together.
  • Wooden spoon or spatula: To stir the dough before kneading.
  • Stand mixer with dough hook (optional): Makes kneading easier, but you can do it by hand.
  • Rolling pin: To roll out the dough into a thin sheet.
  • Sharp knife or pizza cutter: To cut the dough into triangles.
  • Baking sheet: To bake the crescent rolls evenly.
  • Parchment paper or silicone baking mat: Prevents sticking and makes cleanup easier.
  • Clean kitchen towel or plastic wrap: To cover the dough while it rises.

Ingredients
  

  • 2 1/4 Tsp (1 packet) active dry yeast
  • 3/4 Cup Warm water (about 110°F or 45°C)
  • 1/2 Cup Granulated sugar
  • 1 Tsp Salt
  • 1/2 Cup Unsalted butter, softened
  • 1/2 Cup Milk, lukewarm
  • 1 Large egg
  • 4 Cups All-purpose flour, more for dusting
  • Additional butter for brushing (about 1/4 cup melted)

Instructions
 

  • Activate the Yeast: In a large bowl, dissolve the yeast in the warm water. Let it sit for about 5 minutes until frothy, indicating the yeast is active.
  • Mix Wet Ingredients: Add the sugar, salt, softened butter, milk, and egg to the yeast mixture. Mix well until everything is thoroughly combined.
  • Add Flour: Gradually add the flour to the wet ingredients, stirring until the dough begins to form.
  • Knead the Dough: Turn the dough out onto a floured surface and knead for about 8-10 minutes, until it's smooth and elastic. Add a little more flour if the dough is too sticky, but try to add as little as possible to keep the dough soft.
  • First Rise: Place the kneaded dough in a greased bowl, turning once to grease the top. Cover with a clean kitchen towel and let it rise in a warm, draft-free place for about 1 to 1 1/2 hours, or until doubled in size.
  • Shape the Crescents: Once risen, punch down the dough gently and turn it out onto a floured surface. Divide the dough in half, and roll each half into a circle about 1/4 inch thick. Cut each circle into 8 wedges. Roll up the wedges starting from the wide end to form crescents.
  • Second Rise: Place the shaped crescents on a baking sheet lined with parchment paper, making sure the tip is tucked under each roll to prevent unrolling during baking. Cover and let them rise again for about 30 minutes, or until nearly doubled.
  • Preheat the Oven: While the crescents are rising, preheat your oven to 375°F (190°C).
  • Bake: Brush the tops of the crescents with melted butter, then bake in the preheated oven for 12-15 minutes, or until golden brown.
  • Cool and Serve: Remove from the oven and place on a wire rack to cool slightly. Serve warm for the best taste.

Notes

Make-Ahead Instructions

Homemade crescent dough can be prepared in advance to save time and ensure fresh, flaky rolls whenever you need them. Here’s how to prep ahead:
  • Refrigerate the Dough: After kneading, cover the dough tightly with plastic wrap or place it in an airtight container. Store in the refrigerator for up to 24 hours. When ready to use, let it sit at room temperature for 15-20 minutes before rolling and shaping.
  • Freeze the Dough: To store for longer, shape the dough into a ball, wrap it tightly in plastic wrap, and place it in a freezer-safe bag. Freeze for up to 3 months. When ready to use, thaw in the refrigerator overnight, then let it come to room temperature before rolling.
  • Freeze Pre-Cut Crescent Dough: After rolling and cutting the dough into triangles, layer them with parchment paper in an airtight container and freeze. When ready to bake, simply thaw, fill, and roll.

How to Store Leftover Baked Crescent Rolls

  • Room Temperature: Store baked crescent rolls in an airtight container for up to 2 days in a cool, dry place.
  • Refrigerator: Store in an airtight container for up to 5 days. Warm before serving for the best texture.
  • Freezer: Fully baked crescent rolls can be frozen for up to 3 months. Wrap them individually in plastic wrap, place them in a freezer-safe bag, and thaw at room temperature when ready to eat.

How to Reheat Homemade Crescent Rolls

  • Oven: Preheat to 300°F (150°C) and warm for 5-7 minutes to restore their fresh-baked texture.
  • Microwave: Heat individual rolls for 10-15 seconds for a quick warm-up.
  • Air Fryer: Reheat at 300°F (150°C) for 2-3 minutes for a crispier texture.
With these tips, you can always have fresh, homemade crescent dough or rolls ready to go for any meal or occasion.
Keyword Best Homemade Crescent Dough, Crescent Roll Dough for Baking, Easy Crescent Roll Dough, Flaky Crescent Roll Dough Recipe, Homemade Crescent Dough Recipe, Homemade Pastry Dough Recipe, How to Make Crescent Roll Dough from Scratch, No-Yeast Crescent Roll Dough, Simple Crescent Dough for Pastries, Soft and Buttery Crescent Dough
Cinnamon crescent rolls fresh out of the oven, with icing melting into the flaky layers.

Bringing Warmth and Comfort to Your Kitchen

There’s something special about the smell of fresh-baked Cinnamon Crescent Rolls filling your home—warm, buttery, and packed with sweet cinnamon goodness. Whether you’re making them for a cozy breakfast, a weekend brunch, or a simple dessert, these rolls bring comfort and joy with every bite. They’re easy to make, endlessly customizable, and guaranteed to be a hit with family and friends.

Baking is about more than just following a recipe—it’s about creating memories, sharing moments, and enjoying the simple pleasures in life. Whether you’re using store-bought crescent dough for a quick treat or making your own from scratch, every step is an opportunity to slow down and savor the process. So go ahead, roll up some cinnamon-sugar magic, drizzle on that sweet glaze, and enjoy the homemade goodness that brings people together.

Join Now!

Love this recipe? Don’t miss out on even more delicious, healthy, and easy-to-make recipes like this Cinnamon Crescent Rolls! By joining our email community, you’ll gain access to exclusive content, bonus recipes, and tips to make clean eating a breeze.

Enter your email & click below to subscribe and start receiving tasty inspiration right away. It only takes a minute to join our growing community of food lovers dedicated to making healthy eating delicious and fun.

Subscribe to our newsletter today to receive our exclusive printable weekly meal planner and recipe cards absolutely FREE.
Thank you for subscribing!
Close
Your custom text © Copyright 2025. All rights reserved.
Close