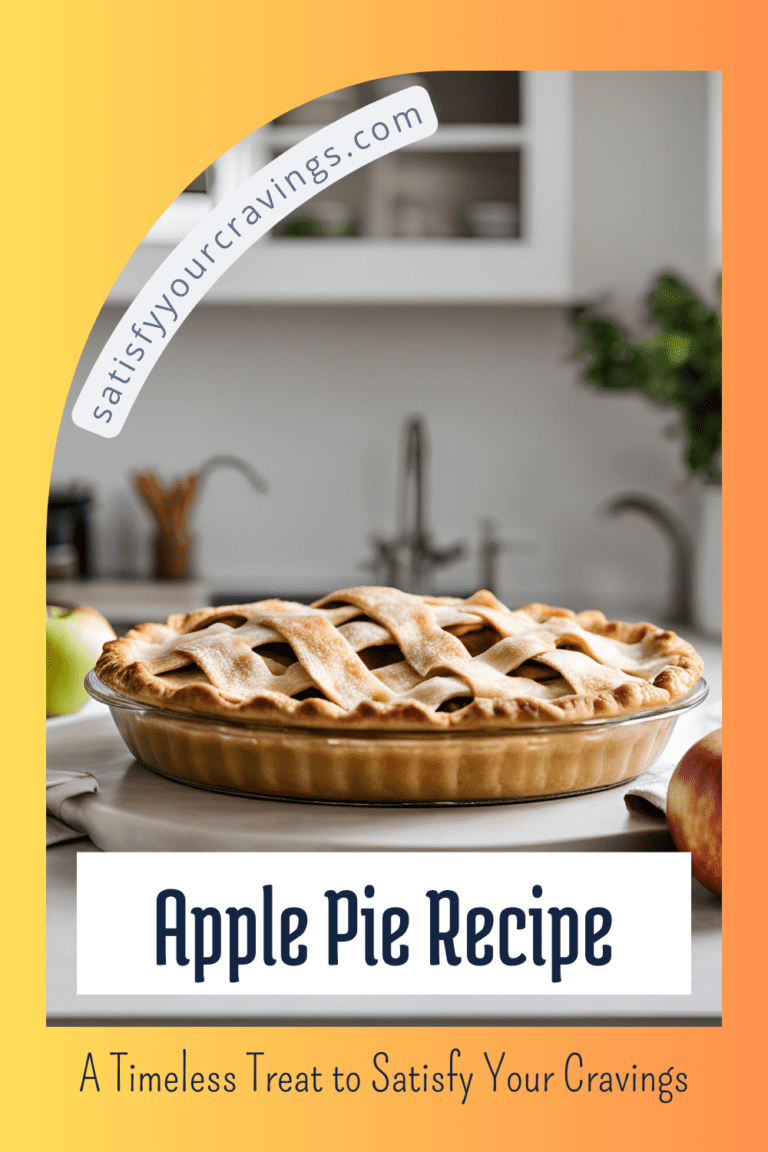
Classic Apple Pie
These partnerships help support our content and keep our recipes free for our amazing readers. We only recommend products and brands we personally use and trust in our own kitchen. Thank you for supporting us! 💛
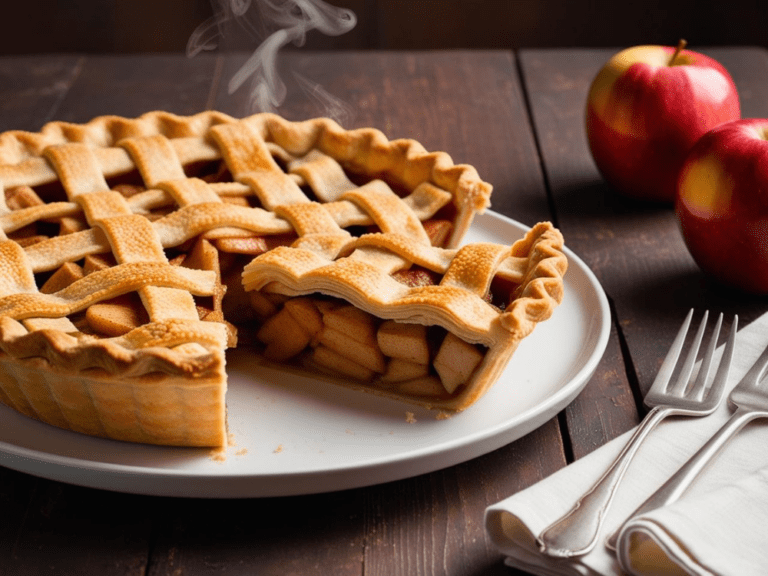
🥧 The Best Classic Apple Pie Recipe (Just Like Grandma’s)
Few desserts say comfort quite like a Classic Apple Pie. With its buttery, flaky crust and perfectly spiced apple filling, this timeless recipe is a staple of American baking — and for good reason. Whether you’re celebrating a special occasion, embracing the coziness of fall, or simply satisfying a sweet craving, this homemade apple pie delivers everything you love in a slice: sweetness, warmth, and a hint of nostalgia in every bite.
What makes this apple pie truly special is its simplicity — just fresh apples, cozy spices, and a golden lattice crust baked to perfection. It’s beginner-friendly, freezer-friendly, and endlessly crowd-pleasing. So roll up your sleeves, preheat your oven, and let’s bake the ultimate slice of tradition together. Your kitchen is about to smell amazing!
🍏 Best Apples for Apple Pie: The Ultimate Guide
When it comes to baking the perfect classic apple pie, not all apples are created equal. The variety you choose can make a huge difference in the flavor, texture, and overall success of your pie. So what are the best apples for apple pie? Let’s break it down!
✅ What to Look For in Pie Apples:
To get that perfect bite — soft yet structured, sweet but not too sweet — look for apples that are:
-
Firm enough to hold their shape when baked
-
Balanced in flavor (not overly sweet or too tart)
-
Juicy, but not watery
Using a combination of apple varieties often gives the best results, adding depth of flavor and the perfect bite.
🍏 Best Apple Varieties for Baking Pie
1. Granny Smith Apples (Tart & Firm)
A pie classic! These bright green apples are incredibly tart and hold their shape beautifully in the oven. They’re the go-to choice for many bakers who want to balance sweetness with a tangy kick.
Why We Love It:
-
Keeps its texture
-
Adds tartness to balance sugary fillings
-
Pairs well with warm spices like cinnamon and nutmeg
2. Honeycrisp Apples (Sweet-Tart & Juicy)
Honeycrisp is known for its crisp bite and juicy flesh. It has a subtle sweetness with just the right amount of tartness.
Why We Love It:
-
Sweet flavor with complexity
-
Holds up well during baking
-
Adds moisture without making the crust soggy
3. Braeburn Apples (Balanced & Bold)
Braeburns are slightly spiced, sweet, and aromatic — ideal for apple pies that need a bold flavor without overpowering the spice blend.
Why We Love It:
-
Firm texture
-
Full-bodied flavor
-
Bakes evenly
4. Pink Lady (Cripps Pink) Apples (Crisp & Vibrant)
These apples are a little sweeter than Granny Smith but still hold a tart bite. They stay firm and add a beautiful flavor to any baked dessert.
Why We Love It:
-
Bright and balanced flavor
-
Perfect for pies with minimal added sugar
-
Gorgeous color and aroma
5. Jonagold Apples (Tangy-Sweet & Juicy)
A cross between Jonathan and Golden Delicious, Jonagold apples are fantastic for pie thanks to their honeyed sweetness and tender, yet firm, texture.
Why We Love It:
-
Naturally sweet — less added sugar needed
-
Softens nicely without becoming mushy
-
Great when paired with a tart apple like Granny Smith
6. Golden Delicious Apples (Mildly Sweet & Soft)
These mellow apples bake down to a tender consistency and blend well with other more tart apples.
Why We Love It:
-
Mild flavor perfect for spice-heavy pies
-
Great for mixing with firmer varieties
-
Breaks down slightly to create a soft, jammy texture
🥧 Best Apple Pie Flavor Combos:
Mixing apples creates dimension and keeps your pie interesting! Here are some tried-and-true blends:
-
Granny Smith + Honeycrisp – A sweet-tart dream team
-
Braeburn + Golden Delicious – Bold flavor + soft texture
-
Pink Lady + Jonagold – Complex sweetness with a juicy bite
-
Granny Smith + Fuji – Tart and crisp meets floral sweetness
🍎 Pro Tips:
-
Avoid mealy apples like Red Delicious or McIntosh — they tend to break down too much and create a mushy filling.
-
Peel your apples for a smoother texture.
-
Slice them evenly to ensure they cook at the same rate.
-
Add a squeeze of lemon juice to prevent browning and brighten flavor!
💬 Bottom Line:
The secret to an unforgettable apple pie is in the apples you choose. Whether you love your pie tangy, sweet, or somewhere in between, combining two or more apple varieties will elevate your pie from good to bakery-worthy!
🥧 Pie Crust 101: Flaky & Foolproof
Let’s be honest — the pie crust is what makes or breaks an apple pie. That golden, buttery, perfectly flaky crust cradling warm cinnamon apples? Pure magic. And the best part? You don’t have to be a pro baker to get it right.
Whether you’re rolling out dough for the first time or perfecting your go-to recipe, this guide will help you master a foolproof, flaky pie crust every time.
🔑 What Makes a Pie Crust Flaky?
Flakiness comes down to two things:
-
Cold fat (butter or shortening)
-
Minimal handling of the dough
When the cold butter hits the heat of the oven, it creates steam pockets that puff up into beautiful, delicate flakes. Overworking the dough or using soft, warm butter will melt that magic away.
🧈 Butter vs. Shortening (or Both?)
Let’s break it down:
Butter Crust
-
Rich flavor
-
Flaky texture
-
Beautiful golden color
Shortening Crust
-
Extra tender
-
Easier to handle
-
Holds shape better
Half Butter, Half Shortening
The best of both worlds! Flavor + structure + ease = dream crust.
✅ Our favorite method for Classic Apple Pie: 100% cold unsalted butter for max flavor and flaky layers.
🧊 Pro Tips for Perfect Pie Dough
-
Keep EVERYTHING cold — butter, water, even your flour if you’re in a warm kitchen.
-
Use ice water, not tap water. Add it slowly, just enough until the dough comes together.
-
Don’t overmix. You should see little specks of butter in your dough — this = flake potential!
-
After forming the dough, wrap it tightly in plastic wrap and chill for at least 1 hour.
-
Flour your surface generously when rolling it out, but don’t go overboard or it’ll dry out the dough.
🌀 Rolling It Out Like a Pro
-
Roll from the center out, turning the dough a quarter turn every few rolls.
-
Aim for about ⅛ inch thickness.
-
To transfer to your pie dish, roll the dough over your rolling pin, then unroll it into the dish gently.
-
Press it lightly into the pan, but don’t stretch it — stretching = shrinking when baked.
🌟 Crust Tips for Picture-Perfect Results
-
Dock the bottom crust (prick with a fork) if you’re pre-baking.
-
Use a pie shield or foil collar to prevent the edges from over-browning.
-
Brush the crust with egg wash (1 egg + 1 tbsp water) for that bakery-style golden shine ✨
-
For extra sparkle, sprinkle raw or turbinado sugar on the top crust before baking.
❄️ What If I Don’t Want to Make Crust from Scratch?
No shame in that game! If you’re short on time, a good store-bought pie crust can still deliver amazing results.
Look for:
-
All-butter crusts (Trader Joe’s and Whole Foods both carry great ones!)
-
Rolled, not pre-shaped, so you can customize your dish
Just remember to bring it to room temp for 10 minutes before unrolling to avoid cracking.
🧵 Want to Get Fancy? Try a Lattice Crust!
A lattice top isn’t just gorgeous — it also lets steam escape and keeps your filling from bubbling over. To make one:
-
Roll out your top crust and cut it into even strips (about ¾”–1” wide).
-
Lay half of the strips in one direction over the pie.
-
Gently fold every other strip back halfway and weave in a new strip crosswise.
-
Continue weaving until it’s fully latticed, then trim and crimp the edges.
📸 Tip: Add step-by-step process photos or video for extra engagement!
💡 Trouble-Shooting: Common Pie Crust Problems
| Problem | Solution |
|---|---|
| Dough cracks when rolling | Let it sit 5–10 minutes at room temp to soften slightly |
| Crust shrinks in the oven | Don’t stretch it in the pan, chill before baking |
| Crust is tough | Likely overworked or too much water added |
| Bottom crust is soggy | Try blind baking OR place pie on a hot baking sheet |
🥧 Final Thoughts:
You don’t need fancy tools or decades of baking experience — just a little patience, cold ingredients, and the right tips. With this flaky, foolproof crust, your Classic Apple Pie is guaranteed to taste just as amazing as it looks!
Try some of our other recipes!
🔥 Pre-Cooking Apples for Apple Pie: Yes or No?
If you’ve ever baked an apple pie and ended up with a big gap between the crust and filling—or a soggy bottom—then you’ve probably asked yourself this popular baking question:
“Should I pre-cook the apples before baking my apple pie?”
Well, the answer isn’t exactly one-size-fits-all. It depends on what texture, flavor, and pie structure you’re aiming for. Let’s dive into the pros and cons of pre-cooking your apples so you can decide which method is right for your perfect pie.
✅ The Case for Pre-Cooking Apples
Many experienced bakers (and pie competition winners!) swear by pre-cooking the apples — and here’s why:
1. No More Pie Gaps
Raw apples shrink significantly while baking. That’s what creates that dreaded air pocket under the top crust. By pre-cooking them slightly, you’ve already reduced their volume — so your pie stays full and picture-perfect.
2. Even Texture
Pre-cooking ensures every apple slice is tender and fully cooked, especially if you’re using firmer varieties like Granny Smith or Honeycrisp.
3. Flavor Boost
When you sauté the apples with cinnamon, nutmeg, and a touch of sugar before baking, the spices really infuse the fruit, and the flavor becomes richer and more developed.
4. Control Over Sweetness
Pre-cooking lets you taste and adjust the filling before it even goes in the crust. Add more sugar, lemon juice, or spice depending on your apples and preferences.
🛑 Reasons to Skip Pre-Cooking
That said, not everyone loves pre-cooking — and there are some valid reasons to go the traditional route with raw apples:
1. Less Time & Cleanup
If you’re going for simplicity, skipping the stovetop step means less mess and fewer dishes.
2. Classic Texture
Some bakers love the slightly varied bite of raw-baked apple pie — with slices that are soft around the edges but still a bit firm in the center.
3. You’re Using Softer Apples
If you’re working with apples that break down quickly (like Golden Delicious or McIntosh), pre-cooking could lead to mush. Raw is better in this case to preserve texture.
🍏 When to Pre-Cook (and When Not To)
| Pre-Cook Apples If… | Use Raw Apples If… |
|---|---|
| You’re using firm apples like Granny Smith or Honeycrisp | You prefer a rustic, traditional pie texture |
| You want a full, shrink-proof pie | You’re short on prep time |
| You like deeply spiced, caramelized flavor | You’re using softer apples like Golden Delicious |
| You want to adjust sugar/spice levels beforehand | You enjoy slight variance in apple texture |
🍯 How to Pre-Cook Your Apples (The Easy Way)
If you decide to go for it, here’s a quick method:
Ingredients:
-
Sliced apples
-
2–3 tablespoons butter
-
1/2 cup brown or cane sugar
-
1–2 teaspoons cinnamon
-
Pinch of nutmeg
-
1 tablespoon lemon juice
-
1 tablespoon flour or cornstarch (for thickening)
Instructions:
-
In a large skillet, melt butter over medium heat.
-
Add apples, sugar, lemon juice, and spices.
-
Cook for 5–8 minutes, stirring often, until apples start to soften but aren’t mushy.
-
Stir in flour/cornstarch and cook 1–2 more minutes until slightly thickened.
-
Let the filling cool completely before adding it to your crust!
📌 Pro Tip: Cooling the filling is crucial — otherwise, it will melt your crust and make it soggy.
💬 So… What’s the Final Verdict?
Both methods have their merits. But if you’re going for:
-
A professional-looking pie without gaps
-
Consistent apple texture throughout
-
Full control over flavor
👉 Then pre-cooking is the way to go.
However, if you’re short on time or baking for nostalgia and love the traditional, rustic vibe — raw apples will still get the job done deliciously.
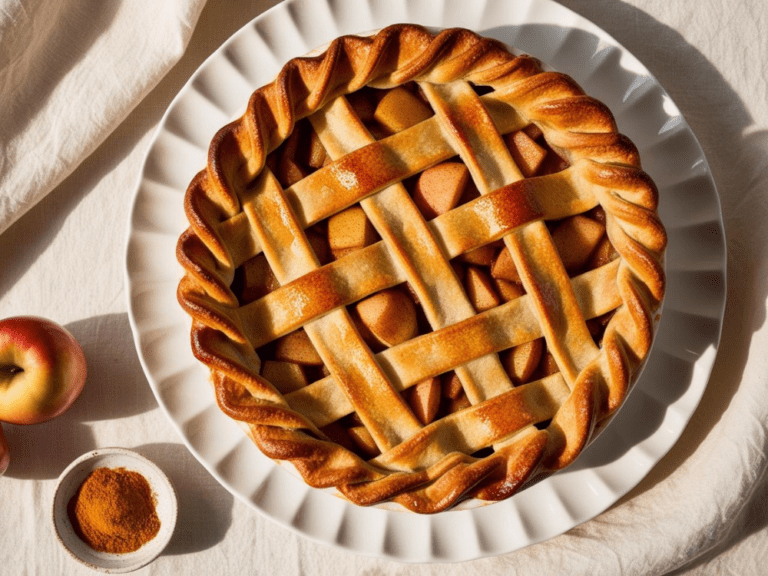
🧵 How to Weave a Lattice Crust (Step-by-Step)
If you want to elevate your classic apple pie from delicious to Instagram-worthy, a lattice crust is the way to go! Not only does it give your pie that beautiful rustic-bakery look, but it also helps steam escape during baking, allowing your filling to thicken and bubble to perfection underneath the flaky top.
Even if you’re new to baking, weaving a lattice crust is easier than it looks — especially with this step-by-step guide. Let’s get weaving!
🧑🍳 What You’ll Need:
-
Chilled pie dough (homemade or store-bought)
-
Rolling pin
-
Sharp knife or pastry wheel
-
Ruler (optional, for perfect strips)
-
A little patience and creativity 😊
✂️ Step 1: Roll Out Your Dough
Start with well-chilled pie dough. Roll it out on a lightly floured surface into a 12-inch circle, about ⅛ inch thick. Use your bottom crust to line your pie plate and fill it with your apple mixture.
Then roll out your top crust — this is the one we’ll turn into strips.
📏 Step 2: Cut Even Strips
Using a sharp knife, pizza cutter, or pastry wheel, cut the dough into ½- to 1-inch-wide strips. You’ll need about 10–12 strips for a classic lattice.
📌 Pro Tip: Use a fluted pastry wheel for pretty edges, or a ruler to get perfectly even strips.
🧵 Step 3: Lay Down the First Set of Strips
Lay half of your strips (usually 5 or 6) horizontally across the top of the pie, spaced evenly. These will stay in place.
🔀 Step 4: Start Weaving!
Here’s where the magic happens:
-
Fold back every other horizontal strip halfway (like opening mini doors).
-
Lay one vertical strip down the center of the pie.
-
Fold the horizontal strips back over the vertical strip.
-
Now fold back the opposite horizontal strips, and lay the next vertical strip.
-
Repeat the process until you’ve woven all the way across.
It should look like a basket weave — alternating strips going over and under each other.
✂️ Step 5: Trim & Crimp the Edges
Once all your strips are woven:
-
Trim the overhanging dough so it matches the edge of the bottom crust.
-
Press the edges together to seal — then fold under and crimp with your fingers or a fork for a polished finish.
✨ Step 6: Brush & Bake
Brush your beautiful lattice crust with an egg wash (1 egg + 1 tbsp water or milk) for that golden shine. Optional: Sprinkle with turbinado or raw sugar for sparkle and crunch!
Then bake according to your pie recipe’s instructions — usually 375–400°F for 45–60 minutes, or until the crust is golden and the filling is bubbling through.
📸 Bonus Tips for Picture-Perfect Lattice Crust:
-
Keep the dough cold! If it gets too soft while weaving, pop it in the fridge for 10–15 minutes.
-
Get creative! Try braids, leaf cutouts, or heart shapes for seasonal flair.
-
Add a few steam vents if you’re not using a full lattice, to allow filling to breathe.
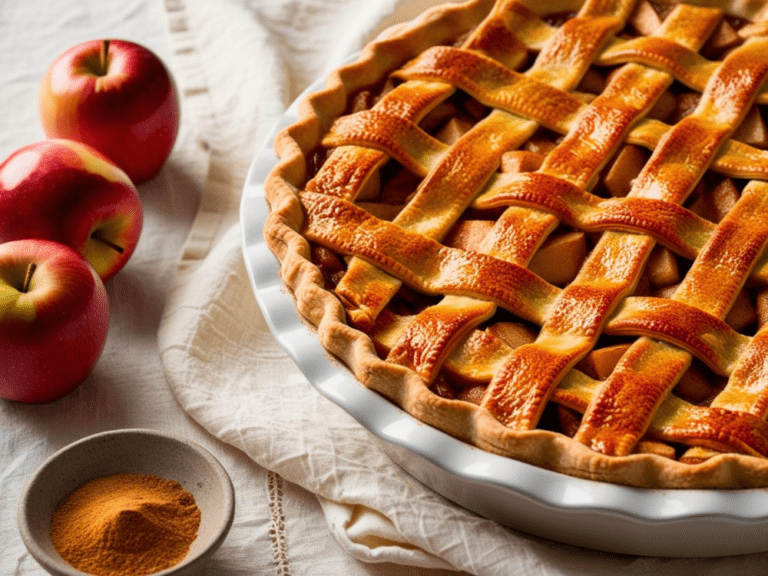
💬 Why Lattice?
Besides being beautiful, a lattice top allows steam to escape, which helps the filling thicken without getting soggy. It’s especially perfect for juicy fruit pies like apple, cherry, or blueberry.
Weaving a lattice crust might seem intimidating, but once you try it, you’ll see it’s a fun and rewarding baking technique that makes any pie feel extra special. Whether you’re making a holiday showstopper or a cozy Sunday dessert, this simple touch turns your pie into a work of art!
🍽️ Cooking & Serving Tips for the Perfect Apple Pie
So you’ve prepped your dough, filled it with spiced apples, and lovingly weaved a lattice crust… Now it’s time to bake and serve your masterpiece! But wait — before you pop it in the oven or dig into that first warm slice, there are a few important tips that can take your apple pie from good to unforgettable.
Whether you’re a first-timer or a seasoned baker, these pro cooking and serving tips will help you achieve perfect results every single time.
🔥 Cooking Tips: How to Bake Apple Pie Like a Pro
1. Preheat Your Oven — All the Way
Always fully preheat your oven to the right temperature before your pie goes in. Apple pie usually bakes best at 375°F to 400°F, depending on your crust and filling thickness.
📌 Tip: A hot oven gives the crust a head start to set and rise, making it extra flaky.
2. Bake on the Lower Rack
Place your pie on the lower third of the oven. This helps the bottom crust bake evenly and prevents that dreaded soggy bottom.
🥧 Bonus Tip: Place your pie on a preheated baking sheet or pizza stone to really crisp up the bottom crust!
3. Use a Pie Shield to Prevent Over-Browning
The crust edge tends to brown faster than the rest of the pie. Use a pie shield or cover the edges with strips of foil about halfway through baking to avoid burning the crust while the filling continues to cook.
4. Watch for Bubbling Juice
You’ll know your pie is done when the filling is visibly bubbling through the lattice crust or steam vents. This means the fruit is fully cooked and the juices have thickened.
⏰ Bake times usually range from 45 to 60 minutes depending on your oven.
5. Don’t Underbake the Crust
A golden crust means flavor and structure. If you pull the pie too early, the crust may be pale and soggy. Let it bake until it’s deep golden-brown and crisp — even if it takes an extra 5–10 minutes.
⏳ Cooling Tips: Patience Pays Off
1. Let It Cool for At Least 2 Hours
We know it’s hard — but don’t slice into your pie too soon! Let it cool on a wire rack for 2–4 hours so the filling sets properly. This helps the slices hold their shape.
🥄 Cutting too early = a runny, messy pie.
2. Cool at Room Temperature, Not in the Fridge
Cooling your pie in the fridge can make the crust go soft. Instead, leave it uncovered at room temperature to cool naturally.
3. Don’t Cover It While It’s Still Warm
Covering a warm pie traps steam and leads to a soggy crust. Let it cool completely before wrapping or storing.
🍨 Serving Tips: Take It Over the Top
1. Serve Slightly Warm
The best way to enjoy apple pie? Gently warmed, not piping hot. Pop it in the oven at 300°F for 10–15 minutes to reheat without drying it out.
2. Top It Like a Pro
Upgrade your slice with one of these dreamy toppings:
-
A big scoop of vanilla ice cream
-
A dollop of fresh whipped cream
-
A drizzle of caramel sauce or maple glaze
-
A sprinkle of cinnamon sugar
3. Pair It with a Beverage
Try these classic pairings for a full dessert experience:
-
Hot apple cider
-
Chai latte or cinnamon tea
-
Coffee with a splash of cream
-
Bourbon or spiced rum for a grown-up treat
4. Slice with a Serrated Knife
Want picture-perfect slices? Use a serrated knife and clean it between cuts. This keeps the flaky crust and gooey filling from turning into a mess.
💡 Bonus: Serving a Crowd?
If you’re baking apple pie for a party or holiday, try:
-
Baking it in a rectangular dish and slicing into bars
-
Serving with a DIY topping bar (ice cream, sauces, whipped cream, nuts)
-
Baking mini apple pies or hand pies for individual servings
Baking the perfect apple pie doesn’t stop at the oven timer. From baking on the lower rack to cooling fully and serving with flair, these thoughtful steps will help you wow your guests and savor every bite. Because a great apple pie isn’t just baked — it’s served with love.
❄️ Can You Freeze Apple Pie? Yes — Here’s Exactly How!
One of the best things about homemade apple pie (besides how amazing it smells baking in the oven) is that it freezes beautifully — before or after baking. Whether you’re prepping ahead for the holidays or trying to save leftovers, freezing apple pie is a smart, delicious way to enjoy it whenever a craving strikes.
The key is knowing how and when to freeze it so you preserve that flaky crust, tender apples, and warm cinnamon spice. Let’s dive into everything you need to know about freezing apple pie like a pro!
🥶 Should You Freeze Apple Pie Before or After Baking?
You can freeze apple pie both ways, but there are pros and cons to each:
🥧 Option 1: Freeze Apple Pie Before Baking (Best for Fresh-Baked Flavor)
If you want that fresh-baked aroma and perfectly crisp crust, freezing your apple pie unbaked is the way to go. This method preserves the texture and lets you enjoy a “just-out-of-the-oven” experience later.
✅ How to Freeze an Unbaked Apple Pie:
-
Assemble your pie completely, including the crust and filling.
-
Do not apply the egg wash until you’re ready to bake.
-
Place the pie on a baking sheet and freeze uncovered for 2–3 hours (this prevents smudging or sticking).
-
Once frozen solid, wrap the pie tightly in plastic wrap and a layer of foil, or use a heavy-duty freezer bag.
-
Label it with the date and baking instructions.
🕒 Freezer Life: Up to 3 months
📌 Bonus Tip: You can also freeze individual mini pies or hand pies the same way!
🔥 How to Bake a Frozen Unbaked Pie:
-
Do not thaw — bake straight from frozen.
-
Brush the top with egg wash for that golden crust.
-
Bake at 400°F for 20 minutes, then reduce heat to 375°F and bake for another 40–50 minutes or until the filling is bubbling and the crust is golden.
⏰ Total baking time will be 10–15 minutes longer than usual.
🍎 Option 2: Freeze Apple Pie After Baking (Best for Saving Leftovers)
Already baked your pie but can’t finish it? Freezing leftover pie is a great way to avoid waste and treat yourself later.
✅ How to Freeze a Baked Apple Pie:
-
Let the pie cool completely (very important — hot pie causes ice crystals and soggy crust).
-
Wrap the whole pie (or individual slices) tightly in plastic wrap, followed by aluminum foil.
-
Place in a freezer-safe container or zip-top bag to protect it from freezer burn.
🕒 Freezer Life: Best enjoyed within 2 months for maximum flavor and texture.
🔁 How to Reheat a Frozen Baked Pie:
-
Whole Pie: Thaw overnight in the fridge, then warm in a 350°F oven for 25–30 minutes.
-
Single Slices: Heat in a toaster oven or oven-safe dish at 325°F for 10–15 minutes.
-
Avoid the microwave if you want to maintain that crispy crust!
📌 Tip: Cover the edges with foil to prevent over-browning while reheating.
🤔 FAQ: Common Freezing Questions
Q: Can I freeze pie with a crumb topping?
Yes! Just freeze it the same way as a regular crust. You can even sprinkle a little extra topping before baking to freshen it up.
Q: Will freezing change the texture of the apples?
If frozen properly, the texture holds up beautifully. Firmer apples like Granny Smith, Honeycrisp, and Braeburn freeze the best.
Q: Can I bake a frozen pie in a glass dish?
It’s best to use metal or foil pie pans when freezing unbaked pies. If using glass, let it warm slightly on the counter while preheating your oven to avoid cracking.
Freezing apple pie is a total game-changer — whether you’re prepping ahead for the holidays, making extra for a friend, or saving that last slice for a future treat. With a few simple steps, you can keep that flaky crust, gooey cinnamon-apple filling, and warm homemade flavor intact for months.
So go ahead… make two pies instead of one — your future self will thank you! 😉
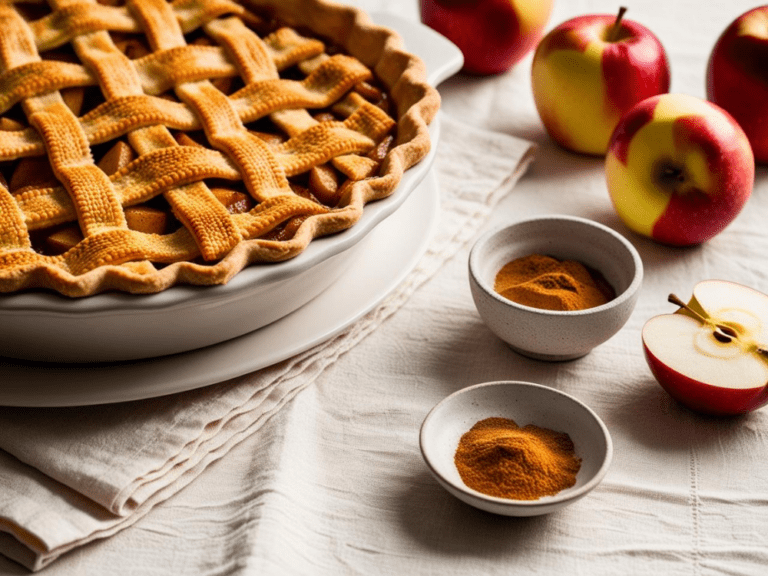
🍂 Flavor Enhancers: The Spice Mix That Makes Apple Pie Shine
If apples are the heart of a classic apple pie, then the spice mix is its soul. The right combination of warm, aromatic spices can transform a good pie into an unforgettable one — bursting with cozy, nostalgic flavor in every bite.
Whether you’re a cinnamon purist or someone who loves experimenting with layers of spice, this guide will walk you through the best flavor enhancers for apple pie and how to find your perfect blend.
🌟 The Must-Have Spice: Cinnamon
It’s no surprise that ground cinnamon is the cornerstone of most apple pie recipes. This warm, sweet, and slightly woody spice pairs beautifully with tart apples and adds that signature fall aroma we all know and love.
-
Use 1 to 2 teaspoons per pie depending on how bold you want the flavor.
-
Try Ceylon cinnamon for a more delicate, floral note, or Cassia cinnamon for a stronger, classic flavor.
📌 Pro Tip: Bloom your cinnamon in melted butter or a warm skillet before adding it to your filling to really unlock its fragrance.
🌰 Supporting Cast: Warm & Cozy Spices
1. Nutmeg
Adds an earthy, nutty depth that rounds out the sweetness of the apples.
-
Use ¼ to ½ teaspoon max — it’s potent!
-
Freshly grated nutmeg gives the most vibrant flavor.
2. Allspice
Despite its name, allspice is a single spice that tastes like a combo of cinnamon, cloves, and nutmeg. It’s bold and complex.
-
Adds warmth and a subtle bite.
-
Use ⅛ to ¼ teaspoon for balance without overpowering.
3. Clove
Clove brings a bold, slightly spicy, and almost peppery kick to your spice blend.
-
A little goes a long way — use just a pinch.
-
Perfect for adding that “holiday” aroma to your pie.
4. Ginger
Ground ginger adds gentle heat and a refreshing brightness that cuts through the sweetness.
-
Use ¼ teaspoon to keep it subtle and fresh.
-
Great for pairing with sweeter apple varieties like Fuji or Gala.
🍋 Brightening Boosters: Zest, Juice & Extracts
1. Lemon Juice & Zest
Lemon juice adds brightness and helps balance the sweetness, while zest infuses a fresh citrus note.
-
Use 1 tablespoon lemon juice and 1 teaspoon zest for the perfect pop of freshness.
-
Also helps prevent apples from browning.
2. Vanilla Extract
A splash of pure vanilla extract adds rich warmth and enhances all the other flavors.
-
Use 1 to 1½ teaspoons in your filling or tossed with your apple slices.
-
Try vanilla bean paste for an even deeper vanilla punch.
3. Almond Extract (Optional)
Just a tiny drop of almond extract can add a slightly sweet, nutty background flavor that complements the apples and spices.
-
Use ⅛ teaspoon — it’s strong!
🧡 Customizable Apple Pie Spice Blend
Want a go-to blend you can prep in advance? Try this simple but powerful DIY Apple Pie Spice Mix:
Apple Pie Spice (Makes Enough for 2 Pies):
-
2 tsp ground cinnamon
-
½ tsp ground nutmeg
-
¼ tsp ground allspice
-
¼ tsp ground ginger
-
Pinch of ground clove
Mix and store in a small airtight jar for instant flavor magic 🍎✨
🌱 Bonus Flavor Add-Ins (Optional but Delish!)
-
Brown sugar: Adds molasses depth that white sugar can’t.
-
Maple syrup: Swap 1–2 tablespoons of sugar for maple syrup for rich autumn vibes.
-
Bourbon or brandy: Add a splash (1–2 tsp) for complexity and a grown-up twist.
-
Orange zest: Adds floral citrus flavor — great for holiday pies!
The right spice blend can elevate your apple pie from classic to crave-worthy. Whether you like it bold and spicy or mellow and fragrant, experimenting with spices is a fun and easy way to make the recipe your own.
Don’t be afraid to adjust the mix to suit your taste or the apples you’re using — because the best apple pie is the one that makes your kitchen smell like home 💛
♻️ How to Reheat Apple Pie (So It Tastes Freshly Baked)
Whether you’re enjoying a slice of leftover apple pie from yesterday’s feast or pulling a frozen one out of the freezer for a cozy treat, knowing how to reheat it properly can make all the difference. No one wants a soggy crust or rubbery apples — you want that warm, just-baked feel with a crisp, golden crust and a tender, cinnamon-spiced filling.
The good news? With the right method, you can reheat apple pie so well that it tastes like it just came out of the oven. Here’s exactly how to do it — slice by slice or as a whole pie!
🔥 Reheating Apple Pie in the Oven (Best Method)
This is hands-down the best way to reheat apple pie. It revives the crisp texture of the crust while warming the filling all the way through.
🥧 For a Whole Pie:
-
Preheat your oven to 350°F (175°C).
-
Remove any wrapping or plastic.
-
Place the pie on a baking sheet lined with parchment paper.
-
Cover the edges with foil to prevent over-browning.
-
Bake for 25–30 minutes, or until the center is warm and the crust is crisp.
📌 Pro Tip: If you’re reheating a frozen pie, let it thaw in the refrigerator overnight before reheating.
🥧 For a Single Slice:
-
Preheat the oven to 350°F.
-
Place the slice on a baking sheet and cover loosely with foil.
-
Heat for 10–15 minutes, or until warmed through.
✅ This method keeps the crust flaky and the filling gooey — no microwave mush here!
⏲️ Reheating Apple Pie in a Toaster Oven
If you’re just reheating a couple of slices and want to skip heating the big oven, the toaster oven is a great option.
-
Set the toaster oven to 350°F.
-
Place the pie slice on foil or parchment paper.
-
Heat for 10–12 minutes, checking for doneness.
🎯 Why it works: The toaster oven provides even heat without drying the pie out.
⚡ Reheating Apple Pie in the Microwave (Quick Fix)
Let’s be real — sometimes you’re just craving warm pie now. The microwave gets the job done quickly, but be warned: it can make the crust soft or chewy if you’re not careful.
How to Do It Right:
-
Place one slice of pie on a microwave-safe plate.
-
Drape a lightly damp paper towel over the top (this helps prevent it from drying out).
-
Microwave on 50% power for 30–60 seconds, checking every 15 seconds.
🚫 Avoid using full power — high heat will make the filling too hot and the crust rubbery.
💨 Reheating Apple Pie in an Air Fryer
Yes, the air fryer works too — especially if you’re looking to restore that crisp crust on a single slice.
-
Set your air fryer to 325°F.
-
Place the slice in the basket on parchment or foil.
-
Heat for 3–5 minutes, or until warmed through and the crust is crispy.
🔥 Watch carefully — air fryers work fast!
🍦 Serving Suggestions After Reheating
Once your pie is perfectly warmed, take it to the next level with one of these delicious pairings:
-
Vanilla ice cream (a classic for a reason!)
-
Whipped cream with a dusting of cinnamon
-
Maple drizzle or salted caramel sauce
-
Chopped toasted pecans for crunch
Reheating apple pie doesn’t mean sacrificing that fresh-baked feel. Whether you’re using the oven for optimal crispiness or the microwave for a quick fix, the key is gentle, even heat and a little care. With the right method, your leftovers can taste just as delicious as day one — or maybe even better.
Because when it comes to apple pie, every slice deserves to be savored 🍏🥧✨
These partnerships help support our content and keep our recipes free for our amazing readers. We only recommend products and brands we personally use and trust in our own kitchen. Thank you for supporting us! 💛
🧰 Top 5 Essential Tools for Baking the Perfect Apple Pie
1. Rolling Pin
A quality rolling pin ensures your dough is rolled out evenly, which is crucial for a uniform crust. The Aisoso French Rolling Pin is a top choice, praised for its simplicity and effectiveness.
-
Product: Aisoso French Rolling Pin, 17.7 Inches Wood Rolling Pin for Baking
-
Rating: 4.8 out of 5 stars
-
Why We Recommend It: Its tapered design offers excellent control, and its smooth surface prevents dough from sticking.
2. Pie Dish
A reliable pie dish is vital for even baking and presentation. The Pyrex 9-Inch Pie Plate is a classic, known for its durability and consistent results.
-
Product: Pyrex 9 Inch Pie Plate
-
Rating: 4.8 out of 5 stars
-
Why We Recommend It: Made from tempered glass, it allows you to monitor the browning of the crust and is safe for oven, microwave, and dishwasher use.
3. Pastry Blender
Achieving a flaky crust requires cutting butter into flour efficiently. The Spring Chef Dough Blender is a sturdy tool that simplifies this process.
-
Product: Spring Chef Dough Blender, Top Professional Pastry Cutter
-
Rating: 4.7 out of 5 stars
-
Why We Recommend It: Its heavy-duty stainless steel blades make blending ingredients quick and easy, ensuring a perfect dough consistency.
4. Pastry Wheel
For decorative crusts, a pastry wheel is indispensable. The Ateco Fluted Pastry Wheel adds a professional touch to your pie edges.
-
Product: Ateco Fluted Pastry Wheel, 1 3/8 Inch Blade
-
Rating: 4.7 out of 5 stars
-
Why We Recommend It: Its fluted design creates beautiful edges, and the stainless steel blade ensures durability.
5. Pie Crust Shield
Preventing the edges of your pie crust from over-browning is essential. The Mrs. Anderson’s Baking Pie Crust Shield is an effective solution.
-
Product: Mrs. Anderson’s Baking Pie Crust Protector Shield, Fits 9.5-Inch and 10-Inch Plates
-
Rating: 4.5 out of 5 stars
-
Why We Recommend It: Made from aluminum, it’s reusable and fits standard pie sizes, ensuring even baking without burning the crust edges.

Classic Apple Pie
Equipment
- Rolling Pin: For evenly rolling out your pie dough to the perfect thickness for both the bottom and top crust.
- 9-Inch Pie Dish: A standard-sized dish that ensures your filling bakes evenly and your crust gets beautifully golden.
- Mixing Bowls: Needed for combining your apple filling ingredients and prepping your dough.
- Pastry Blender or Fork: For cutting cold butter into your flour to create a flaky, tender pie crust.
- Measuring Cups and Spoons: Essential for accurately measuring ingredients like sugar, flour, spices, and butter.
- Apple Peeler & Corer (Optional): Speeds up the process of prepping apples, especially if you're making more than one pie.
- Pastry Wheel or Knife: Used to create decorative lattice strips or fluted edges for the top crust.
- Pie Shield or Foil: Protects the crust edges from over-browning during baking.
- Pastry Brush: For brushing egg wash or milk onto the crust to achieve that golden finish.
- Cooling Rack: Allows air to circulate under the pie after baking so the crust doesn’t get soggy.
Ingredients
For the crust:
- 2 1/2 Cups All-purpose flour
- 1 Tsp Salt
- 1 Tsp Sugar
- 1 Cup Unsalted butter, chilled and diced
- 1/2 Cup Ice water
For the filling:
- 6 Cups Thinly sliced and peeled apples (about 6 medium apples, a mix of Granny Smith and Honeycrisp is great for texture and flavor)
- 3/4 Cup Sugar
- 2 Tbsp All-purpose flour
- 1 Tsp Ground cinnamon
- 1/4 Tsp Ground nutmeg
- 1 Tbsp Lemon juice
- 2 Tbsp Unsalted butter, chopped into small pieces
Instructions
- Prepare the Pie Crust:In a large bowl, whisk together flour, salt, and sugar. Add the chilled butter pieces and, using a pastry blender or your fingertips, mix until the mixture resembles coarse crumbs.Gradually add ice water, stirring with a fork until the dough holds together without being wet or sticky. Divide the dough into two balls, flatten into disks, and chill for at least 1 hour.
- Make the Filling:In a large mixing bowl, combine the sliced apples, sugar, flour, cinnamon, nutmeg, and lemon juice. Toss to coat apples evenly and set aside.
- Assemble the Pie:Preheat your oven to 425°F (220°C).Roll out one disk of dough on a lightly floured surface into a 12-inch circle. Carefully place into a 9-inch pie plate.Fill the crust with your apple mixture and dot with butter.Roll out the second disk of dough and lay it over the filling. Trim excess dough, and pinch edges to seal. Cut slits in the top to vent steam.
- Bake:Bake for 45-50 minutes or until the crust is golden brown and filling is bubbly. If edges brown too quickly, cover them with foil.
- Cool and Serve:Allow the pie to cool on a wire rack for at least 2 hours before serving to let the filling set.

🧡 A Sweet Slice of Tradition
There’s something truly special about baking a Classic Apple Pie from scratch — the comforting aroma of cinnamon and apples, the golden lattice crust fresh from the oven, and the first warm bite shared around the table. It’s more than just a dessert; it’s a memory in the making.
Whether you’re baking this pie for a holiday gathering, a cozy weekend treat, or simply to savor the season, we hope this recipe becomes a beloved favorite in your kitchen — just like it is in ours.
From our home to yours, happy baking! 🥰
And don’t forget to top it with a scoop of vanilla ice cream and a big smile.
Join Now!
❤️ Love this recipe? Don’t miss out on even more delicious, healthy, and easy-to-make recipes like this Classic Apple Pie
🍽️ By joining our email community, you’ll gain exclusive access to bonus content, printable recipes, and clean eating tips that make healthy living a breeze.
📬 Enter your email & click below to subscribe — it only takes a minute to join our growing community of food lovers who believe healthy should still taste amazing!
These partnerships help support our content and keep our recipes free for our amazing readers. We only recommend products and brands we personally use and trust in our own kitchen. Thank you for supporting us! 💛