No-Bake Cheesecake
These partnerships help support our content and keep our recipes free for our amazing readers. We only recommend products and brands we personally use and trust in our own kitchen. Thank you for supporting us! 💛
The Ultimate No-Bake Cheesecake Recipe: Easy, Creamy, and Irresistible
Who doesn’t love a dessert that’s as easy to make as it is delicious? This No-Bake Cheesecake is a game-changer, perfect for when you’re craving something sweet but don’t want to turn on the oven. With its smooth, creamy filling and buttery graham cracker crust, it’s a dessert that feels fancy without the fuss. Whether you’re a seasoned baker or a beginner in the kitchen, this recipe comes together effortlessly, making it a crowd-pleaser for any occasion.
The best part? You can customize it to your heart’s content. Top it with fresh strawberries, blueberries, or even a drizzle of chocolate—whatever satisfies your sweet tooth. It’s the kind of dessert that looks like you spent hours on it, but only you’ll know the secret of how simple it really is. So, grab your ingredients and let’s whip up a cheesecake that’s bound to impress!
Why You’ll Love This Recipe
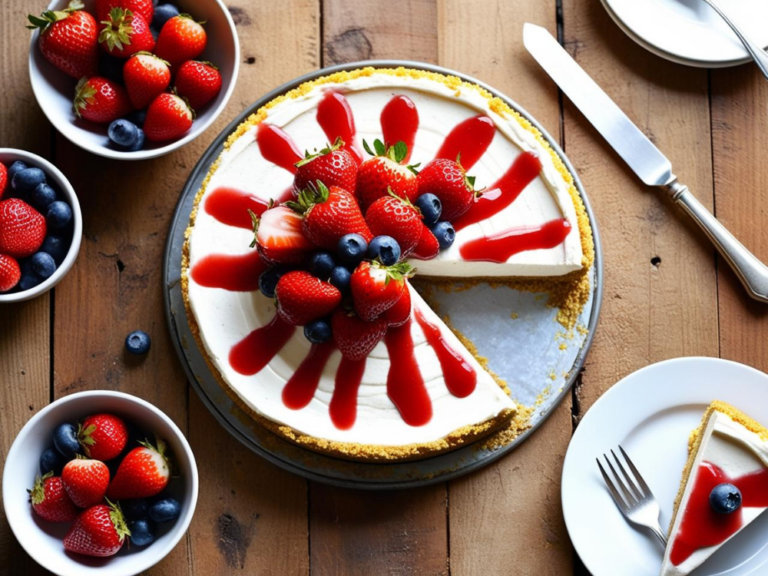
If you’ve ever wanted a dessert that’s not only ridiculously delicious but also incredibly easy to make, this no-bake cheesecake is about to become your new favorite. It’s everything you love about a classic cheesecake—creamy, luscious, and downright indulgent—without any of the hassle. No need to worry about cracking tops or finicky water baths. With this recipe, all you need is a few simple ingredients, a little chill time, and the result is a dessert that looks and tastes like it came straight from a fancy bakery.
One of the best things about this no-bake cheesecake is its versatility. You can dress it up or keep it simple depending on the occasion. Hosting a summer barbecue? Top it with a medley of fresh berries for a light and refreshing finish. Celebrating a special event? Add a drizzle of chocolate ganache or a swirl of caramel sauce to make it extra decadent. And if you’re feeling adventurous, you can even experiment with flavors like lemon, espresso, or Oreo—this recipe is your blank canvas for dessert creativity.
Beyond its versatility, this cheesecake also wins points for being incredibly approachable. Whether you’re a seasoned baker or a complete novice, you’ll appreciate how foolproof it is. The crust comes together in minutes with crushed graham crackers and melted butter, and the filling is as simple as mixing cream cheese, sugar, and cream. No baking means no stress about overcooking or dealing with a hot oven, making this recipe perfect for those who prefer an effortless yet impressive dessert.
Lastly, let’s talk about how much people love this cheesecake. It’s the kind of dessert that steals the show, no matter the occasion. Bring it to a potluck, and it’ll disappear before you know it. Serve it at a family dinner, and you’ll have everyone asking for the recipe. The creamy texture, paired with the crunchy crust and whatever toppings you choose, creates a flavor and experience that’s truly unforgettable. Once you’ve made this no-bake cheesecake, it’ll be hard to go back to anything else.
Pro Tips for Perfect No-Bake Cheesecake
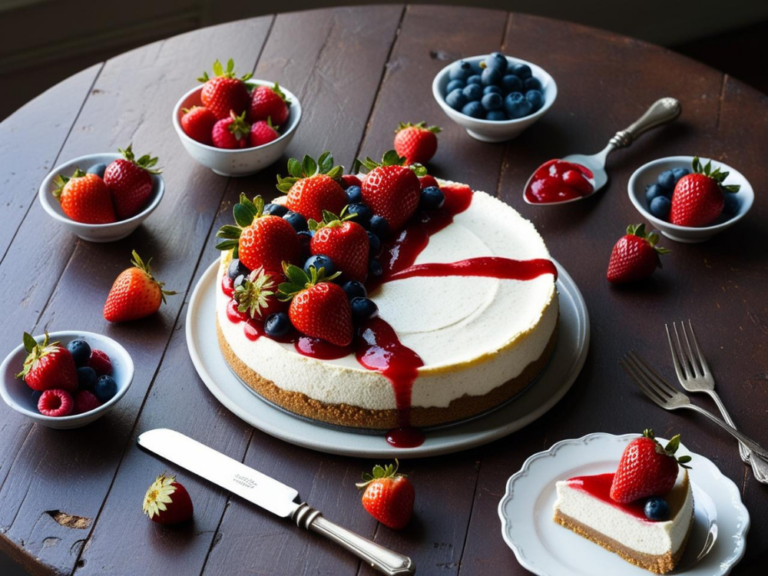
When it comes to making the perfect no-bake cheesecake, there are a few simple tips that can take your dessert from good to absolutely unforgettable. While the recipe itself is straightforward, paying attention to the details will ensure your cheesecake turns out creamy, smooth, and just as stunning as it tastes. Here are some tried-and-true tips to help you achieve cheesecake perfection every time.
1. Room Temperature Ingredients Are Key
One of the most important steps is to ensure your cream cheese is at room temperature before you start mixing. Cold cream cheese can lead to a lumpy filling, no matter how much you mix. Let it sit out for about 30 minutes before you begin. This small step will give you a velvety-smooth filling that’s free of any clumps.
2. Use a Springform Pan for Easy Removal
If you want your cheesecake to look like it came from a bakery, invest in a good-quality springform pan. This pan allows you to easily remove the sides, leaving a perfectly formed cheesecake. To make it even easier to serve, line the bottom of the pan with parchment paper before adding the crust.
3. Pack the Crust Firmly
For the crust, use the back of a spoon or the bottom of a measuring cup to press the graham cracker mixture firmly into the pan. A tightly packed crust will hold together better when you slice the cheesecake, giving you that perfect bite of buttery crunch with every forkful.
4. Don’t Overmix the Filling
When making the filling, mix just until the ingredients are combined. Overmixing can cause the filling to become too soft or incorporate too much air, which might affect how it sets. Aim for a creamy, smooth texture without going overboard.
5. Chill, Don’t Rush
Patience is a virtue when it comes to no-bake cheesecake. Allow it to chill in the refrigerator for at least 4-6 hours, though overnight is even better. This ensures the filling sets properly and gives you those clean, professional slices. Cutting into the cheesecake too soon can lead to a mess, so resist the temptation!
6. Customize with Your Favorite Toppings
The beauty of no-bake cheesecake is how easily it can be personalized. Top it with fresh fruit, a drizzle of chocolate or caramel, crushed candy bars, or even a dusting of cocoa powder. Your choice of toppings can take the cheesecake from a simple dessert to a show-stopping centerpiece.
7. Slice with Precision
To get those picture-perfect slices, run your knife under hot water, then dry it before cutting each slice. This prevents the filling from sticking to the knife and ensures clean edges. Wipe the blade clean between slices for the best results.
8. Test Your Filling’s Consistency
Before pouring the filling onto the crust, check its consistency. It should be thick but pourable and should hold its shape once poured. If it’s too runny, give it a bit more mixing time to thicken up.
9. Adjust Sweetness to Taste
Not all sweet cravings are the same, so feel free to adjust the amount of sugar in the recipe to suit your taste. Start with the suggested amount, then add more in small increments, tasting as you go.
10. Experiment with Layers
For an eye-catching twist, try creating layers in your cheesecake. Divide the filling and add cocoa powder, fruit puree, or food coloring to one half, then layer it over the plain filling for a marbled or striped effect. It’s a small effort that makes a big impact.
By following these pro tips, you’ll elevate your no-bake cheesecake game and impress everyone lucky enough to enjoy it. Whether it’s your first time making it or your hundredth, these little tricks will make sure your cheesecake is always the star of the dessert table.
Try some of our other recipes!
History of Cheesecake: A Dessert That’s Truly Timeless
Cheesecake has a fascinating history that spans centuries, cultures, and continents. While today we might associate cheesecake with decadent slices at trendy cafes or homemade no-bake recipes, its origins are far more ancient and intriguing. This dessert has evolved from a humble treat enjoyed by early civilizations to the versatile, globally beloved dessert we know today.
Ancient Beginnings
The origins of cheesecake date back over 4,000 years to ancient Greece. In fact, one of the first recorded cheesecakes was served to athletes during the first Olympic Games in 776 BC. Made with simple ingredients like cheese, honey, and wheat, this early version was both a source of energy and a sweet treat. Historians believe the Greeks viewed cheesecake as a gift from the gods, often serving it at weddings and celebrations.
When the Romans conquered Greece, they adopted the cheesecake recipe and began to put their own spin on it. Roman cheesecake, known as “libum,” was baked and often used as an offering to the gods. As the Roman Empire expanded, so did cheesecake, spreading throughout Europe and evolving with local ingredients and tastes.
A European Renaissance
By the medieval period, cheesecake recipes began to take on new life in Europe. With the introduction of cream cheese and sugar, the dessert became richer and more indulgent. In England, cheesecake often included dried fruits and spices, while in Italy, ricotta became the star ingredient, giving rise to Italian-style cheesecakes that are still popular today.
As trade routes expanded during the Renaissance, cheesecake recipes spread to other parts of the world, evolving based on the local palate. For example, Germany embraced quark cheese for their version of cheesecake, while Scandinavian countries often used sour cream or yogurt for a tangy twist.
Cheesecake Comes to America
Cheesecake made its way to America with European immigrants, and by the 19th century, it had become a household dessert. The game-changer came in the late 1800s when a New York dairyman, William Lawrence, accidentally invented cream cheese while trying to replicate a French cheese. This serendipitous creation led to the development of the iconic New York-style cheesecake, which remains a symbol of indulgence and decadence today.
New York-style cheesecake, characterized by its dense texture and rich flavor, became a staple in diners and bakeries across the United States. It’s often baked with a graham cracker crust and served plain or topped with fresh fruit, chocolate, or caramel. From there, cheesecake variations flourished, from the light and fluffy Japanese cheesecake to the no-bake versions we love today.
Modern Cheesecake: A Global Sensation
Today, cheesecake is a dessert that transcends borders. Every culture has its unique spin on the classic recipe. From Basque burnt cheesecake in Spain to matcha-flavored cheesecake in Japan, the possibilities are endless. The no-bake cheesecake, in particular, has gained popularity for its simplicity and versatility, making it accessible to home bakers around the world.
With the rise of social media, cheesecake has become a visual delight as much as a culinary one. Cheesecake bars, jar cheesecakes, and even layered or rainbow cheesecakes have captured the imagination of dessert lovers everywhere. It’s a testament to how this dessert continues to evolve and adapt, staying relevant and irresistible through the ages.
A Dessert for the Ages
The history of cheesecake is a story of resilience and creativity, a dessert that has stood the test of time and geography. Whether you’re indulging in a slice of classic New York-style cheesecake, experimenting with international flavors, or enjoying a quick no-bake version, you’re part of a tradition that stretches back millennia. It’s more than just a dessert—it’s a celebration of culture, innovation, and the universal love for something sweet and satisfying.
How to Make This Cheesecake Healthier: Indulgence Without the Guilt
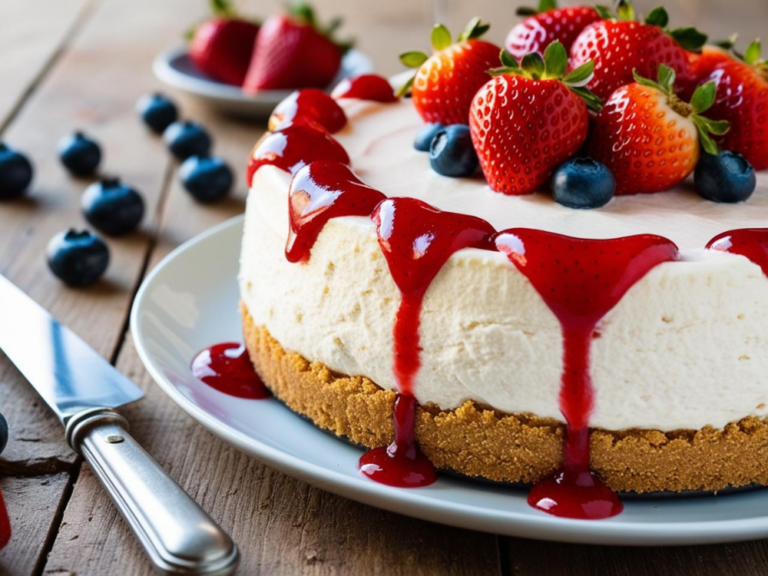
Who says you can’t enjoy a rich, creamy cheesecake while staying on track with your health goals? With just a few smart swaps and tweaks, you can turn this indulgent dessert into a guilt-free treat. Whether you’re looking to cut calories, reduce sugar, or add a nutritional boost, there are plenty of ways to make this no-bake cheesecake a healthier option without sacrificing its delicious flavor or creamy texture.
1. Lighten Up the Crust
The graham cracker crust is a classic, but it can also be calorie-heavy due to the butter and sugar. Try these healthier alternatives:
- Swap regular graham crackers for whole-grain or low-sugar options. This will add fiber and reduce the sugar content.
- Use coconut oil instead of butter. Coconut oil works just as well to bind the crust, and it adds a subtle hint of flavor.
- Go crustless. Skip the crust altogether for a gluten-free, low-carb option. Simply pour the filling into a springform pan or individual jars for a lighter take.
2. Use Low-Fat or Dairy-Free Cream Cheese
Cream cheese is the star of any cheesecake, but traditional varieties can be high in fat. Instead:
- Opt for low-fat or reduced-fat cream cheese to significantly cut back on calories and saturated fat.
- Try dairy-free cream cheese alternatives made from almond, cashew, or coconut for a plant-based version that’s still creamy and delicious.
3. Sweeten Smartly
Sugar is another ingredient that can be adjusted to make your cheesecake healthier:
- Use natural sweeteners like honey, maple syrup, or agave instead of refined sugar. These options provide a touch of sweetness while offering some nutritional benefits.
- Try a sugar substitute like stevia, monk fruit, or erythritol to keep the sweetness while making the recipe diabetic-friendly.
- Reduce the amount of sweetener altogether if you’re topping your cheesecake with naturally sweet fruits like berries or mango.
4. Boost the Filling with Nutrition
Enhance the filling with nutritious ingredients:
- Blend in Greek yogurt for a protein-packed boost and a tangy flavor that complements the cream cheese.
- Add a scoop of protein powder to the filling for an extra punch of protein, especially if you’re making this as a post-workout treat.
- Mix in pureed fruits like strawberries, blueberries, or pumpkin for natural sweetness, vibrant color, and added vitamins.
5. Lighten the Whipping Cream
Whipping cream adds richness to the filling, but you can lighten it up:
- Use coconut cream instead of heavy cream for a dairy-free option with fewer calories.
- Replace some of the whipping cream with almond milk or skim milk to reduce fat content while maintaining creaminess.
6. Add Nutrient-Rich Toppings
The topping is where you can really get creative and add nutritional value:
- Fresh fruit is always a winner. Load your cheesecake with a variety of berries, kiwi, or pomegranate seeds for a burst of color, antioxidants, and natural sweetness.
- Sprinkle nuts or seeds like almonds, walnuts, or chia seeds on top for a satisfying crunch and healthy fats.
- Drizzle a small amount of dark chocolate or fruit puree for a touch of indulgence without overdoing it.
7. Make It Smaller
Portion control can make a big difference when it comes to dessert:
- Make mini cheesecakes in jars or muffin tins for built-in portion control. These individual servings are perfect for satisfying your sweet tooth without overindulging.
- Cut smaller slices and pair them with a side of fruit or tea for a lighter dessert experience.
8. Focus on Seasonal Ingredients
Using fresh, seasonal fruits and ingredients not only enhances the flavor but also ensures you’re getting the most nutrients. For example:
- In summer, use fresh strawberries, peaches, or blueberries.
- In winter, try topping with spiced poached pears or a citrus zest.
9. Skip the Artificial Additions
Avoid artificial food coloring, preservatives, and heavily processed ingredients. Opt for natural flavors like vanilla extract, lemon juice, or cocoa powder for a healthier, more wholesome dessert.
10. Chill Longer for Creamier Texture
When you reduce fat or sugar, the texture might slightly differ. Allow your cheesecake to chill overnight to achieve a firmer, creamier result, even with the healthier swaps.
Enjoy Dessert Guilt-Free
With these simple modifications, you can enjoy your no-bake cheesecake while feeling great about what you’re eating. Whether you’re looking for a low-fat, low-sugar, or plant-based option, these tips let you customize the recipe to suit your dietary needs and health goals. Dessert doesn’t have to be an indulgence you regret—it can be a balanced, satisfying part of a healthy lifestyle. So go ahead and whip up your cheesecake, knowing it’s as good for you as it is delicious!
FAQs: Your Cheesecake Questions Answered
Making a no-bake cheesecake might seem simple, but like any recipe, it comes with its own set of questions. Whether you’re a beginner in the kitchen or a seasoned baker trying a no-bake version for the first time, a little guidance can go a long way. Here’s a collection of frequently asked questions to help you troubleshoot, customize, and perfect your cheesecake every single time.
1. Why is My Cheesecake Not Setting?
One of the most common issues with no-bake cheesecakes is a filling that doesn’t set properly. This can happen for a few reasons:
- Not enough chilling time. Cheesecakes need at least 4-6 hours in the refrigerator to fully set, though overnight is best.
- Incorrect ingredient measurements. If you don’t use the exact amounts of cream cheese, whipping cream, or stabilizers like gelatin (if included), the filling may not firm up.
- Overmixing the filling. Incorporating too much air can prevent it from setting properly.
2. Can I Freeze a No-Bake Cheesecake?
Yes, you can freeze a no-bake cheesecake! Freezing not only makes it last longer but also allows for better preparation ahead of time.
- Wrap the cheesecake tightly in plastic wrap or store it in an airtight container before freezing.
- When you’re ready to serve, let it thaw in the refrigerator for several hours or overnight.
- Keep in mind that toppings like fresh fruit or whipped cream are best added after thawing to maintain freshness.
3. What’s the Best Way to Prevent a Soggy Crust?
A soggy crust can ruin an otherwise perfect cheesecake. To avoid this:
- Pack the crust firmly into the pan to create a strong barrier.
- Chill the crust in the fridge for at least 15 minutes before adding the filling. For extra protection, you can also bake the crust for 5-10 minutes (even for no-bake recipes) and let it cool completely before using.
4. Can I Use a Different Pan?
While a springform pan is ideal for easy removal, you can use alternatives like a regular pie dish, tart pan, or even individual jars for serving. Keep in mind:
- A springform pan provides clean, professional-looking edges.
- If using a pie dish, you’ll need to scoop out slices, so presentation may differ.
5. Can I Make This Cheesecake Dairy-Free or Vegan?
Absolutely! To make a dairy-free or vegan version:
- Replace cream cheese with a plant-based alternative made from almond, cashew, or coconut.
- Use full-fat coconut milk or cream instead of whipping cream.
- Swap butter in the crust for melted coconut oil or a plant-based margarine.
- Sweeten with agave or maple syrup for a natural touch.
6. How Long Does No-Bake Cheesecake Last in the Fridge?
A no-bake cheesecake will stay fresh in the refrigerator for 3-4 days when stored properly.
- Cover it tightly with plastic wrap or place it in an airtight container to keep it from absorbing fridge odors.
- For the best texture and taste, serve it within the first couple of days.
7. What Toppings Work Best for a No-Bake Cheesecake?
The beauty of a no-bake cheesecake is how versatile it is. Some topping ideas include:
- Fresh fruits like strawberries, blueberries, or mango.
- Chocolate shavings or drizzle.
- Caramel sauce or fruit puree.
- Crushed cookies, nuts, or even edible flowers for a creative touch.
8. How Do I Slice a Cheesecake Cleanly?
Getting picture-perfect slices is all about the technique:
- Use a sharp knife dipped in hot water and wiped dry before each cut.
- Wipe the blade clean after every slice to avoid smudges.
- For extra precision, refrigerate the cheesecake for 10-15 minutes before slicing to ensure it’s firm.
9. Can I Adjust the Sweetness of the Cheesecake?
Yes, the sweetness is entirely customizable:
- Reduce or increase the amount of sugar to suit your taste.
- Experiment with natural sweeteners like honey, maple syrup, or stevia.
- If your topping is particularly sweet (like caramel or fruit syrup), consider reducing the sugar in the filling for better balance.
10. What Can I Do If My Crust Falls Apart?
If your crust isn’t holding together, it could be due to insufficient binding or loose packing. Here’s how to fix it:
- Add a little more melted butter or coconut oil to the crust mixture.
- Press the crust firmly into the pan with the back of a spoon or a flat-bottomed glass.
- Chill the crust longer before adding the filling to give it more time to set.
11. Can I Make Mini No-Bake Cheesecakes?
Definitely! Mini cheesecakes are perfect for portion control and special occasions. Use muffin tins lined with cupcake liners or small jars for individual servings. These are great for parties, and they’re just as easy to prepare as a full-sized cheesecake.
12. Why Does My Cheesecake Taste Grainy?
A grainy texture is usually the result of improperly mixed cream cheese. To avoid this:
- Ensure the cream cheese is softened to room temperature before mixing.
- Mix slowly at first to fully incorporate the ingredients without overworking the filling.
- Use a high-quality cream cheese for the best results.
By addressing these common questions, you’ll feel confident tackling any no-bake cheesecake challenge. Whether it’s your first time or your fiftieth, knowing how to handle these situations ensures your dessert will always be a show-stopper.
Serving Suggestions: Elevate Your No-Bake Cheesecake Experience
A no-bake cheesecake is already a show-stopper on its own, but how you serve it can take it to a whole new level. From pairing it with complementary flavors to presenting it in creative ways, there’s no limit to how you can elevate this creamy dessert. Whether you’re making it for a casual family dinner or a sophisticated gathering, these serving suggestions will help you wow your guests and make every bite unforgettable.
1. Add a Fresh, Fruity Twist
One of the easiest and most visually stunning ways to serve no-bake cheesecake is by pairing it with fresh fruits. Their natural sweetness and vibrant colors make a beautiful contrast to the creamy filling.
- Berry Medley: Top your cheesecake with a mix of strawberries, blueberries, and raspberries for a classic and refreshing option.
- Citrus Touch: Garnish with orange or lemon slices for a zesty flavor that cuts through the richness.
- Tropical Escape: Mango, pineapple, or kiwi can give your cheesecake a tropical vibe that’s perfect for summer gatherings.
2. Drizzle It with Sauces
A drizzle of sauce can transform a simple cheesecake into an indulgent masterpiece.
- Chocolate Sauce: For chocoholics, a generous drizzle of melted dark chocolate or fudge sauce is pure heaven.
- Caramel or Butterscotch: These rich, buttery flavors add a touch of decadence to every bite.
- Fruit Puree: Blend fresh fruits like strawberries, raspberries, or peaches with a bit of sugar to create a vibrant fruit sauce.
3. Pair It with Whipped Cream
A dollop of freshly whipped cream is a classic accompaniment to cheesecake.
- Keep it simple with lightly sweetened whipped cream.
- Add a flavor boost with vanilla, cinnamon, or a splash of almond extract.
4. Serve It in Individual Portions
For a fun and practical twist, serve your cheesecake in individual portions.
- Jars or Glasses: Layer the crust, filling, and toppings in clear jars for a portable, visually appealing dessert.
- Mini Cheesecakes: Use a muffin tin with cupcake liners to create bite-sized treats that are perfect for parties or potlucks.
5. Add Crunchy Textures
A creamy dessert like cheesecake benefits from a little crunch.
- Nuts: Sprinkle chopped almonds, pecans, or walnuts on top for a satisfying texture.
- Cookie Crumbs: Add crushed Oreos, ginger snaps, or graham crackers for a playful topping.
- Toasted Coconut: For a tropical flair, sprinkle toasted coconut shreds over the cheesecake.
6. Serve It Alongside Beverages
Pairing your cheesecake with the right drink can elevate the dining experience.
- Coffee or Espresso: The rich, bitter notes of coffee perfectly balance the sweetness of the cheesecake.
- Tea: Herbal or floral teas, like chamomile or jasmine, pair wonderfully with the creamy texture.
- Dessert Wine: A glass of Moscato or Port complements the richness of the cheesecake beautifully.
7. Make It a Cheesecake Bar
For a crowd, set up a cheesecake bar where guests can customize their slices.
- Provide bowls of toppings like fresh fruit, sauces, nuts, chocolate chips, and whipped cream.
- Let everyone build their own dessert masterpiece for a fun, interactive experience.
8. Add Seasonal Flair
Adapt your cheesecake presentation to suit the season.
- Spring and Summer: Garnish with edible flowers, fresh berries, or citrus zest for a light and airy feel.
- Fall: Add a drizzle of caramel and a sprinkle of cinnamon or nutmeg for a cozy autumn vibe.
- Winter: Top with sugared cranberries and a dusting of powdered sugar for a festive touch.
9. Serve It with a Side
Enhance your cheesecake with complementary side dishes.
- Fruit Salad: A mix of seasonal fruits adds a fresh element to balance the richness.
- Ice Cream: Serve a small scoop of vanilla or fruit-flavored ice cream alongside the cheesecake.
- Savory Pairing: Pair cheesecake with a cheese platter for an unconventional but delightful combination.
10. Experiment with Layers and Swirls
Impress your guests by adding layers or swirls to your cheesecake.
- Layered Cheesecake: Alternate layers of cheesecake filling with chocolate mousse, fruit puree, or caramel.
- Swirled Topping: Use a toothpick or knife to swirl fruit sauce, chocolate, or caramel on top for a marbled effect.
11. Plate It Like a Pro
Presentation matters, especially for special occasions.
- Use a clean white plate to make the cheesecake the star.
- Garnish with a sprig of mint, a sprinkle of powdered sugar, or a few fresh berries for a restaurant-style touch.
- Add decorative drizzles of sauce around the plate for an elegant finish.
12. Turn It Into a Parfait
For a lighter, layered dessert, deconstruct your cheesecake into a parfait. Alternate layers of crust, filling, and fruit in a glass for a refreshing and eye-catching treat.
13. Incorporate Global Influences
Add a twist inspired by international flavors:
- Matcha Cheesecake: Dust the top with matcha powder for a Japanese-inspired flair.
- Basque Burnt Cheesecake Style: Torch the top lightly to mimic the caramelized surface of a Basque cheesecake.
- Mediterranean Touch: Drizzle with honey and sprinkle with pistachios for a Mediterranean vibe.
By thinking beyond the basics, you can turn a simple no-bake cheesecake into a dessert experience that’s unforgettable. Whether you’re hosting a dinner party, celebrating a special occasion, or just treating yourself, these serving suggestions will help you make the most of your cheesecake creation. After all, the only thing better than a delicious dessert is one that’s served with a little extra flair!
These partnerships help support our content and keep our recipes free for our amazing readers. We only recommend products and brands we personally use and trust in our own kitchen. Thank you for supporting us! 💛
🛍️ Shop the Recipe
No oven? No problem! 🙌 This no-bake cheesecake is the perfect dreamy dessert to whip up with minimal effort and maximum creamy goodness 🍓 Whether you’re prepping for a party, holiday, or just treating yourself (because you deserve it!), here are my favorite tools and ingredients to make it smooth, simple, and satisfying.
As an Amazon Associate, we earn from qualifying purchases. Thank you for supporting Satisfy Your Cravings — your clicks help keep the sweet recipes coming! 💛
✅ 9-Inch Springform Pan – For Perfect, Mess-Free Cheesecake Removal
✅ Electric Hand Mixer – Whip It Good for That Fluffy Texture
✅ Graham Cracker Crumbs – Ready to Mix & Press
✅ Organic Cream Cheese – Rich, Creamy & Clean
✅ Heavy Cream
✅ Pure Vanilla Extract – Real Flavor, No Fillers
✅ Silicone Spatula Set – Scrape Every Last Bit of Batter 😋
✅ Glass Cake Stand with Lid – For Beautiful Presentation
💡 Clean Dessert Tip: For a wholesome twist, try using organic graham crackers, maple syrup instead of sugar, and full-fat cream cheese made without stabilizers.
No-Bake Cheesecake
Equipment
- Mixing Bowls: Use for combining ingredients for the crust and filling. At least two bowls (one for the crust and one for the filling) are recommended.
- Electric Mixer (Hand or Stand Mixer): Ideal for whipping the cream cheese and other ingredients until smooth and creamy. A stand mixer makes the process hands-free, but a hand mixer works just as well.
- Springform Pan (9-inch): A springform pan allows easy removal of the cheesecake without disturbing the crust or edges. Line the bottom with parchment paper for added convenience.
- Measuring Cups and Spoons: Use for accurately measuring ingredients like graham crackers, sugar, and cream.
- Spatula or Silicone Scraper: Perfect for scraping down the sides of the bowl to ensure all ingredients are fully mixed and for smoothing the cheesecake filling.
- Food Processor or Blender: Use to crush graham crackers into fine crumbs for the crust. If you don’t have one, you can place the crackers in a zip-top bag and crush them with a rolling pin.
- Rolling Pin (Optional): For manually crushing graham crackers if a food processor isn’t available.
- Flat-Bottomed Glass or Measuring Cup: Helps to firmly press the crust into the pan for a solid base.
- Plastic Wrap or Aluminum Foil: Used to cover the cheesecake while it chills in the fridge, keeping it fresh and preventing odors from other foods.
- Sharp Knife and Hot Water: Essential for cleanly slicing the cheesecake when serving. Dip the knife in hot water and wipe it clean between slices for a professional look.
Ingredients
- 2 Cups Graham Cracker Crumbs
- 1/2 Cup Unsalted Butter Melted
- 24 oz Cream Cheese Softened
- 1 Cup Powdered Sugar
- 1 tsp Vanilla Extract
- 1 Cup Heavy Cream
- 1 Cup Fresh Berries/Fruit For Garnish
Instructions
- In a bowl, combine graham cracker crumbs and melted butter to create the crust. Press the mixture into the bottom of a spring form pan and refrigerate while preparing the filling.
- In a large bowl, beat the softened cream cheese until smooth.
- Add powdered sugar and vanilla extract to the cream cheese, continuing to beat until well combined.
- In a separate bowl, whip the heavy cream until stiff peaks form.
- Gently fold the whipped cream into the cream cheese mixture until evenly incorporated.
- Pour the creamy filling over the prepared crust, spreading it evenly.
- Refrigerate the cheesecake for at least 4 hours or overnight to set.
- Before serving, garnish with fresh berries for a burst of color and flavor.
Notes
Storing in the Refrigerator
Since no-bake cheesecakes rely on refrigeration to set, the fridge is the perfect place to store them.-
Cover Properly:
- After your cheesecake has set, cover it tightly to prevent it from drying out or absorbing odors from other foods in the fridge. Use plastic wrap, aluminum foil, or an airtight container if your pan fits inside one.
- For a springform pan, place plastic wrap or foil snugly over the top to seal in freshness.
-
Storage Duration:
- Your no-bake cheesecake will stay fresh for up to 3-4 days in the refrigerator. For the best taste and texture, enjoy it within the first two days.
-
Toppings Matter:
- If your cheesecake has fresh fruit or whipped cream as toppings, it’s best to add those just before serving. Fresh fruit can release moisture and make the cheesecake soggy if left on too long, while whipped cream might lose its fluffiness.
-
Freezing Your No-Bake Cheesecake
Freezing is an excellent option if you want to prepare your cheesecake well in advance or save leftovers for later.-
Before Freezing:
- Ensure your cheesecake has fully set in the refrigerator first. Freezing it too soon can affect the texture and cause it to freeze unevenly.
- If you plan to add toppings like fresh fruit, whipped cream, or sauces, wait to add those until after thawing for the best results.
-
How to Freeze the Whole Cheesecake:
- Remove the outer ring of the springform pan if possible.
- Wrap the cheesecake tightly in plastic wrap, ensuring it’s completely covered. Then, wrap it again in aluminum foil for extra protection against freezer burn.
- Place the wrapped cheesecake in a freezer-safe container or bag for additional security.
-
How to Freeze Individual Slices:
- Slice the cheesecake into individual portions.
- Place each slice on a parchment-lined baking sheet and freeze for 1-2 hours, or until solid.
- Wrap each frozen slice in plastic wrap, followed by a layer of foil, and store in a freezer-safe bag or container. This method allows you to take out only what you need without defrosting the entire cheesecake.
-
Storage Duration:
- Frozen no-bake cheesecake can be stored for up to 2-3 months. After this time, it’s still safe to eat but may lose some of its creamy texture and fresh flavor.
-
Before Freezing:
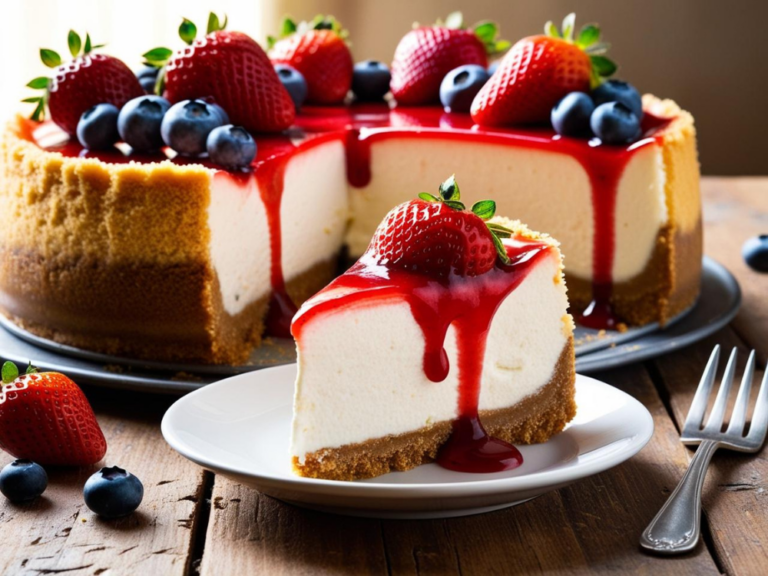
A Sweet Ending to a Perfect Dessert
There’s something undeniably satisfying about a dessert that’s both effortless to make and a guaranteed crowd-pleaser. This no-bake cheesecake is more than just a recipe—it’s an opportunity to create something special for the people you care about, whether it’s a family dinner, a celebration, or just a little indulgence for yourself. Its creamy texture, customizable flavors, and beautiful presentation make it a dessert you’ll come back to again and again.
As you slice into your perfectly chilled cheesecake, take a moment to savor the joy of creating something delicious with your own hands. Whether you’ve topped it with fresh fruit, a drizzle of chocolate, or simply left it as is, this no-bake cheesecake is a reminder that sometimes the simplest things can bring the most happiness. Here’s to sharing sweet moments, one slice at a time!
Join Now!
Love this recipe? Don’t miss out on even more delicious, healthy, and easy-to-make recipes like this No-Bake Cheesecake! By joining our email community, you’ll gain access to exclusive content, bonus recipes, and tips to make clean eating a breeze.
Enter your email & click below to subscribe and start receiving tasty inspiration right away. It only takes a minute to join our growing community of food lovers dedicated to making healthy eating delicious and fun.
These partnerships help support our content and keep our recipes free for our amazing readers. We only recommend products and brands we personally use and trust in our own kitchen. Thank you for supporting us! 💛
